
Whenever you press the Delete key on your keyboard, Windows clears the file, or rather, moves the file from its actual location to the Recycle Bin. This behavior helps you easily recover the file or folder if you’ve deleted it accidentally. However, if left unchecked, the number of files in the Recycle Bin will gradually increase over time. That being said, it is possible to set Recycle Bin to automatically empty itself at regular intervals so you don’t have to remember to do it yourself. This post goes on to show you how to schedule Windows to empty Recycle Bin for you.
Automatically Empty Recycle Bin Using Task Scheduler
Task Scheduler is a built-in application in Windows that allows you to automate tedious tasks on your PC. You can even set it up to automatically clear your Recycle Bin for you. Here’s how:
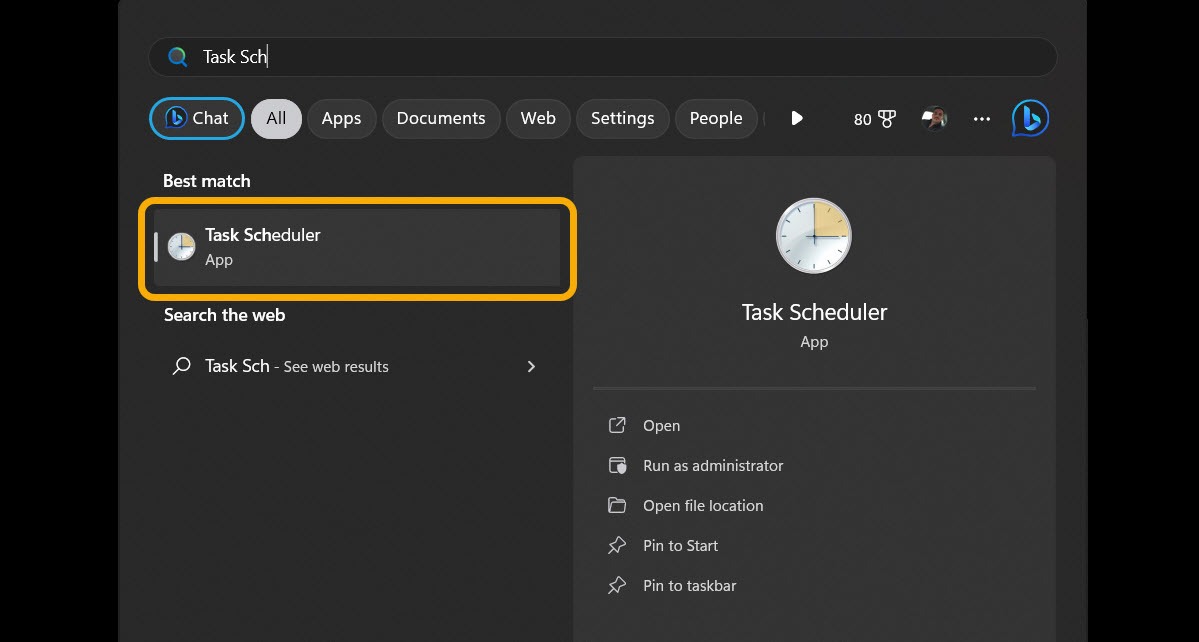
- Type “Task Scheduler” in Windows Search and click the best match below. Alternatively, you can also use the Run (Win + R to open a dialog box) command
taskschd.mscto open the Task Scheduler.
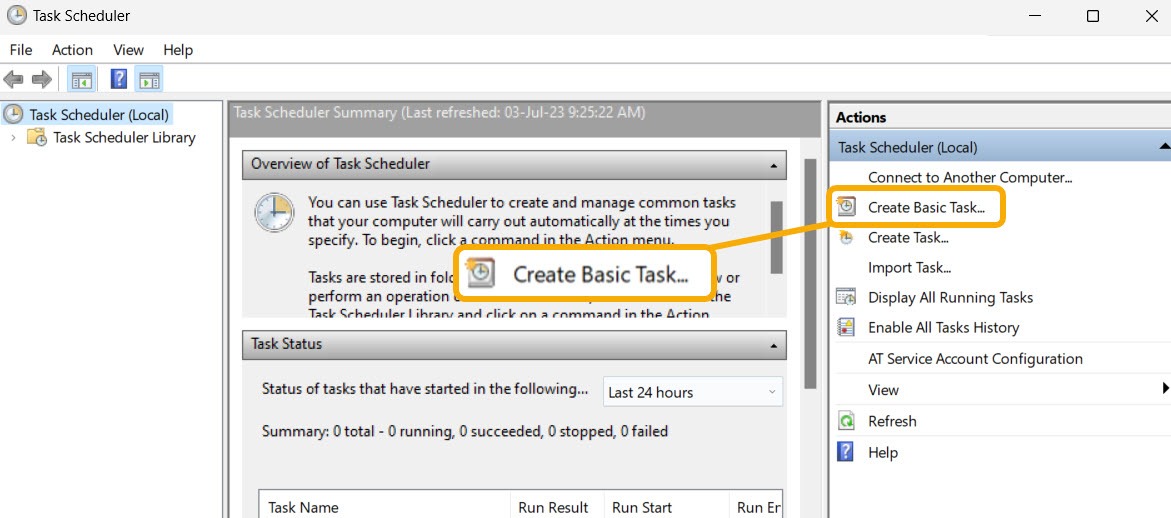
- After opening the Task Scheduler, click on the option “Create Basic Task” appearing under the “Action” category in the right panel.
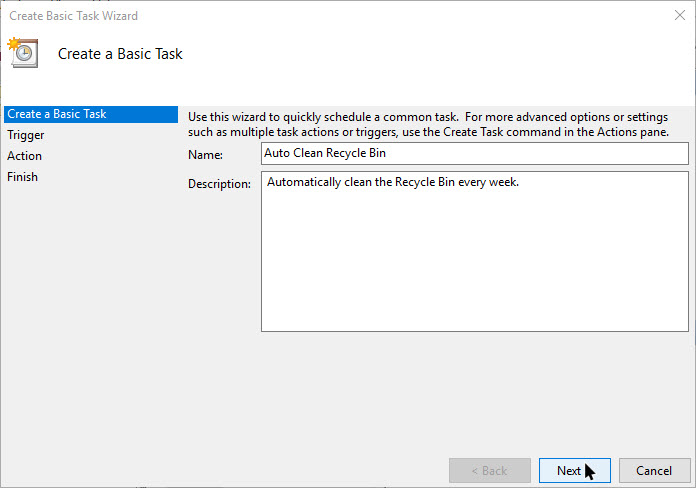
- The above action will open the task creation wizard. Here, enter the name and description of your choice, and then click on the “Next” button to continue.
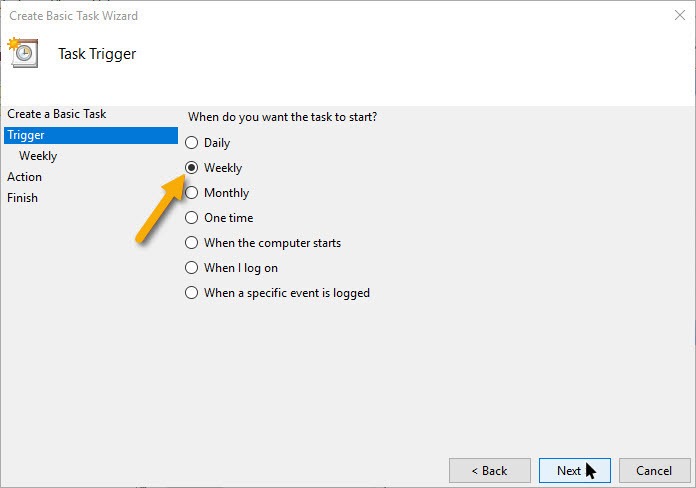
- You can set the interval when you want the task to start. For example, select the “Weekly” radio button and click on the “Next” button.
- Select the starting time, the recurring weekday, and then click on the “Next” button. In this example, we selected our recurring day as “Sunday,” which means that the task will run every Sunday at 2:53 pm.
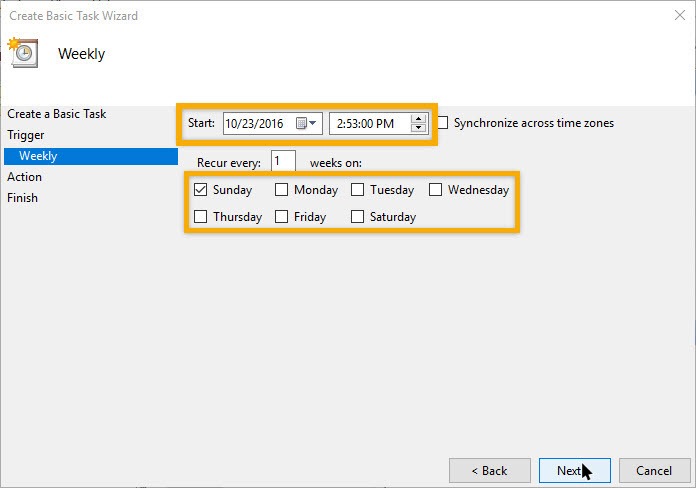
- In the next window, select the “Start a program” radio button, and then click on the “Next” button.
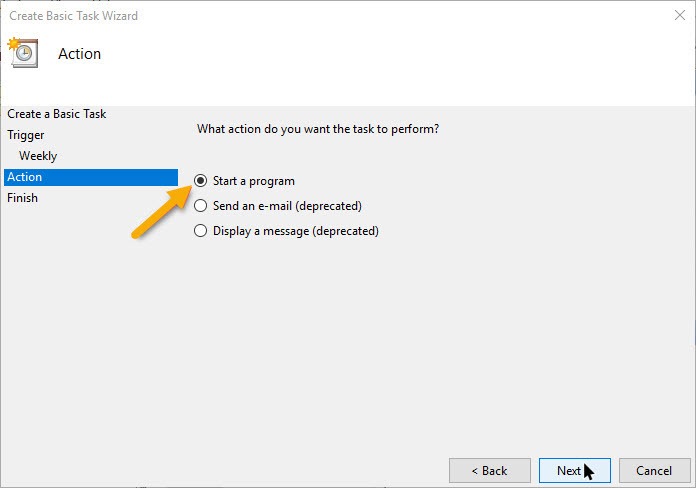
- Enter “cmd.exe” in the “Program/Script” field and the below command in the “Add Arguments” field. This is how it looks like when you are done adding the fields.
/c "echo Y|PowerShell.exe -NoProfile -Command Clear-RecycleBin"
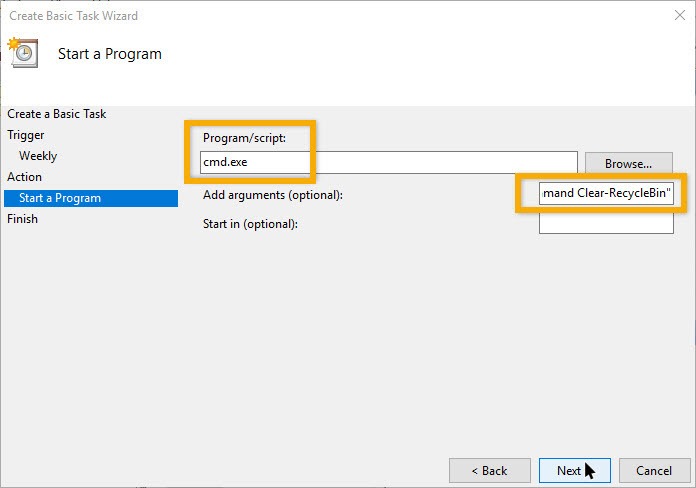
- Now, review all the settings you just configured and click on the “Finish” button to complete the task creation procedure.
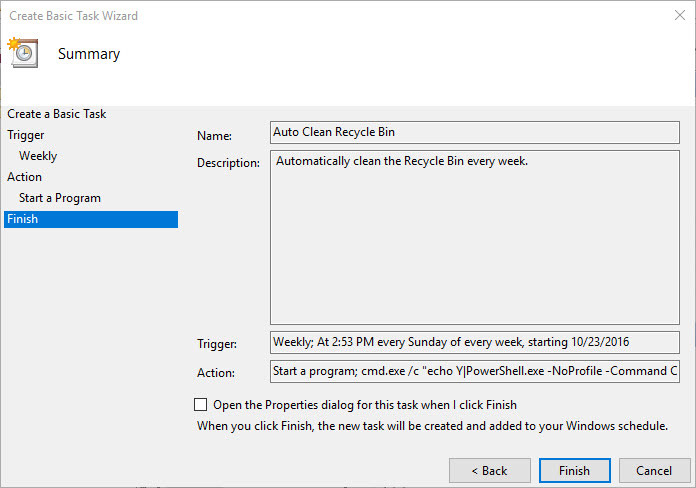
- Select the task in the main window, and then click on the option “Run” appearing under the “Selected Item” category to test the scheduled task.
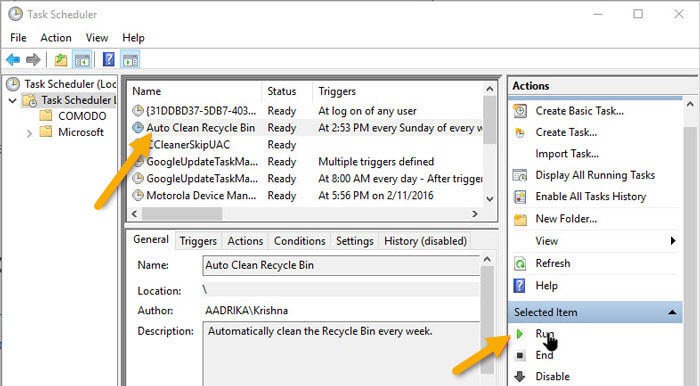
- As soon as you click on the option, if everything goes well, you will see a quick flash of the Command Prompt, and your Recycle Bin will be cleared.
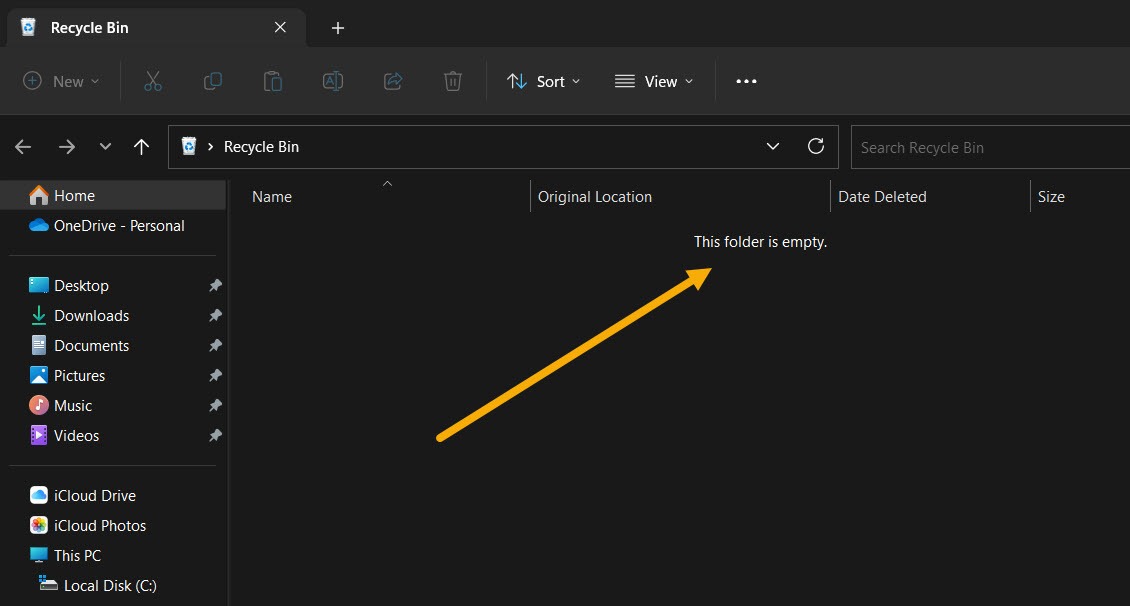
- From this point forward, your Recycle Bin will be automatically emptied according to the trigger you set in the Task Scheduler.
- Be aware that that this method (as well as the others presented in this article) will result in permanently deleting files in Recycle Bin. That being said, recovering permanently deleted files is possible but not guaranteed, especially if using an SSD.
Tip: check these useful tasks you an schedule with Task Scheduler.
Automatically Empty Recycle Bin At Shutdown
While using the Task Scheduler method can be enough, some users may look for a conditional method, not a time-based one. One of the most effective methods is to set your PC to automatically empty the Recycle Bin at every shutdown. We can do this by creating a simple .BAT file and modifying the Group Policy Editor to let Windows launch it automatically.
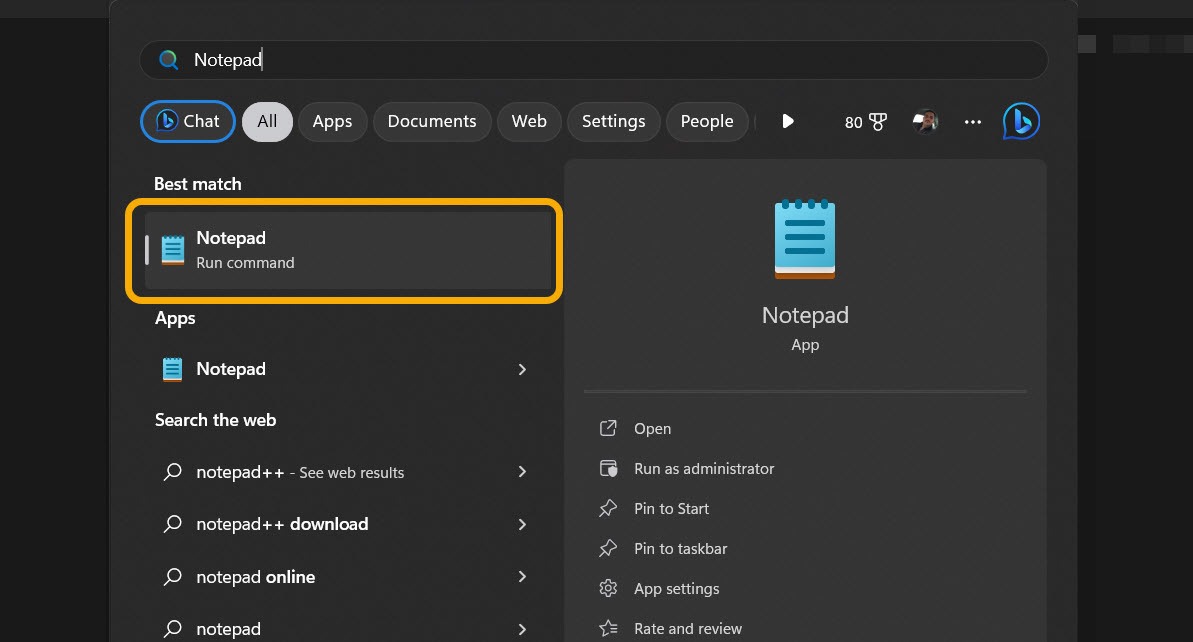
- We’ll start by creating the batch (.BAT) file using Windows’ built-in Notepad. Type Notepad in Windows Search and click below to launch it.
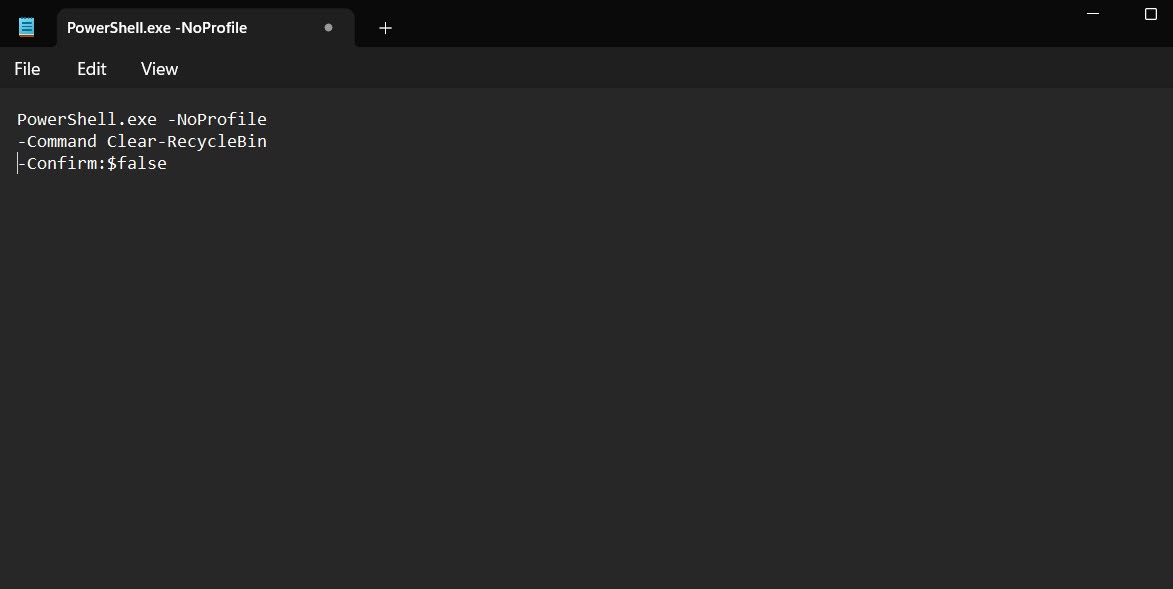
- Copy the following code to Notepad’s text file:
PowerShell.exe -NoProfile <br>-Command Clear-RecycleBin <br>-Confirm:$false
- Click “File -> Save As.”
- Under “Save as Type,” select “All Files.” Finally, name the file “EmptyRecycleBin.bat” and save it wherever you like.
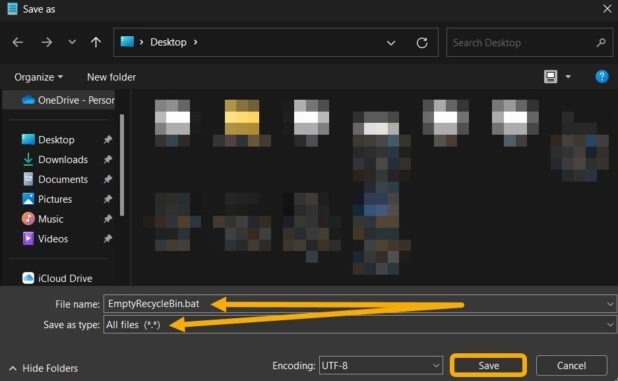
- Now you have a batch file that empties the Recycle Bin every time it’s launched. You can try it immediately – double-click it and check your Recycle Bin! It should be empty.

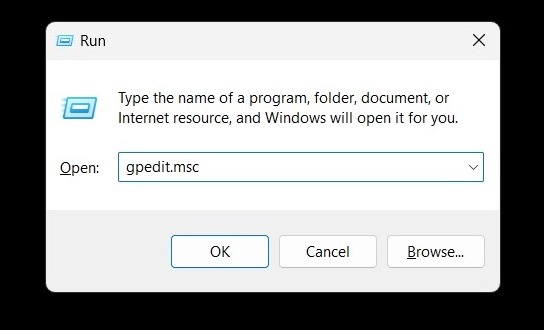
- Next, we need to instruct Windows to automatically launch this batch file at shutdown. This can be done through the Local Group Policy Editor. Press Win + R to open a Run dialog box and type
gpedit.msc.
Note: if you’re using Windows Home edition, you’ll need to enable Group Policy Editor first. Here’s how you can do that.
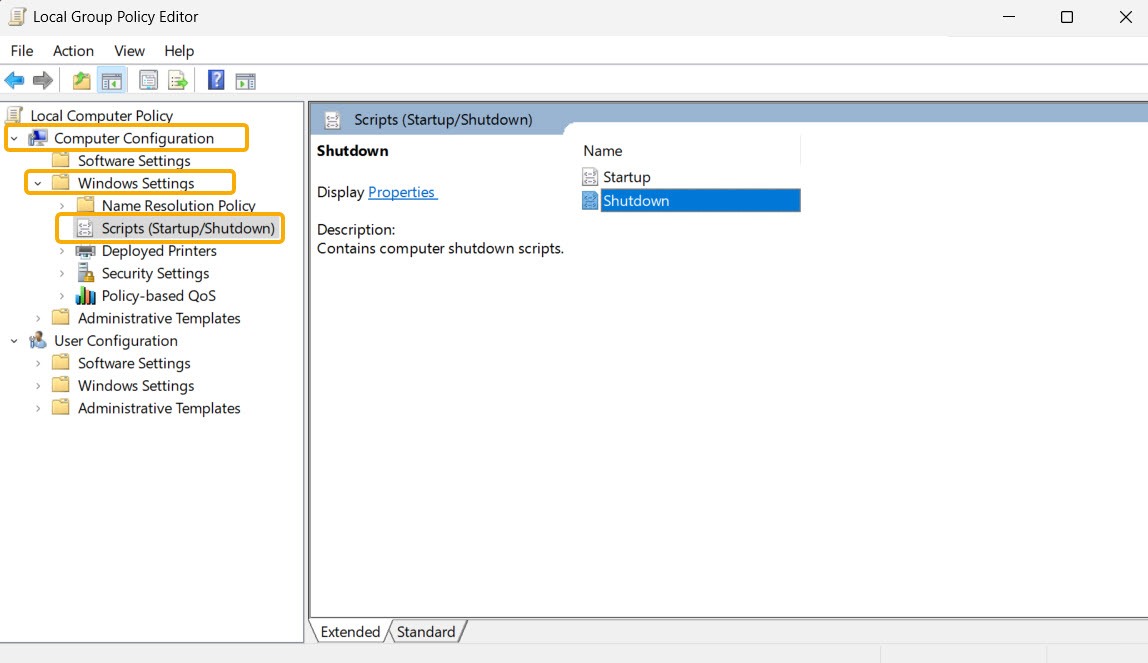
- Navigate to the next path: “Computer Configuration -> Windows Settings > Scripts (Startup/Shutdown) -> Shutdown.”
- Double-click the “Shutdown” script, then select “Add” followed by “Browse.”
- Locate the .BAT file and select it.
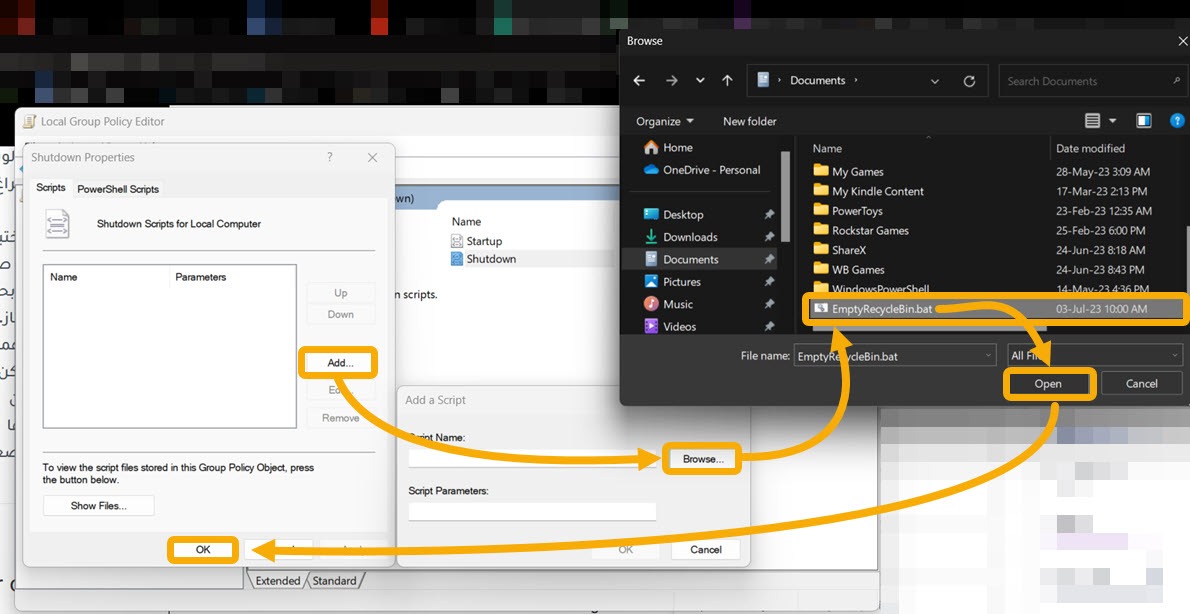
- Back in the Local Group Policy Editor window, click “OK” to save.
- Windows should now launch this .BAT file whenever you shut down your PC.
How to Disable Automatic Recycle Bin Emptying at Shutdown
Disabling this feature is pretty easy, you only need to delete the script we created earlier.
- Launch the Local Group Policy Editor and navigate to the “Scripts (Startup/Shutdown)” section again.
- Double-click the “Shutdown” option, and you’ll find the script we previously set up.
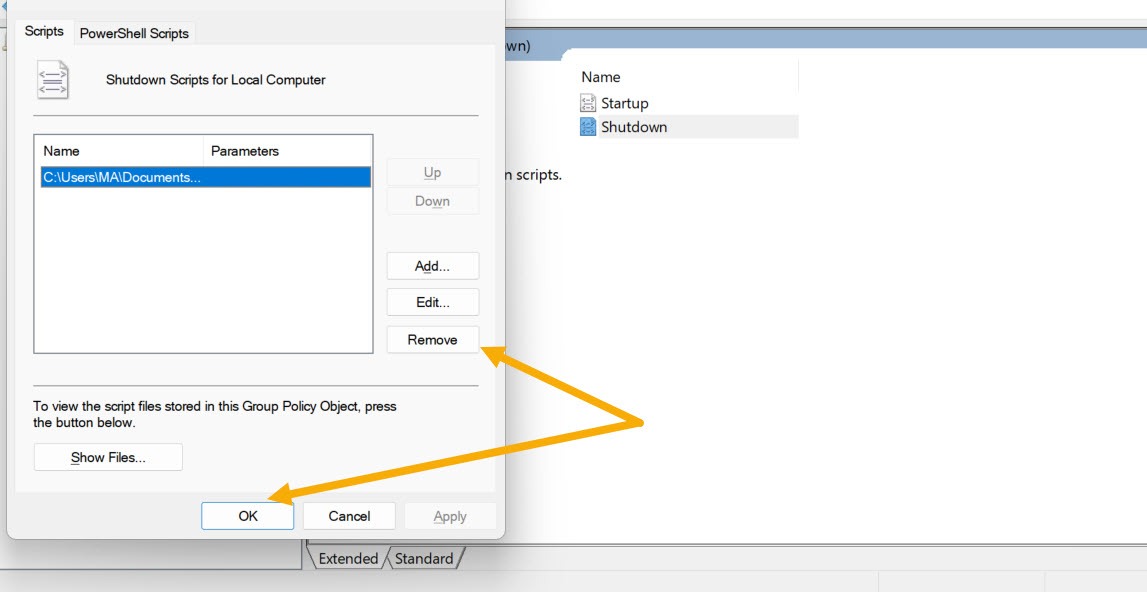
- Click on it once to select it, then click the “Remove” button on the right. Finally, click “OK” to save.
FYI: check the best tools for deleting files completely from your Windows system.
Automatically Empty Recycle Bin Using Storage Sense
Storage Sense is a feature available in the newer Windows versions that allows you to free up storage space. You can also use it to enable Windows to permanently delete the files and folders in the Recycle Bin after a certain amount of time.
- Press Win + I to quickly launch Windows Settings.
- Navigate to “System -> Storage.”
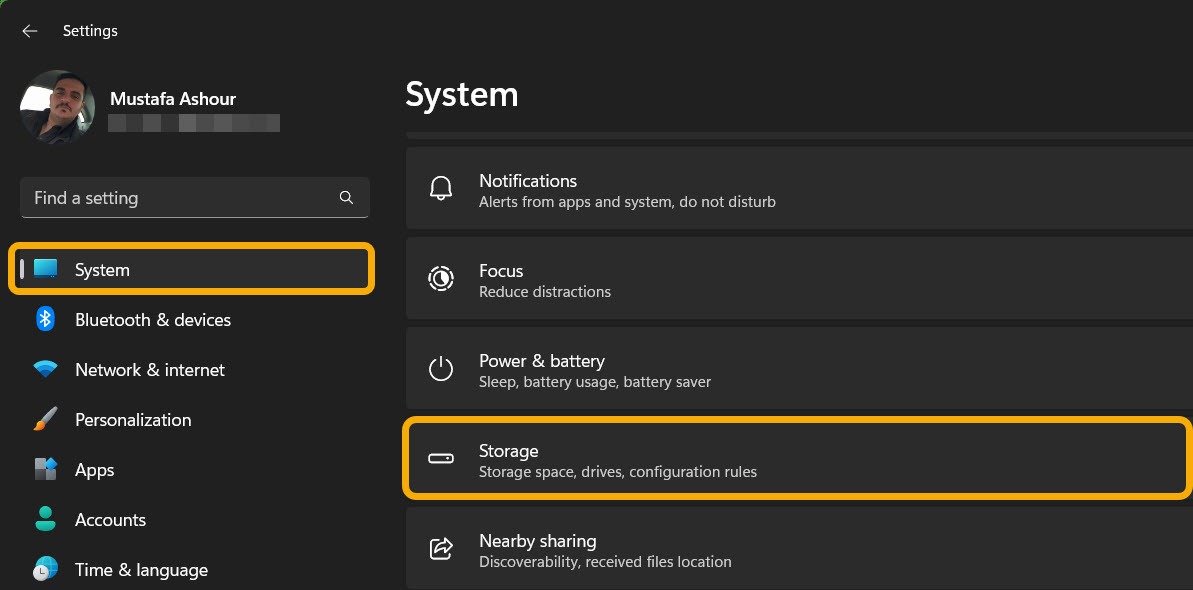
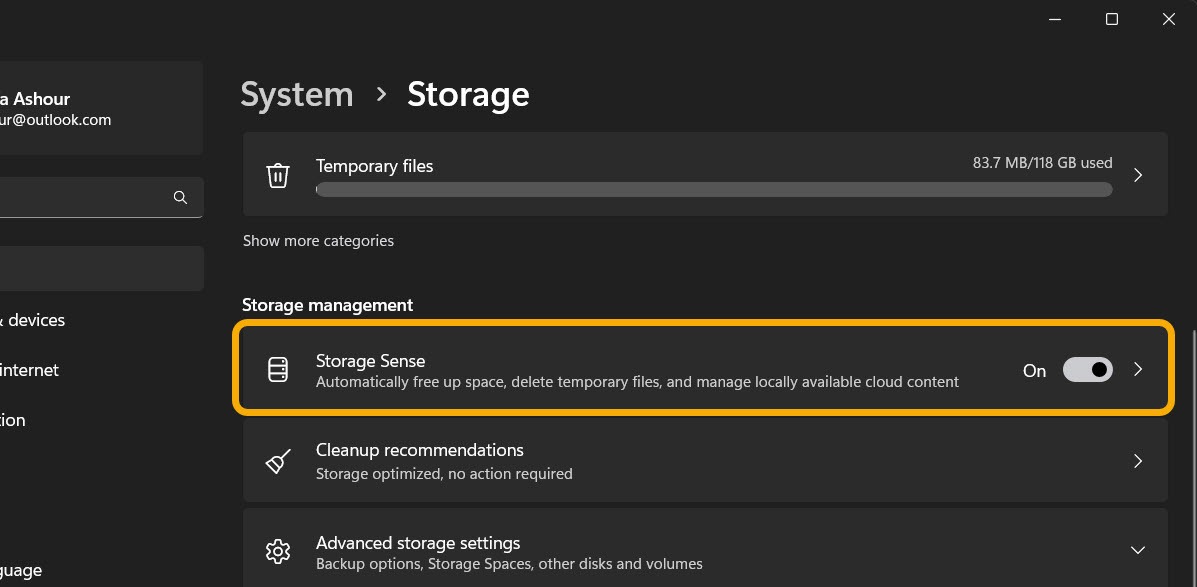
- Enable “Storage Sense” if it’s not enabled, and click on it to see the full options.
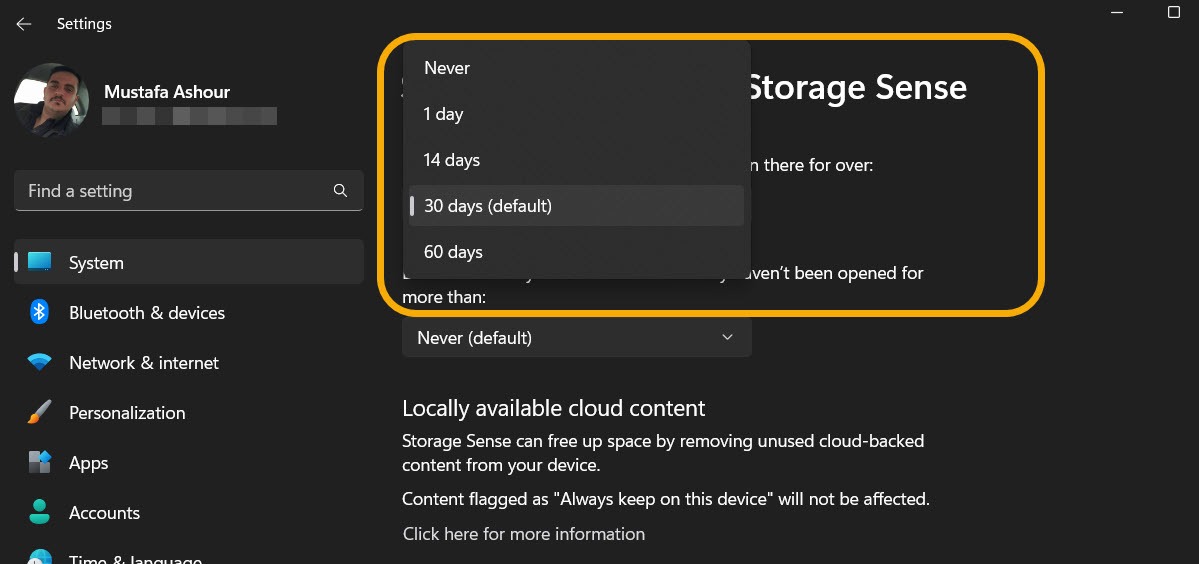
- Find the “Delete files in my recycle bin if they have been there for over” and click below to view the drop down menu.
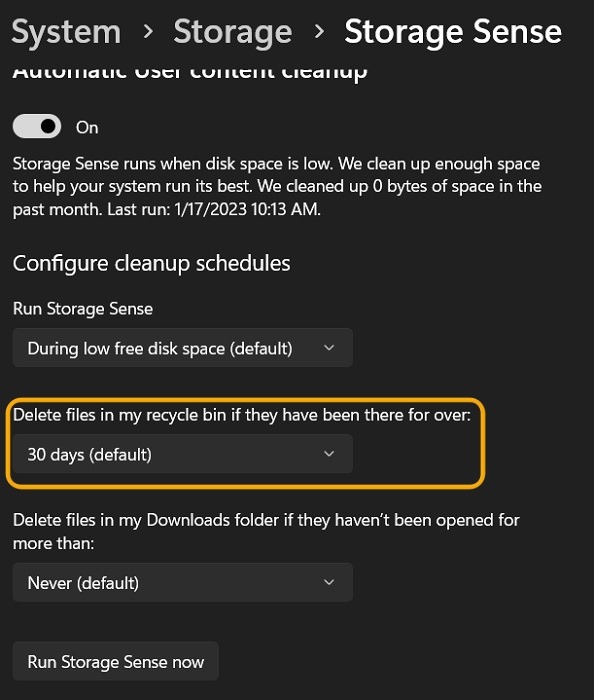
- You can select the time amount that suits you, ranging from 1 day to 60 days, or you can choose “Never.”
Tip: can’t seem to be able to remove a file from your Windows PC? This is how you force delete undeletable files on Windows.
Frequently Asked Questions
Can I disable the Recycle Bin?
Yes, you can right-click the Recycle Bin and select “Properties.” Then you can tick the “Don’t move files to the Recycle Bin, remove files immediately when deleted” option. Doing this will turn off the Recycle Bin, and every file you delete will be permanently deleted. Be cautious after disabling the bin.
Can I hide the Recycle Bin?
Yes, open the settings app by pressing Win + I and navigate to “Personalization → Theme.” Then, scroll down until you see the “Desktop icon settings” option, and click on it. A new window will open, and from there you can select what default icons you want to see on your desktop, including Recycle Bin, This PC, Network, and more.
Image credit: Flaticon, Flaticon 2. Screenshots by Mustafa Ashour and Vamsi Krishna.
Our latest tutorials delivered straight to your inbox