
There are tons of applications that promise you higher network functionality and extreme Internet speeds. Usually, these applications present nothing but a gimmicky interface while sucking money out of your wallet for no realistic benefit. Some of them might even be malware. Here are a few ways to increase your network speed without having to pay for these applications. Tweaking your Internet connection involves more than some shiny application.
General Fixes
Several factors impact your internet connection speeds, and it’s best to start with a few general approaches before getting all technical.
Here are some of the best strategies to enhance network speed:
- Restart your device: Rebooting your computer should be your first approach when fixing most system errors. Doing so flushes random files and data that could impact your overall performance, leading to a less faulty operating system.
- Close unnecessary apps: Running multiple applications on your computer allows them to hog your internet bandwidth, leading to internet connection issues. Terminating unnecessary apps and programs is a MUST to ensure network stability.
- Disconnect other devices: When several devices connect to the same network, each consumes data and takes up parts of your overall bandwidth. Disconnecting additional devices is a logical response when facing slow internet connections.
- Scan for viruses: Malware and all forms of corrupt software often run on your operating system without your knowledge, drastically impacting your computer performance and internet bandwidth. Always protect your device with reputable antivirus software.
- Update drivers and firmware: Outdated drivers and firmware affect how your operating system links to your hardware, leading to various bugs and errors. Accordingly, keeping them up-to-date ensures everything, including the internet router, runs smoothly.
- Clear cookies: While website cookies and cached data aim to provide a seamless browsing experience, they can impact your web performance when they pile up. So, it’s best to clear them every now and then to help your device work faster.
Although the fixes above should resolve most network difficulties, you should move on to the following approaches if the issues persist.
Warning: All of the tweaks below involve editing the registry. As a consequence, you must proceed with caution and back up your registry before performing any of the modifications mentioned below. Accidental deletions and modifications could possibly damage the functionality of your computer. It is best to first back up your Registry before you proceed.
1. IRPStackSize
IRPStackSize (I/O Request Packet Stack Size) represents how many 36-byte receive buffers your computer can use simultaneously. It allows your computer to receive more data at the same time. If you have a large Internet connection (more than 10 Mbps), you’ll benefit from this. For those of you with smaller Internet connections, you may not notice even the slightest difference, so skip this.
Your system usually allocates 15 IRPs in its network stack. More often than not, you’d benefit much more with 32, although you can configure up to 50. Try 32 first.
Here’s how to allow your computer to receive more data:
- Right-click on your “Start Menu” and open “Run.”
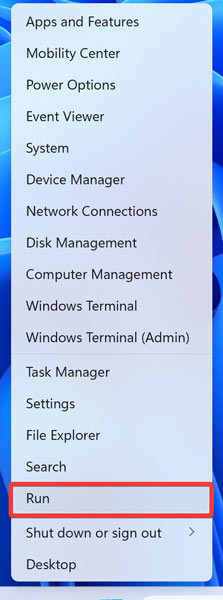
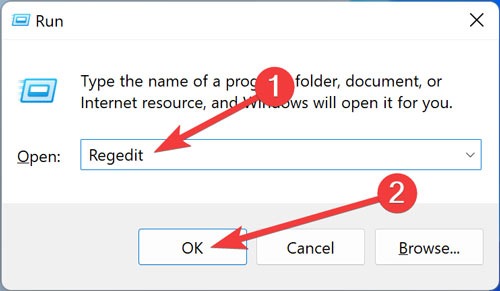
- Type “regedit” into the dialog bar and hit “OK.”
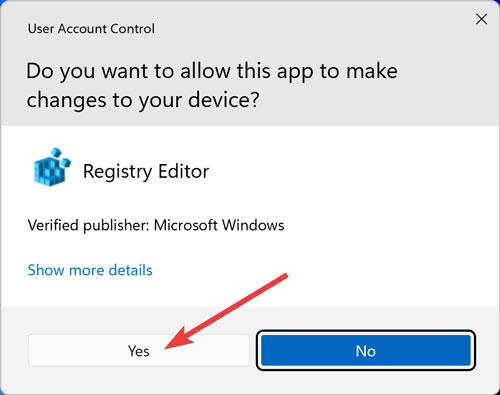
- Confirm the “UAC” by clicking “Yes.”
- Navigate to the following registry:
Computer\HKEY_LOCAL_MACHINE\SYSTEM\CurrentControlSet\Services\LanmanServer\Parameters- Right-click on a blank space, hover over “New,” and choose “DWORD (32-bit) Value.”
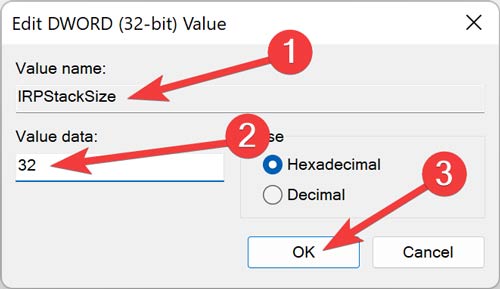
- Change the Value name to “IRPStackSize.” Double click it.

- Change the value data to “32” and click “OK.”
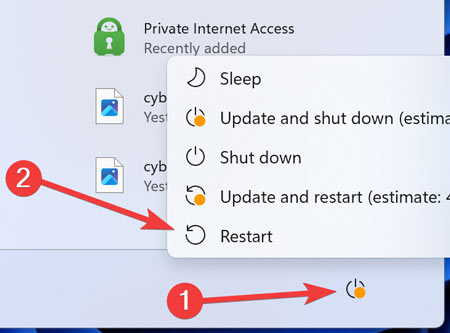
- “Restart” your computer for the changes to take effect.
Tip: Keen to improve your Windows experience? Check out these registry tweaks for a better Windows user experience.
2. SizReqBuf
SizReqBuf represents the size of the raw receive buffers within a server environment. This means it will affect your ability to host something in a high-latency environment. Let’s say you host a game server and tons of people complain about lag. Modifying this value will help reduce the impact of lag. You’d also benefit if you’re hosting a website or any other service, including sending files through instant messenger or Neo Modus Direct Connect.
Your system usually places this buffer at 16384 bytes. For most servers, this is efficient enough, but sometimes you have a small amount of memory and cannot keep up with the high request volume.
Here’s how to modify the Default Frame Size:
- Open the registry manager.
- Navigate to the directory below:
Computer\HKEY_LOCAL_MACHINE\SYSTEM\CurrentControlSet\Services\LanmanServer\Parameters- Right-click on a blank space, hover over “New,” and choose “DWORD (32-bit) Value.”
- Change the Value name to “SizReqBuf,” set the Value data to “17424” or “4356,” and click “OK.”
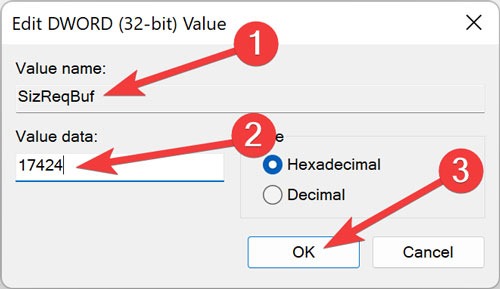
- “Restart” your computer for the changes to take effect.
Note: If you have a server with over 512 MB of physical memory, modify the value to 17424. If you have less than 512 MB of memory, you should consider getting a new computer, but you can change this value to 4356.
3. DefaultTTL
Time to Live (TTL) tells routers how long a packet should stay in the air while attempting delivery before giving up and discarding the packet. When the value is often high, your computer spends more time waiting for a failed packet to deliver, effectively decreasing the amount of productivity in your network.
Without a value set, Windows waits 128 seconds for the transaction to finish. This makes your computer lag terribly if you’re in the middle of something and your connection with a server unexpectedly goes south.
Here’s how to add a default TTL and resolve the issue:
- In the registry manager, navigate to the directory below.
Computer\HKEY_LOCAL_MACHINE\SYSTEM\CurrentControlSet\Services\Tcpip\Parameters- Right-click on a blank space, hover over “New,” and choose “DWORD (32-bit) Value.”
- Change the Value name to “DefaultTTL,” set the Value data to “62,” and click “OK.”
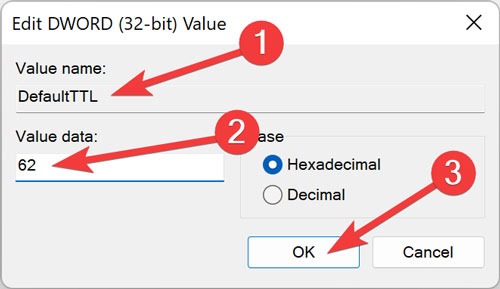
- “Restart” your computer for the changes to take effect.
Tip: The longer you use your Windows, the Registry will get more bloated. Learn how you can clean up the Windows registry now.
4. Tcp1323Opts
Tcp1323Opts lets you use RFC 1323, known as “TCP Extensions for High Performance,” in 3 ways. This particular value works with timestamping and network window scaling. This allows the TCP connection to negotiate a receive window size with a server, letting computers specify receive windows of up to 1 GB.
Here’s how to modify the TCP value:
- In the registry manager, navigate to the directory below:
Computer\HKEY_LOCAL_MACHINE\SYSTEM\CurrentControlSet\Services\Tcpip\Parameters- Right-click on a blank space, hover over “New,” and choose “DWORD (32-bit) Value.”
- Open the “TCP1323Opts” value and change the value to “1.”
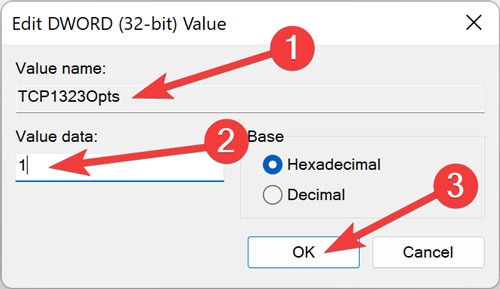
- “Restart” your computer for the changes to take effect.
5. MaxFreeTcbs
MaxFreeTcbs is an iffy value. It determines how many active TCP connections your computer can handle at any given time based on how much physical memory you have and how much performance your computer has with regard to bandwidth.
If the number is too high, your computer may not properly process TCP transactions because of the high amount of active connections talking to the computer at the same time. However, if the number is too low, you can’t host or request as many connections as you’d like. While the setting is arbitrarily determined, you may want to bump up the number when you upgrade your hardware or Internet connection.
Here’s how to modify the TCP transactions:
- In the registry manager, navigate to the directory below:
Computer\HKEY_LOCAL_MACHINE\SYSTEM\CurrentControlSet\Services\Tcpip\Parameters- Right-click on a blank space, hover over “New,” and choose “DWORD (32-bit) Value.”
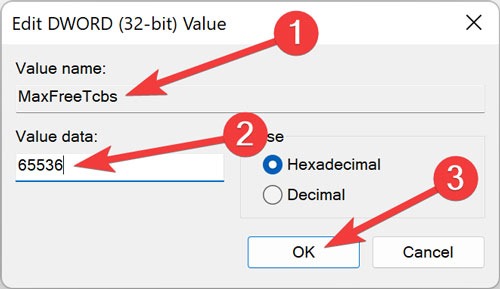
- Change the Value name to “MaxFreeTcbs,” set the Value data to “65536,” and click “OK.”
- “Restart” your computer for the changes to take effect.
Note: If you’re using an older computer with lower-performance hardware, you can set this at a lower number, like 16000.
Tip: Don’t you hate it when you see the “File Is Open in Another Program” error and it doesn’t allow you to open the file? Here’s how to fix it.
6. MaxUserPort
When an application requests an available port to open from Windows, the operating system chooses one port from 1024 to a specified maximum known as “MaxUserPort.”
A port on your computer lets you establish TCP/UDP connections through the Internet and in your local network. We all know that 5000 is less than 65534. What happens when you open more options to programs seeking a port? They find a port much faster than they would with only a couple thousand available choices.
Here’s how to adjust the Maximum User Port:
- In the registry manager, navigate to the directory below:
Computer\HKEY_LOCAL_MACHINE\SYSTEM\CurrentControlSet\Services\Tcpip\Parameters- Right-click on a blank space, hover over “New,” and choose “DWORD (32-bit) Value.”
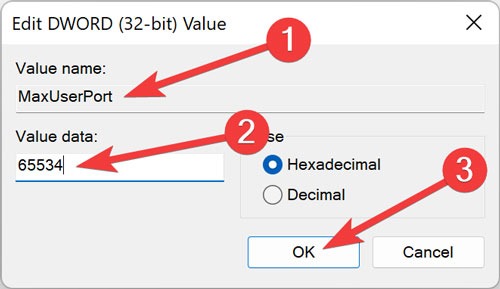
- Change the Value name to “MaxUserPort,” set the Value data to “65534,” and click “OK.”
- “Restart” your computer for the changes to take effect.
Note: Windows sets this value to 5000 by default, but you can set it up for any number from 5000 to 65534.
7. GlobalMaxTcpWindowSize
The “GlobalMaxTcpWindowSize” value has a long name, but you won’t regret modifying it if you have a fast Internet connection (10 to 15 Mbps for two devices) and often upload stuff. This value represents how much data can travel from your computer without receiving an acknowledgment (ACK) packet.
Every time you send small chunks of data on the Internet, your computer has to wait for this packet, which tells your end of the network, “Everything’s OK! Send more!” Sometimes, due to latency and poor peering, this might not be ideal.
You can edit this value to allow more data to travel without waiting for that packet to come. Here’s how to adjust the Maximum User Port:
- In the registry manager, navigate to the directory below:
Computer\HKEY_LOCAL_MACHINE\SYSTEM\CurrentControlSet\Services\Tcpip\Parameters- Right-click on a blank space, hover over “New,” and choose “DWORD (32-bit) Value.”
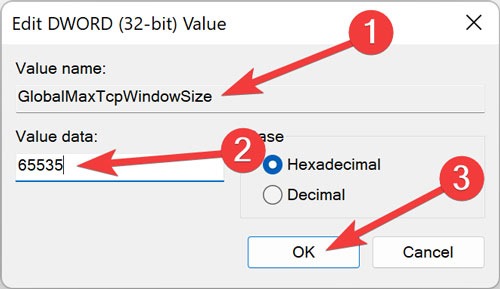
- Change the Value name to “GlobalMaxTcpWindowSize,” set the Value data to “65535,” and click “OK.”
- Restart your computer for the changes to take effect.
Note: After modifying this setting, if you notice a drop in network speed instead of an increase, either remove the value or raise it slightly to 128 kilobytes (by setting the value to 131072).
Tip: Check out the latest Windows Update problems, and how you can fix them.
8. MTU
MTU affects your upstream speed more than your downstream speed, but taking care of upstream is just as important, ensuring that larger chunks of data travel simultaneously.
While your network card typically sets this number automatically, you can adjust this based on your Internet connection speed. But changing this value is tricky.
First, you have to find out your optimal MTU value, which does not require packet fragmentation because of limitations in your Internet connection speed.
Here’s how to find your gateway number:
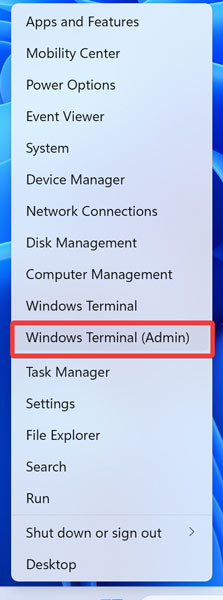
- Right-click on your “Start Menu” and open “Windows Terminal (Admin).”
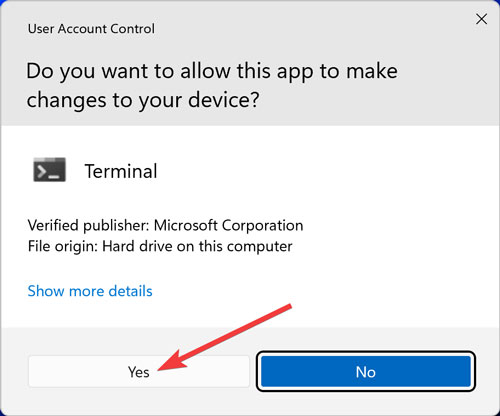
- Confirm the “UAC” by clicking “Yes.”
- When PowerShell launches, type
ipconfigand press Enter on your keyboard.

- Copy the value under “Default Gateway,” which shows up under the network adapter you use for the Internet.
- Type the following command line and press Enter.
ping -f -l <mtu> <your gateway>

Note 1: Replace “<mtu>” with a number from 88 to 4294967295 and “<your gateway>” with the gateway value you found in the previous steps.
Note 2: The MTU value is too high if you see the “Packet needs to be fragmented but DF set” error message. Test different values until you reach the highest possible number without packet fragmentation.
Here’s how to set this value in your registry:
- In the registry manager, navigate to the directory below:
Computer\HKEY_LOCAL_MACHINE\SYSTEM\CurrentControlSet\Services\Tcpip\Parameters\Interfaces\Interface ID- Right-click on a blank space, hover over “New,” and choose “DWORD (32-bit) Value.”
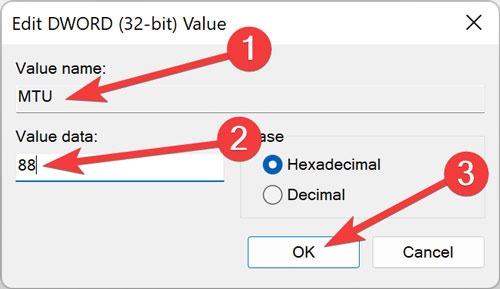
- Change the Value name to “MTU,” set the Value data to the number you got when pinging your gateway, and click “OK.”
- Restart your computer for the changes to take effect.
Note: Other network interfaces could be installed in a computer, mainly when you use it as a router. Replace “Interface ID” with the GUID for your network interface. Just browse the different GUIDs under “Interfaces” and look at the information on the right side of the regedit window to see if it matches the details of the network interface you use to connect to the Web.
Your internet connection should now behave faster than before. However, if none of the approaches above help, contact your ISP for further assistance.
These Registry tweaks are more than enough to increase the network speed on Windows. If you’re having problems with registry errors, see our list of fixes for that. We also have a guide to help you take full ownership of your Windows Registry Keys.
Frequently Asked Questions
How do I disable network throttling in Regedit?
Open the “Windows Registry Editor” and go to HKEY_LOCAL_MACHINE\SOFTWARE\Microsoft\Windows NT\CurrentVersion\Multimedia\SystemProfile. Then open the “NetworkThrottlingIndex” key, change “Value Data” to ffffffff, and click “OK.”
How to increase Internet speed with DNS?
Open “Windows Run,” type “ncpa” into the search dialog, and press Enter. Then pick “Internet Protocol Version 4” from the list and click “Properties.” Finally, set the primary and secondary DNS addresses to “8.8.8.8” and “8.8.4.4” respectively.
Our latest tutorials delivered straight to your inbox