Windows error 0x80070643 is a common issue that users may encounter when attempting to install a new update on their Windows operating system. It typically occurs when installing security updates and is often related to corrupted files and issues with the Security app. This tutorial discusses the different troubleshooting methods to fix this issue for good.
Good to know: learn how to remove bloatware from Windows.
Content
Basic Troubleshooting
Before moving on to the more issue-specific fixes detailed below, try these easy solutions that may solve the error without additional complications:
- Run SFC and DISM scans: corruptions, errors and inconsistencies within the system are known to cause issues like the Windows update error. To check whether this is the case, we recommend running the SFC and DISM utilities via Command Prompt.
- Update your drivers: when drivers become outdated or corrupt, they may not meet the requirements of security updates or may suffer from compatibility issues that can lead to installation failures. To address driver-related issues, you must update them regularly. You can manually download the latest drivers from the hardware manufacturer’s website, or use the Device Manager utility.
1. Run the Windows Update Troubleshooter
The first thing we recommend doing upon facing this update error is running the Windows update troubleshooter. This utility is designed by Microsoft to apply a set of predefined rules and algorithms to identify and fix the underlying cause.
- Press Win + I to open the Settings app.
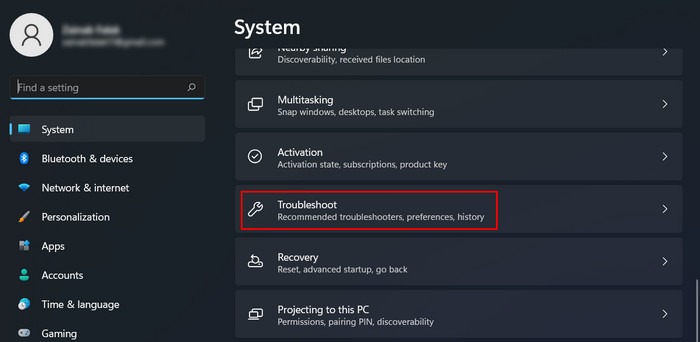
- Choose “System -> Troubleshot.”
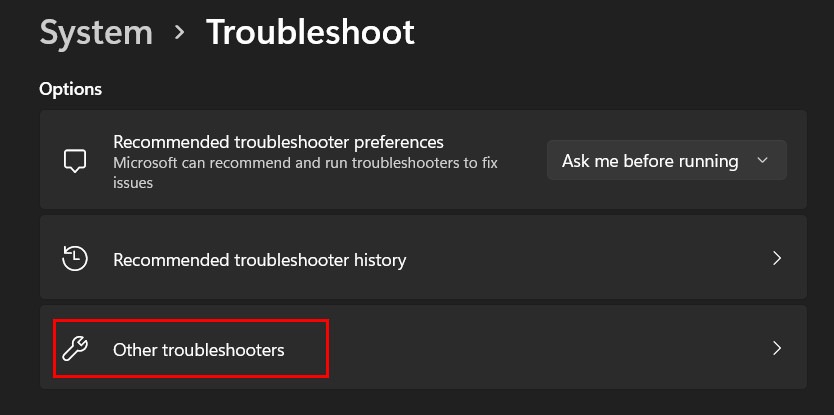
- Click “Other troubleshooters.”
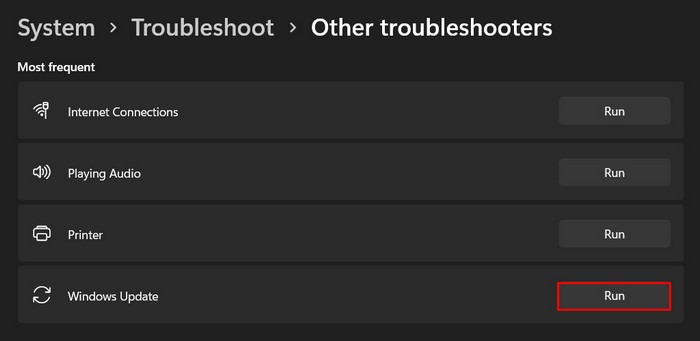
- Look for the “Windows Update” troubleshooter, and click on the “Run” button next to it.
- Analyze the troubleshooter’s results. If it identified a problem, click on “Apply this fix” to proceed.
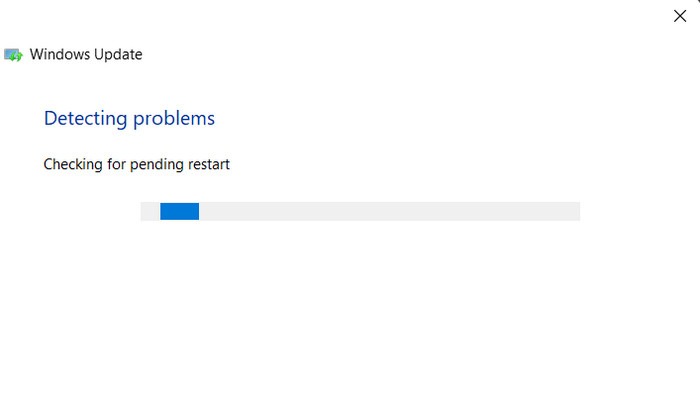
- Otherwise, click on the “Close the troubleshooter” option, and move to the next method below.
- On Windows 10, go to “Settings -> Update & security -> Troubleshoot -> Additional troubleshooters” to find the same utility.
Tip: Windows Troubleshooter not functioning as it should? Learn how to troubleshoot it.
2. Disable Memory Integrity in Windows Security
Since error 0x80070643 is a security update issue, there is a chance that the Memory Integrity feature is causing conflicts, which is leading to the problem.
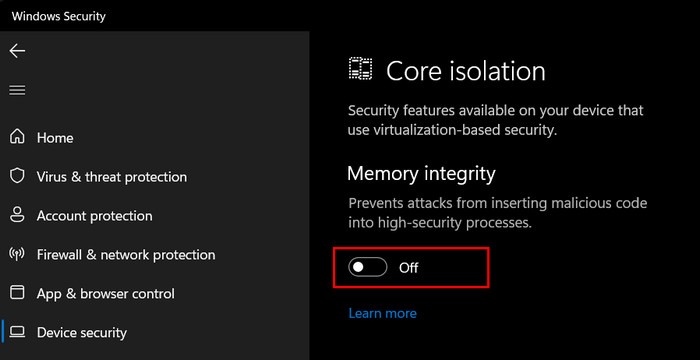
Memory Integrity (also known as Core isolation), is a security feature that uses virtualization-based security to protect critical system processes and memory from unauthorized access and modification.
If Memory integrity is enabled on your computer, disable it, and check whether that makes a difference.
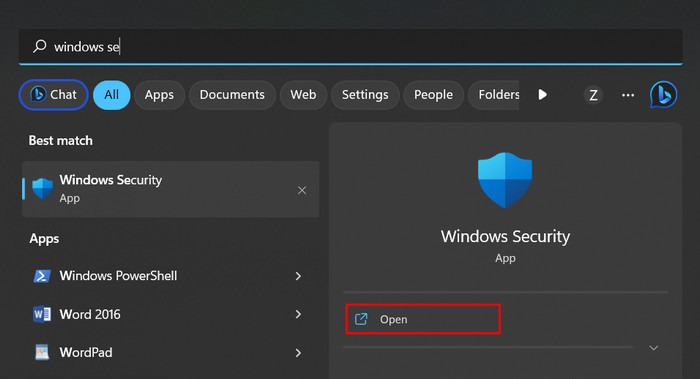
- Type “Windows Security” in Windows Search, and click “Open.”
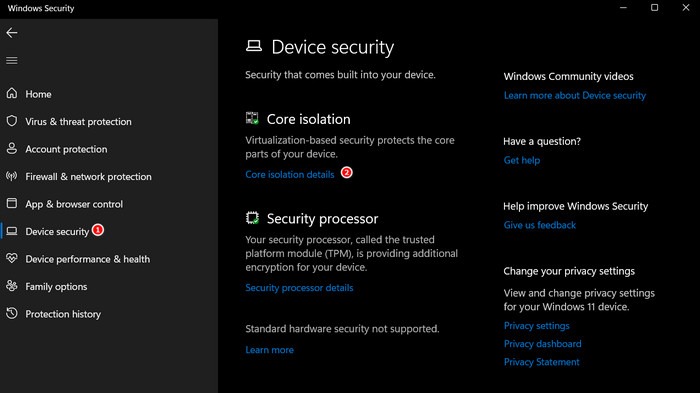
- Choose “Device Security” from the left pane.
- Click on “Core isolation details” under “Core isolation.“
- Toggle off the switch for “Memory integrity.”
- Check whether you can install the targeted update.
Note: disabling memory integrity may temporarily decrease the security provided by the feature, so it is recommended to re-enable it after resolving the update issue.
3. Reset Windows Security
Over time, security settings can become altered or modified, leading to conflicts or update errors.
Eliminate these misconfigurations and restore the default protection settings to ensure proper functionality by resetting Windows Security. Hopefully, this will address security update errors and ensure that your system is adequately protected.
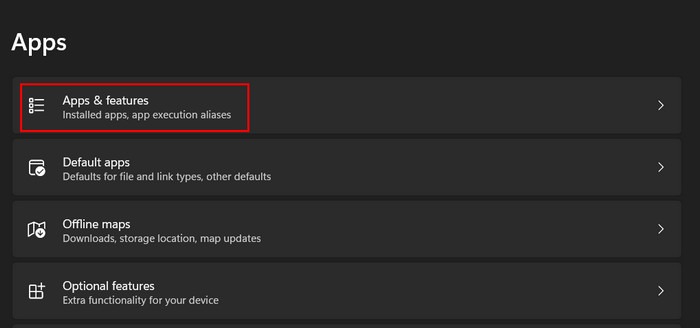
- Navigate to “Settings -> Apps -> Apps & features.” In some newer versions of Windows 11, the option will show up as “Installed apps.”
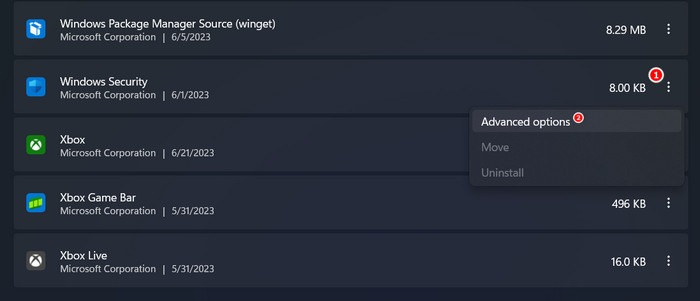
- Scroll through and locate “Windows Security” in the app list.
- Click on the three dots associated with it, and choose “Advanced options.”
- Click on the “Reset” button.
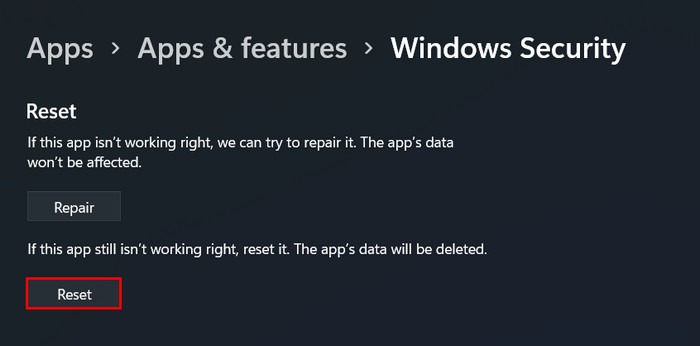
- Wait for the process to complete, and check whether the issue has been resolved.
FYI: this is how you can safely test your antivirus’s efficacy with real malware.
4. Restart Real-Time Protection
There is also a chance that the Real-Time protection feature is experiencing temporary glitches or conflicts that may be preventing it from functioning properly, resulting in the 0x80070643 error.
An easy way to fix such issues with the Real-Time protection feature is to restart it.
- Open the Windows Security app as shown above.
- Choose “Virus & threat protection” from the left pane, and click “Manage settings” under “Virus & threat protection settings” on the right.
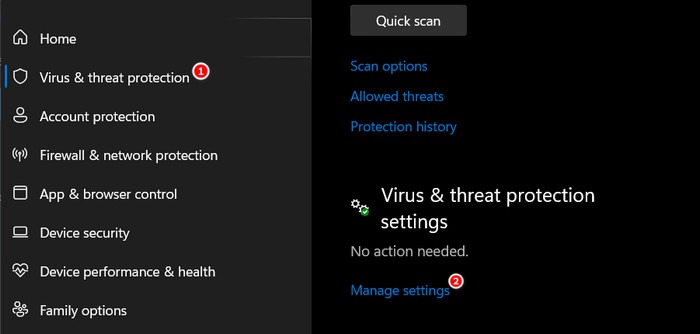
- Scroll down to the “Real-time protection” option, and toggle off the switch below.
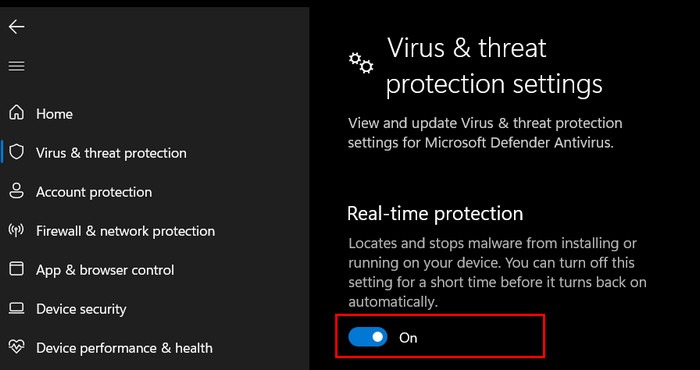
- Wait for a few seconds, then toggle the switch back on to turn “Real-time protection” back on.
- Close the Windows Security app, and check whether the issue has been resolved.
5. Reset the Windows Update Service
In certain instances, the problem may not be associated with Windows Security directly but rather with the Windows Update service.
To check whether this is the case in your situation, restart the Windows Update service and see whether that makes a difference.
- Press Win + R to open a Run window.
- Type
services.mscin Run, and click Enter.
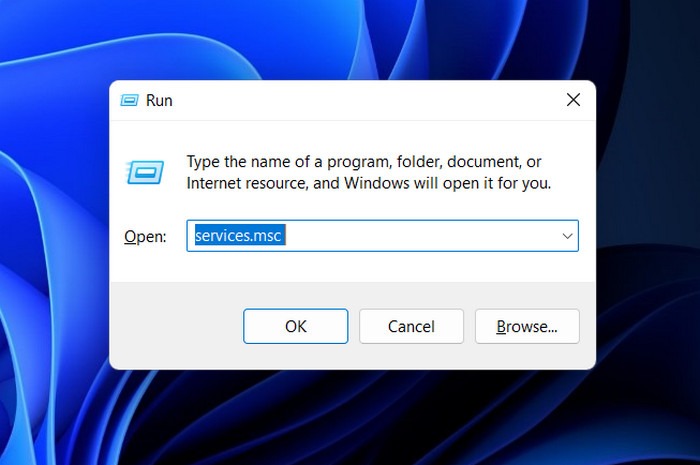
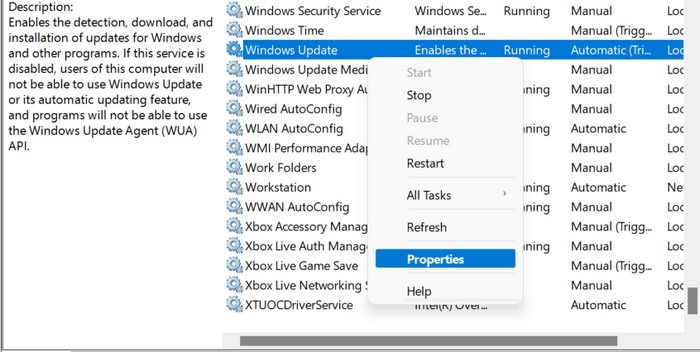
- Locate the “Windows Update” service, and right-click on it.
- Choose “Properties” from the context menu.
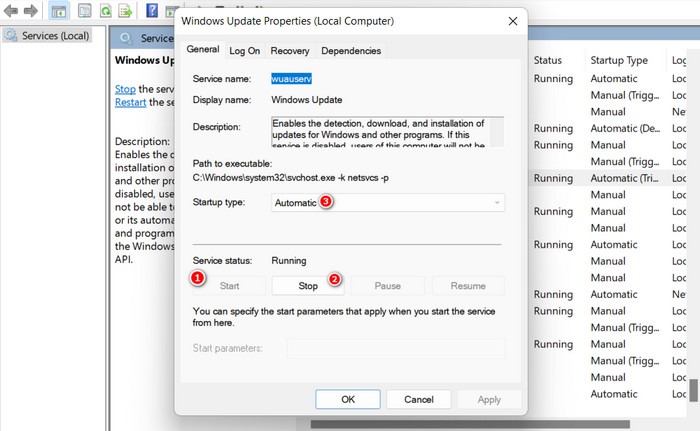
- Click on the “Stop” button, wait for a few seconds, and click “Start.”
- Make sure that the “Startup type” is set to “Automatic,” and click “Apply -> OK” to save the changes.
Tip: if you’re having trouble initiating a System Restore, check out our list of fixes to get back on track.
6. Run .NET Framework Repair Tool
If you are facing the 0x80070643 error when installing Microsoft .NET Framework updates, try using the .NET Framework Repair tool that was developed by Microsoft.
This tool works by repairing the corrupted or missing .NET Framework components that may be leading to the issue.
- Head to the Microsoft website to download the Microsoft .NET Framework Repair Tool, and download the utility by clicking on the “Download” button.
- Once the NetFxRepairTool.exe file downloads, click on it, and select “Yes” in the User Account Control prompt.
- The tool will scan for problems, then recommend changes. Click “Next” to apply the changes.
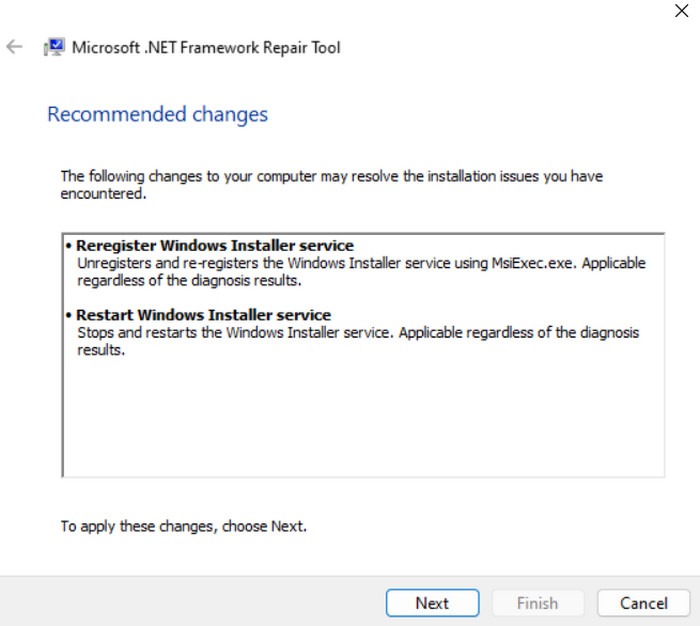
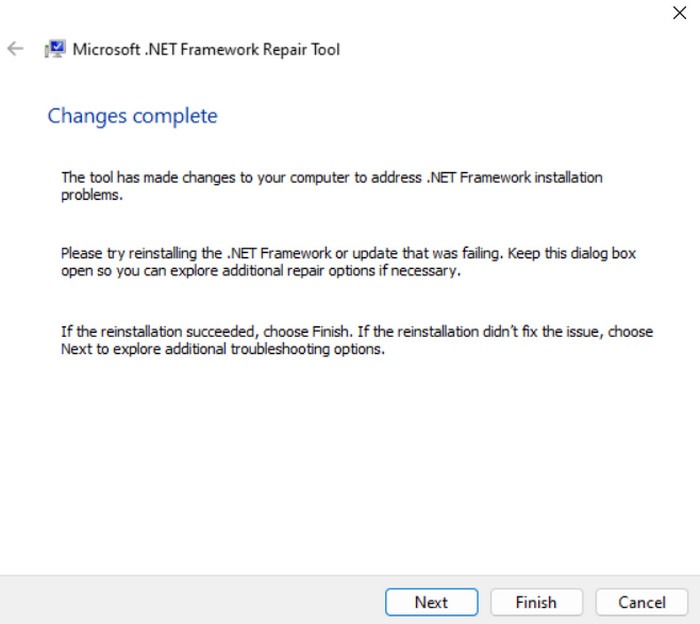
- After the changes are applied, minimize the tool dialog and check whether the issue has been resolved. If it has, click on the “Finish” button. If the error persists, click on “Next” to further troubleshoot the issue.
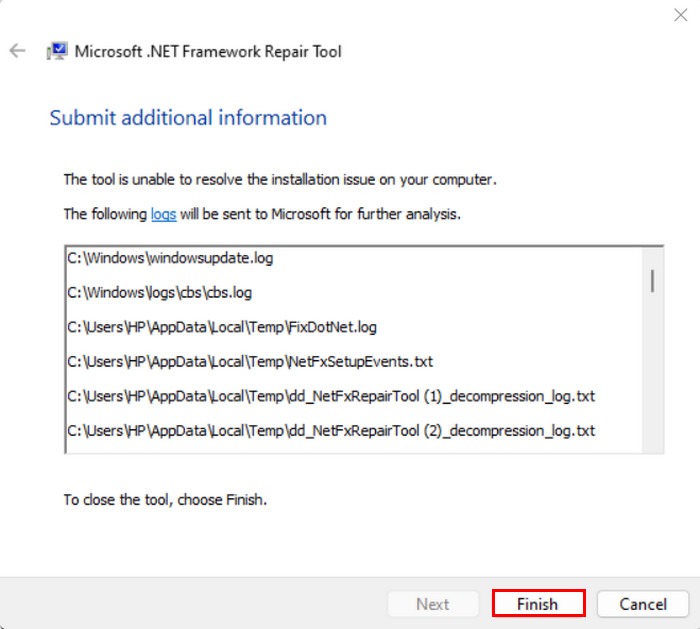
- If the troubleshooter fails to fix the problem, it will send logs to Microsoft for further analysis and notify you. Click “Finish” to end the process.
FYI: get up to speed with how to check your hard disk health in Windows.
7. Reset Windows Update Components
Windows Update relies on various components to download and install updates. If any of these components are damaged or corrupted, it can lead to failed or interrupted updates.
Reset the components to fix any issues with them that could have led to the problem.
- Press Win + R to open Run.
- Type
cmdin Run, and press Shift + Ctrl + Enter to open Command Prompt as an administrator. - Click “Yes” in the User Account Control prompt.
- In Command Prompt, type the following commands one by one, and press Enter to execute them. This will stop the essential Windows update services.
net stop wuauserv
net stop cryptSvc
net stop bits
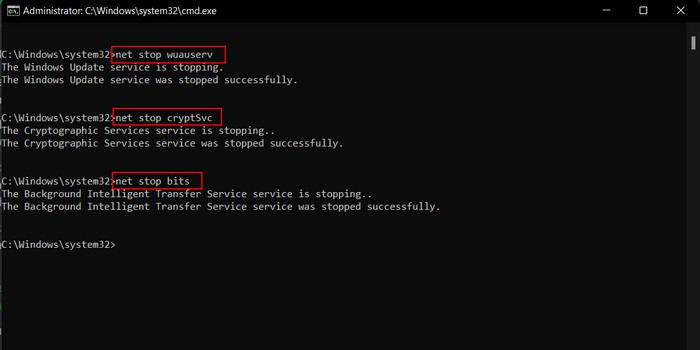
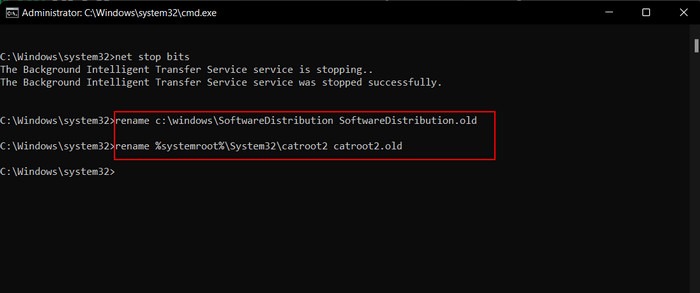
- Run the following commands. This will rename and back up the Software Distribution and Catroot2 folders.
rename c:\windows\SoftwareDistribution SoftwareDistribution.old
rename %systemroot%\System32\catroot2 catroot2.old
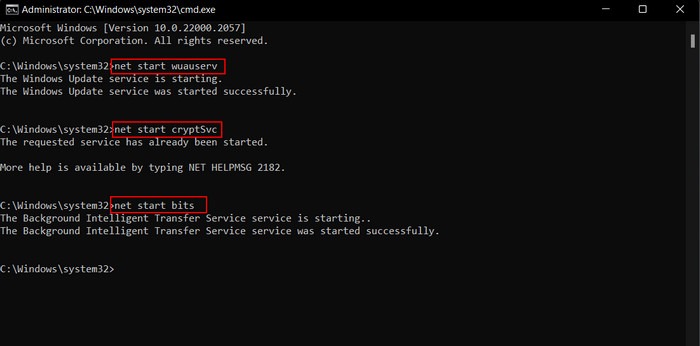
- Run the following to restart the services you stopped earlier:
net start wuauserv
net start cryptSvc
net start bits
- Close cmd and check whether the issue has been resolved.
8. Perform a System Restore
You can also opt to perform a System Restore, which will roll back your system’s configuration to a previous point in time when the issue wasn’t manifesting.
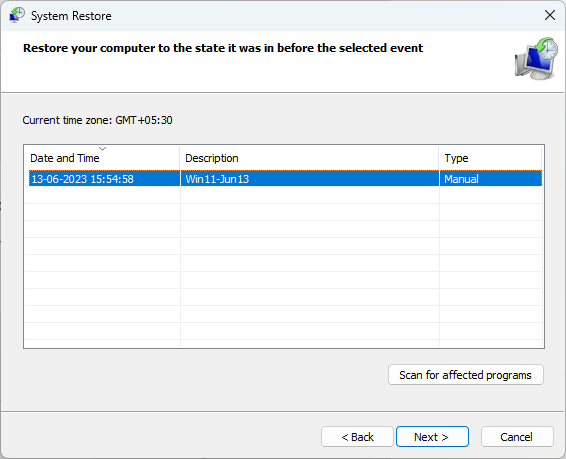
Doing this will restore system settings – including files, registry entries, programs, and drivers, potentially resolving conflicts or errors that are causing issues with the security update installations.
Tip: seeing the “Device has stopped” message in Windows? Learn what to do about it.
Protect Your System With the Latest Security Updates
Regularly installing security updates is essential to protect your system from harmful viruses and malware. If you have exhausted all the methods and are still facing the error, try to reset Windows. Alternatively, switch to a third-party security program until Microsoft releases an official fix.
Image credits: Unsplash. All screenshots by Zainab Falak.
Our latest tutorials delivered straight to your inbox