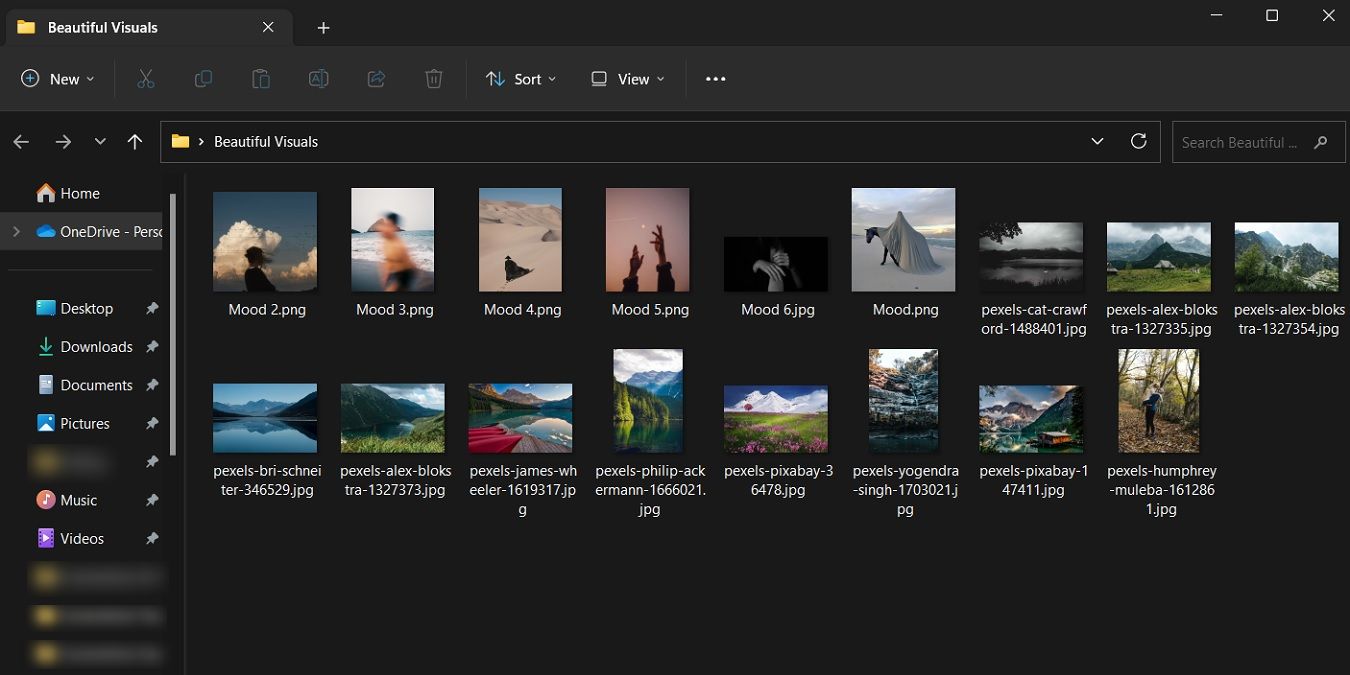
Thumbnails allow you to easily preview images with file extensions, such as .JPG, .PNG, etc., without actually opening the files. If this option weren’t available, you’d have to open countless files to find the one you’re looking for. If you notice that your thumbnails suddenly stop working, you will find the solution in this tutorial.
Good to know: need to rotate, flip or blur images in PowerPoint? We have an entire tutorial dedicated to showing you how to do that.
1. Check File Explorer Options
If you do not see image thumbnails on your PC, you must first check whether the thumbnail preview option is enabled.
- Launch File Explorer.
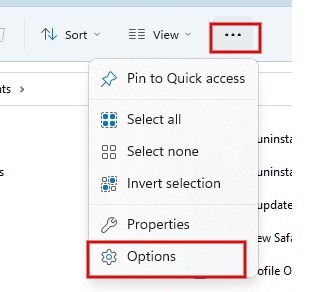
- Click the three-dot icon, and click “Options” in the drop-down menu in the top bar. If your PC is running Windows 10, click “File” at the top, followed by “Change folder and search options.”
- Switch to the “View” tab In the Folder Options window, and ensure that the box for “Always show icons, never thumbnails” remains unticked.
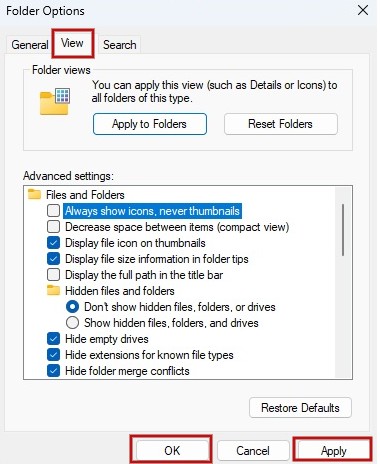
- Click “Apply -> OK” to exit the dialog.
Tip: learn how to clear the cache on your Windows PC.
2. Clear Thumbnail Cache
Sometimes file thumbnails won’t load properly if the cache is corrupted. To resolve that, try clearing the thumbnail cache.
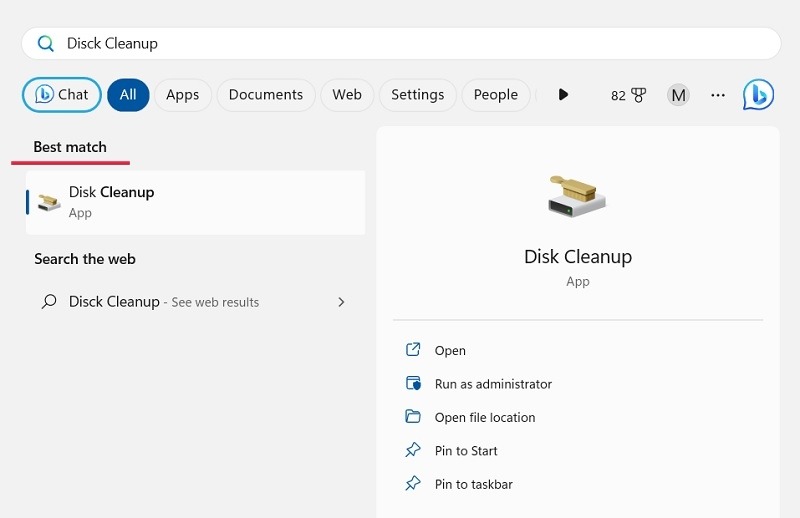
- Type “Disk Cleanup” in the Search bar, and click the best match below to open the app.
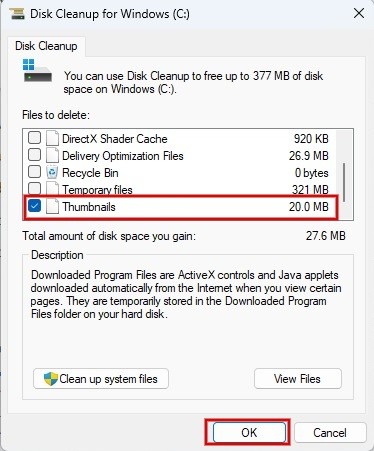
- Scroll down, select “Thumbnails” in the Disk Cleanup window, and click “OK.”
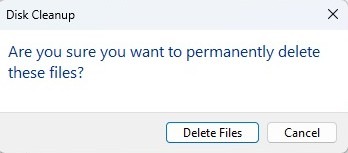
- Click “Delete Files” in the confirmation dialog to delete the thumbnail cache.
- The thumbnail cache will be cleared and rebuilt again.
3. Fix Thumbnail Cache from Command Prompt
Alternatively, use the Command Prompt to clear the thumbnail cache.
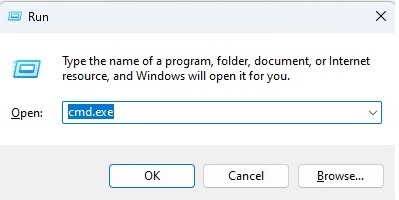
- Open a Run dialog (Win + R), type
cmd, and press Ctrl + Shift + Enter to run it as Administrator.
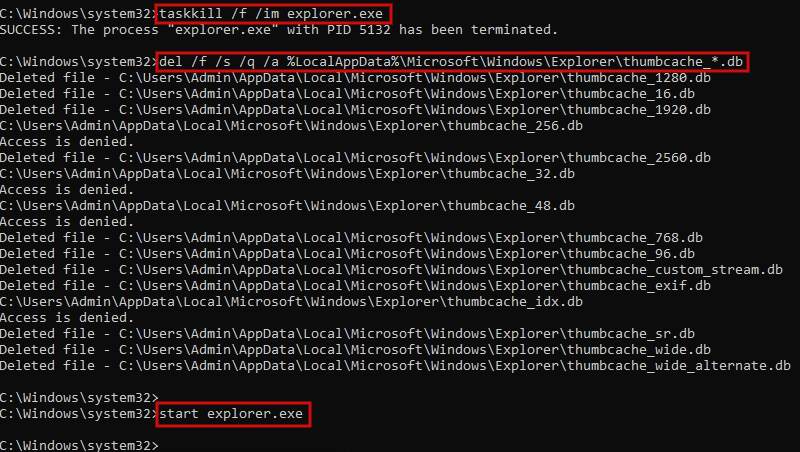
- Type the following command, and press Enter to close the File Explorer app.
taskkill /f /im explorer.exe
- After executing the above command, the File Explorer app will close.
- Type the following command, and press Enter to delete the thumbnail cache.
del /f /s /q /a %LocalAppData%\Microsoft\Windows\Explorer\thumbcache_*.db
- Once the process of deleting the thumbnail cache is complete, start File Explorer with the following command and press Enter.
start explorer.exe
Tip: File Explorer gained tabs in a recent update. Learn how to take advantage of them.
4. Restart File Explorer
If your folder contains hundreds of images, it may take some time for the thumbnails to load properly. If the process is very slow, or File Explorer is stuck in the process, you can restart the File Explorer app to see whether the thumbnails issue has been resolved.
- Launch Task Manager by pressing Ctrl+ Alt+ Del on your keyboard and selecting the appropriate option.
- Right-click “Windows Explorer” under “Apps.”
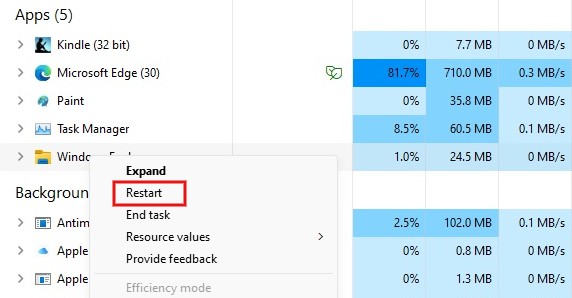
- Click “Restart.”
5. Restore Folder to Defaults
Do you think someone else may have messed with the settings on your computer? Try resetting the folder containing the files to the default state, then recheck whether the thumbnails are working properly.
- Launch File Explorer, and navigate to the folder in question. Open the “Folder Options” window as explained above.
- Remain in the “General” tab, and click on the “Restore Defaults” button.
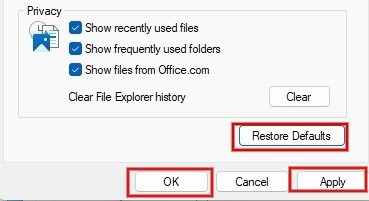
- Press “Apply -> OK” to restore the File Explorer settings to the default state.
FYI: restore Windows to its default settings by performing a factory reset.
6. Check System Settings
Besides the File Explorer options, you need to ensure that the thumbnails option is also enabled in your system’s settings.
- Press Win + I on your keyboard to open the Settings app.
- Click on “About” under “System” on the right side.
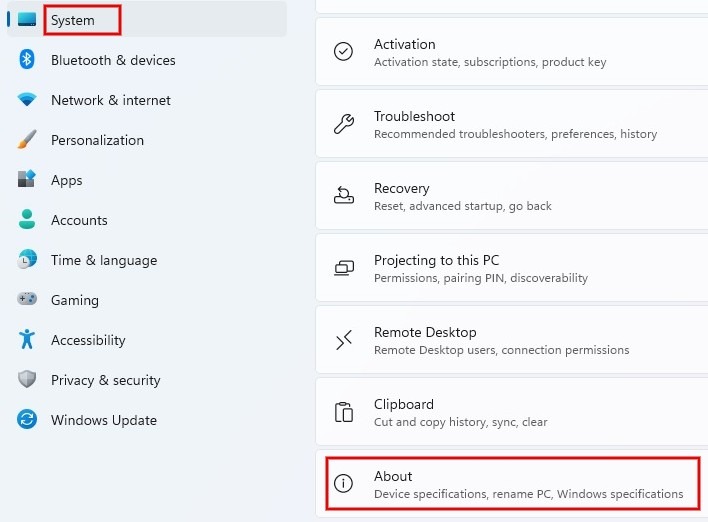
- Press on “Advanced system settings” in the “About” screen. On Windows 10, you can see the “Advanced system settings” under the “Related settings” section on the right.
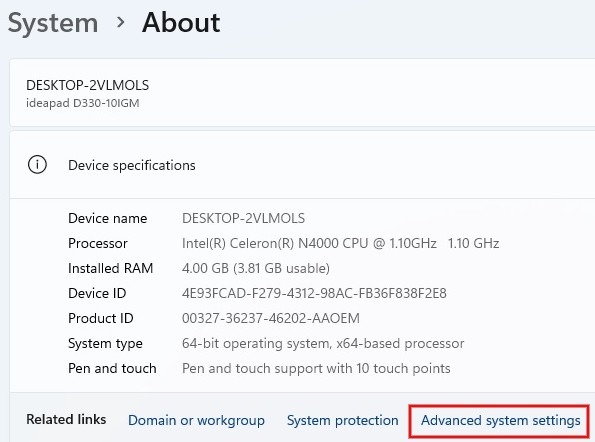
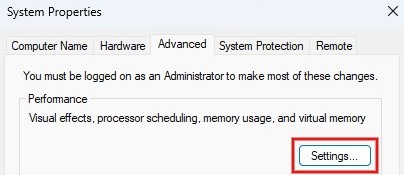
- Click the “Settings” button in the System Properties window.
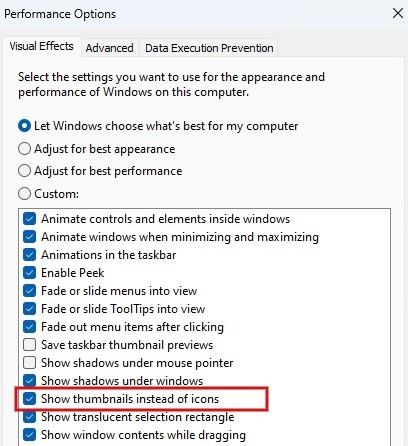
- Remain in the “Visual Effects” tab, and make sure the “Show thumbnails instead of icons” checkbox is selected.
7. Run SFC Scan
SFC (System File Checker) is a built-in tool in Windows that allows you to scan for and restore corrupted system files on your computer. If you’ve tried all of the solutions listed above, but none fixed the problem for you, running an SFC scan may help to resolve the missing thumbnails.
It may take 10 to 15 minutes for the SFC scan to be completed. You will see its status on the Command Prompt screen.
Tip: if you need to recover a file, try these options for restoring deleted files.
Get File Previews Back
Previewing your images should go smoothly after you’ve gone through our list of fixes. If another issue arises soon after, such as the “File is open in another program” error, we have a dedicated tutorial on the issue you may want to check out. Alternatively, if you ever wanted to remove a file but couldn’t, learn how to force delete undeletable files or folders from your Windows system.
All screenshots and images by Meenatchi Nagasubramanian.
Our latest tutorials delivered straight to your inbox