Partition editing or making new file systems on Linux usually means one thing: installing the Gnome Parted partition editor (GParted). For most Linux users, this is the only way to go about it. Still, what if you could edit these partitions and file systems right in the terminal? You can! Here’s how!
Note: you might want to back up your partition first before making any changes to your hard disk.
Creating a Basic Linux Partition Layout with CFdisk
Here’s how to make a basic Linux partition scheme right from the command line.
- The first thing to do is open your terminal. Once you’re there, you’ll need to identify what hard drive you’re looking to change. This can easily be figured out with one simple command.
lsblk
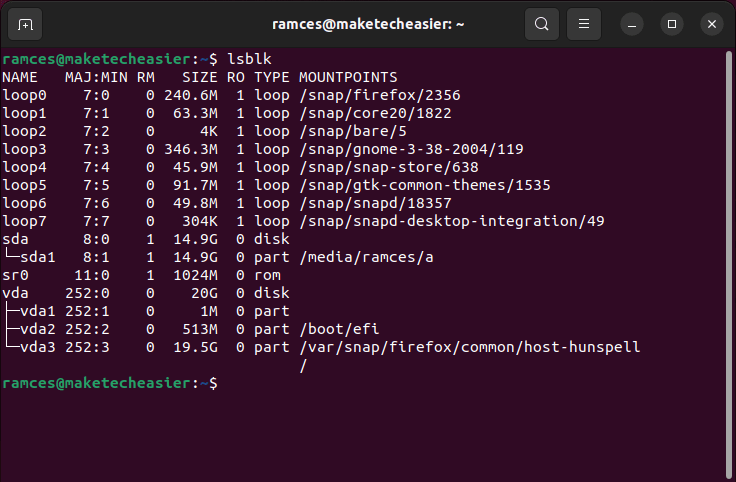
- Once you’ve run
lsblk, you should get a detailed list of each hard drive currently on your system. Look through this generated list, and figure out the denotation to the drive you want to change. Here I’ll be usingsdbfor the sake of example.
- In your terminal enter this command. It will launch a powerful terminal-based partition editing program.
sudo cfdisk /dev/sda
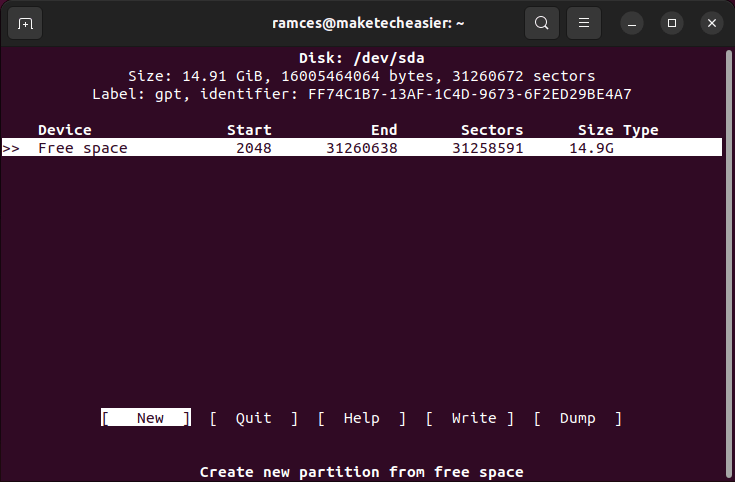
Note: replace sda with whatever lsblk told you your hard drive was.
When this command is entered, you’ll be inside the partition editor and will have total access to the hard drive you wish to modify.
Since hard drive partitions are different, depending on a user’s needs, this part of the guide will go over how to set up a split Linux home/root system layout. You can learn more about Linux partition schemes here.
To start, a root partition will need to be created. This will require a bit of math as the gigabytes on the hard drive need to be divided up. My test drive is 16 GB.
- In CFdisk using the arrow keys on your keyboard, select some free space. Once you’ve found some, use the arrow key to select “[ NEW ]” and press the Enter key.
- The program will ask you to input the partition size. Once you’ve specified the size, press the Enter key. This will be the root partition (or “/dev/sdb1”).
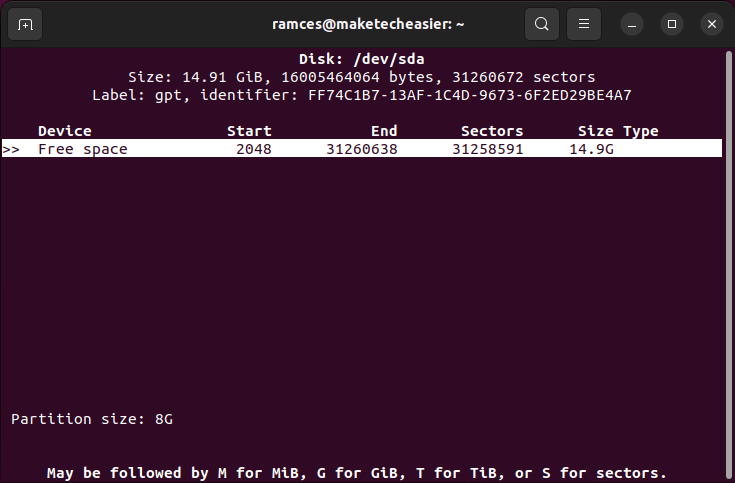
- It’s time to create the home partition (/dev/sdb2). Once again, you’ll need to select some free space in CFdisk. Use the arrow key to select the “[ NEW ]” option, and press the Enter key. Input the size of your home partition, and press the Enter key to create it.
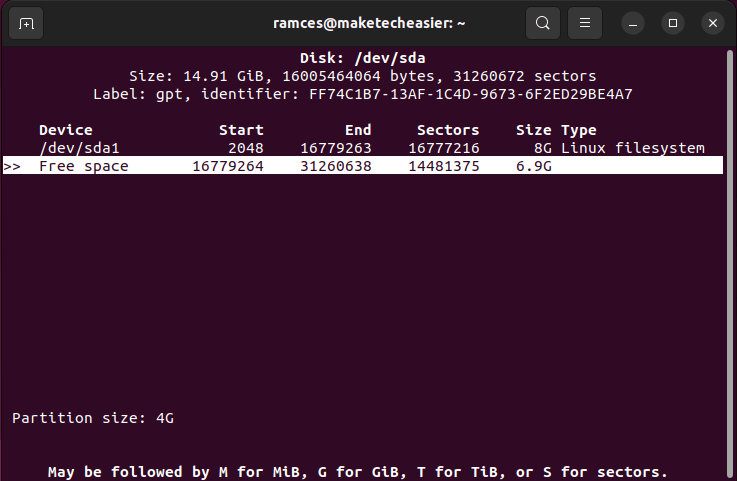
- Finally, you need to create the swap partition. Find some free space, and use the arrow key to select the “[ NEW ]” option. After that calculate exactly how big your Linux swap partition needs to be.
Tip: Learn more about swap partitions and how you can configure your system to use swap effectively.
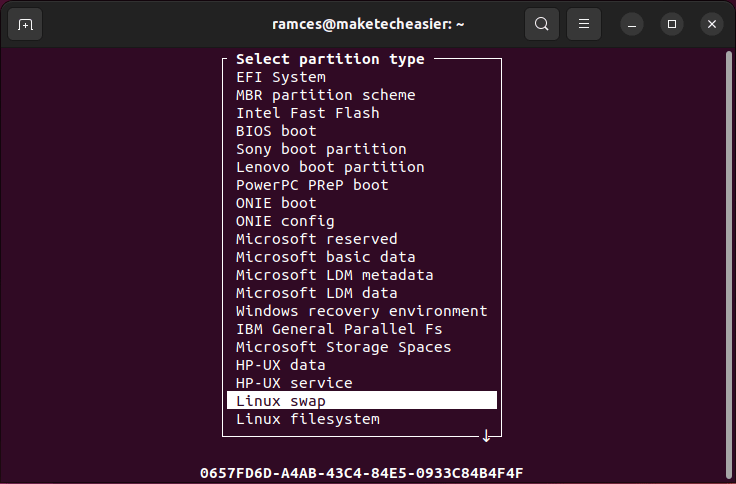
- With the swap partition available, it’s time to specify its type. Highlight it with the up and down arrow keys. After that, use the left and right arrow keys to select “[ TYPE ].” Find Linux swap in the menu, and press Enter.
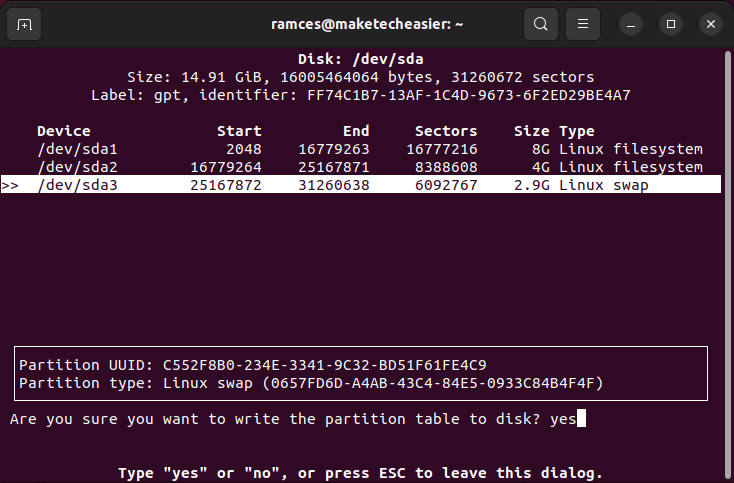
- All of the partition creation is out of the way. All that’s left is to write it to the disk. Using the right arrow key, select the “[ WRITE ]” option, and press the Enter key. This will write your newly created layout directly to the hard drive.
Tip: do you know you can move your Home directory to another partition? Here is how it is done.
Using Fdisk to Create Linux Partition Layouts
Aside from cfdisk, you can also use the more traditional fdisk utility to create and modify disk partitions inside Linux. One of the advantages of this approach is that fdisk often comes by default on most Linux distros.
- Run
fdiskalong with the disk that you want to partition:
sudo fdisk /dev/sda
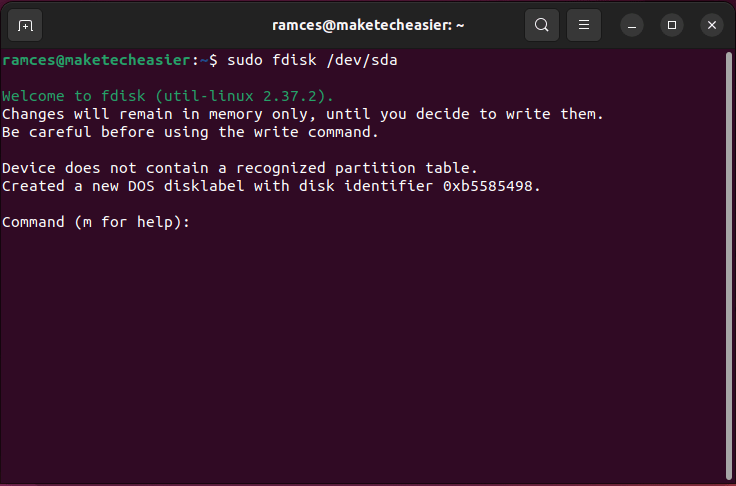
- type g then press Enter to wipe your current partition table and recreate it in the newer “GPT” format.
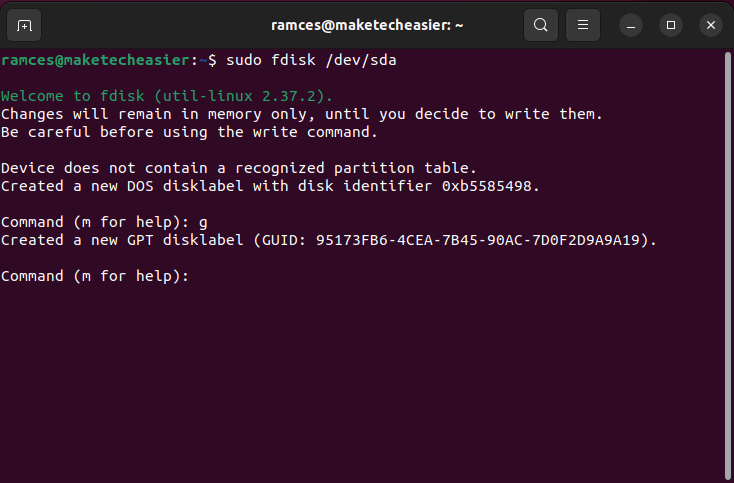
- Type “n 1” then press Enter twice to create the first partition.
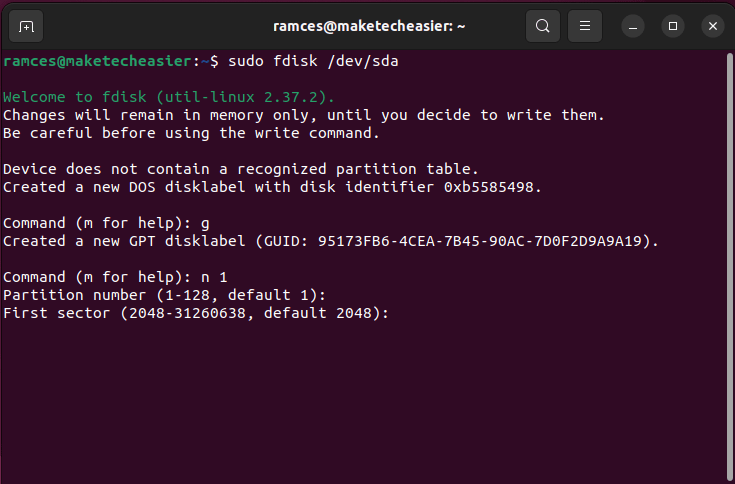
- fdisk will ask for the starting sector of your first partition. Press Enter to select the default value for your disk.
- You need to determine the overall size of your partition. You can use symbols such as M (megabyte), G (gigabyte) and T (terabyte) to refine your partition’s size. For example, “+8G” will set your partition at exactly 8 gigabytes.
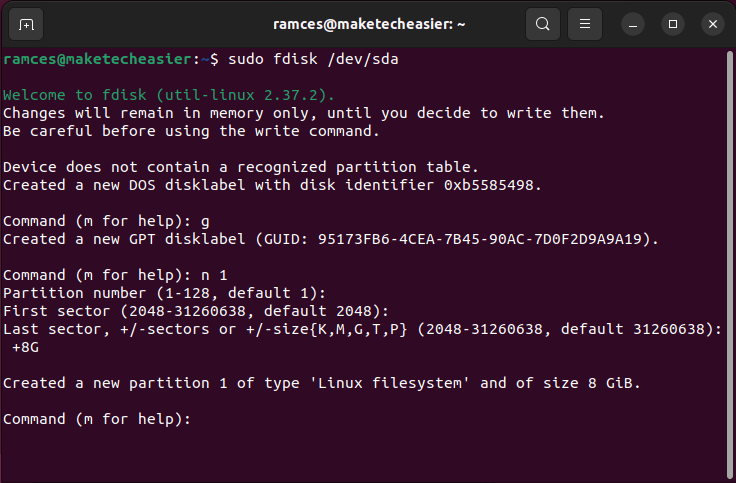
- Once done, type “n 2” and press Enter twice to create the second partition.
- Press Enter again to accept the default starting sector, then provide the size that you want for your second partition. In my case, I will write “+4G” to set the overall size to 4 gigabytes.

- Type “n 3” then press Enter twice to create your last partition.
- Press Enter to accept the default starting sector. However, unlike the previous partitions, you can leave the second prompt blank and press Enter.

- After that, type “t 3”, and press Enter twice to modify the type of the last partition.
- Inside, write “19”, and press Enter to set it to “Linux swap.”

- Lastly, type “wq” and press Enter to save your new partition table layout.
Creating File Systems With mkfs
Sometimes you don’t need to make an entire partition layout. Sometimes you just need to make a filesystem. This can easily be accomplished directly in the terminal with the mkfs command.
- Enter
lsblkin your terminal. It’ll print out a list. Find the partition or drive you want to make a file system on.
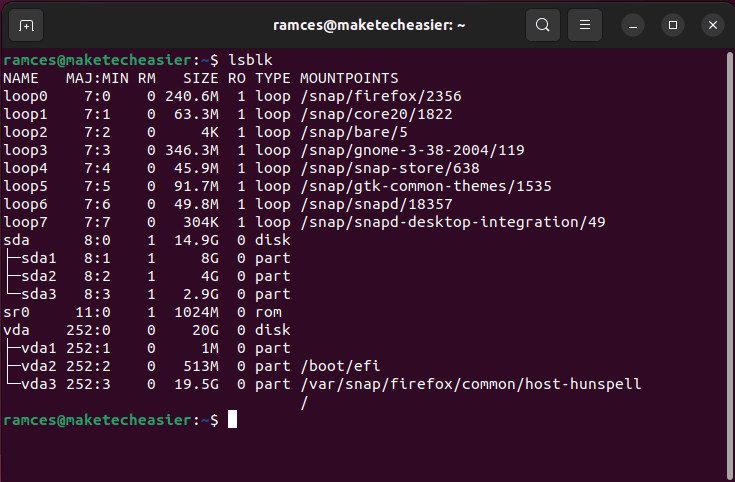
In this example, I’ll point it to the first partition of the secondary drive “/dev/sda1.” It’s also possible to just point mkfs to “/dev/sda” (to make use of the entire drive).
- Enter the following command to create the new file system on a specific partition.
sudo mkfs.ext4 /dev/sda1
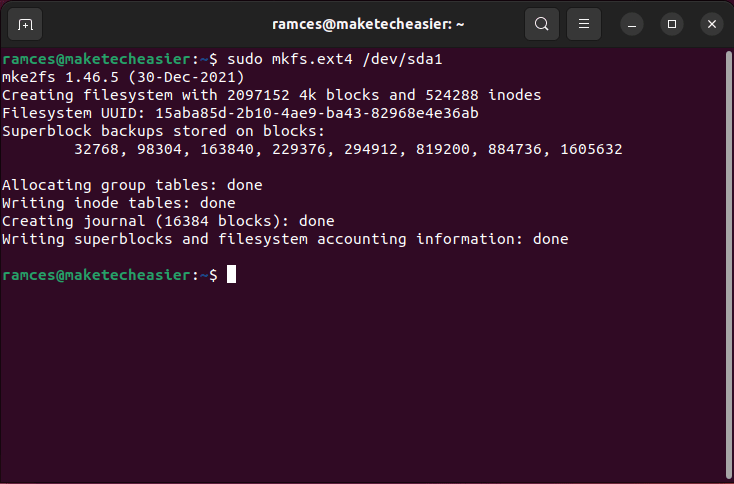
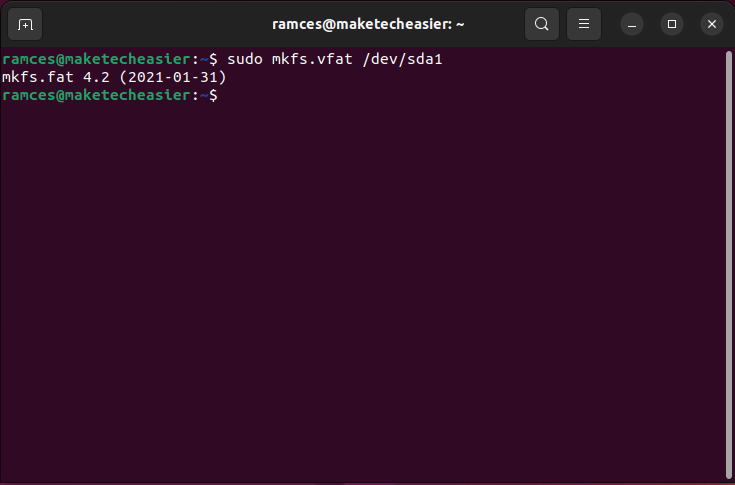
It should be noted that mkfs.ext4 can be changed to whatever file system you want to use. For example, you can create a “FAT” partition by running mkfs.vfat instead:
sudo mkfs.vfat /dev/sda1
Good to know: Learn how your computer stores data in file systems by looking at some of the best file recovery tools in Linux today.
Frequently Asked Questions
Do you need to unmount your drive before running cfdisk?
Ideally yes. However, desktop environments today tend to automatically remove a drive’s device file whenever you unmount it from your file manager. This can be an issue since cfdisk relies on an accessible device file in order to format a drive properly.
To fix this issue, you can either run cfdisk even if your drive is still mounted or unmount it using the umount utility: sudo umount /media/$USER/your-device.
Is it possible to list all the available partition types in fdisk?
Yes. The Type submenu fdisk provides a handy list of all the available partition types that it can format to. To access this, you need to type t followed by the number of the partition that you want to modify. Next, press Shift + L to print a list of the available partition types along with their type number.
Would clearing the partition table completely wipe my drive?
No. A partition table is a small binary file that sits at the beginning of every disk drive. It serves as a “phone book” for your operating system so that it can find the right sectors to load a file system from.
Because of that, removing the partition table will not delete any existing data inside your hard disk. To properly remove the data inside your drives, you can “zero” its contents by piping “/dev/zero” to your device file using dd: sudo dd status=progress if=/dev/zero of=/dev/sda.
Image credit: Sajad Nori via Unsplash. All alterations and screenshots by Ramces Red.
Our latest tutorials delivered straight to your inbox