
In today’s age, where our personal lives intertwine with technology, privacy becomes a crucial aspect of our online activities. When it comes to privacy on Macs, securing your personal photos may take precedence. This guide provides step-by-step instructions on how to hide and unhide photos on a Mac using the Photos app and alternative methods.
Tip: make sure you fully secure your Mac if you are concerned about privacy.
How to Hide Photos on Mac Using the Photos App
The built-in hide feature on Macs can be used throughout the Photos app. To hide photos using the Photos app on your Mac, follow the steps below.
- Open the Photos app.
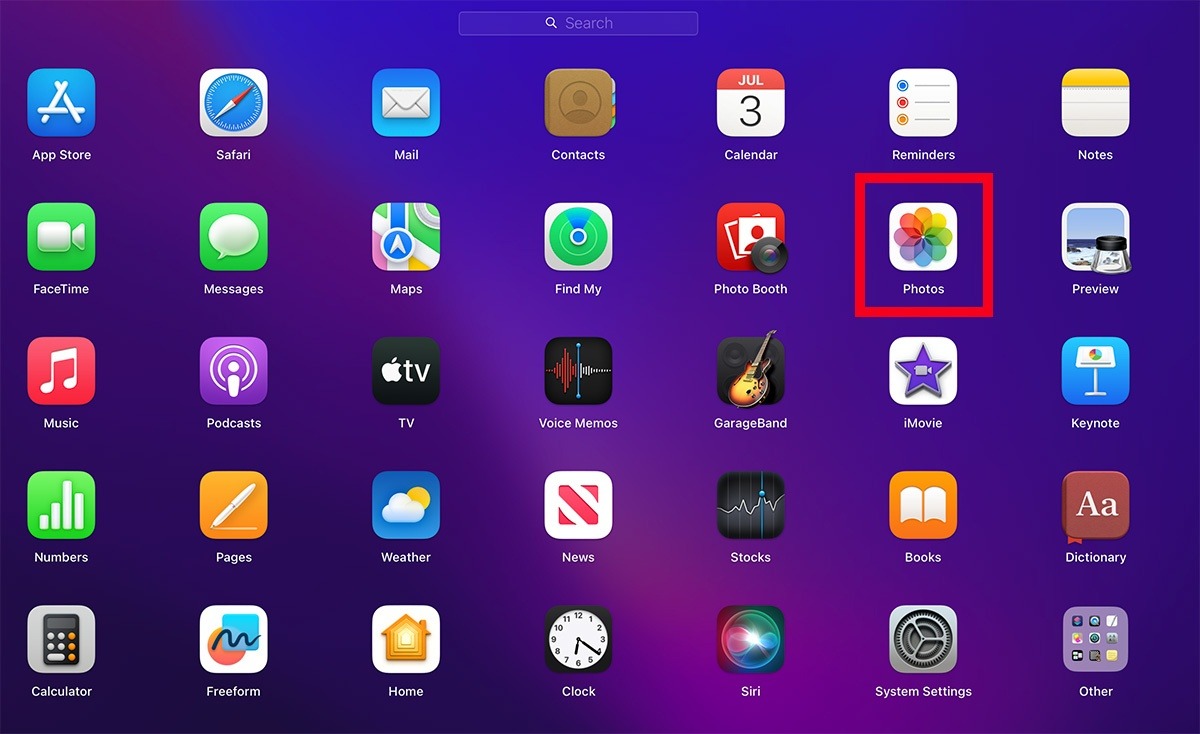
- Your photo library folder will open.
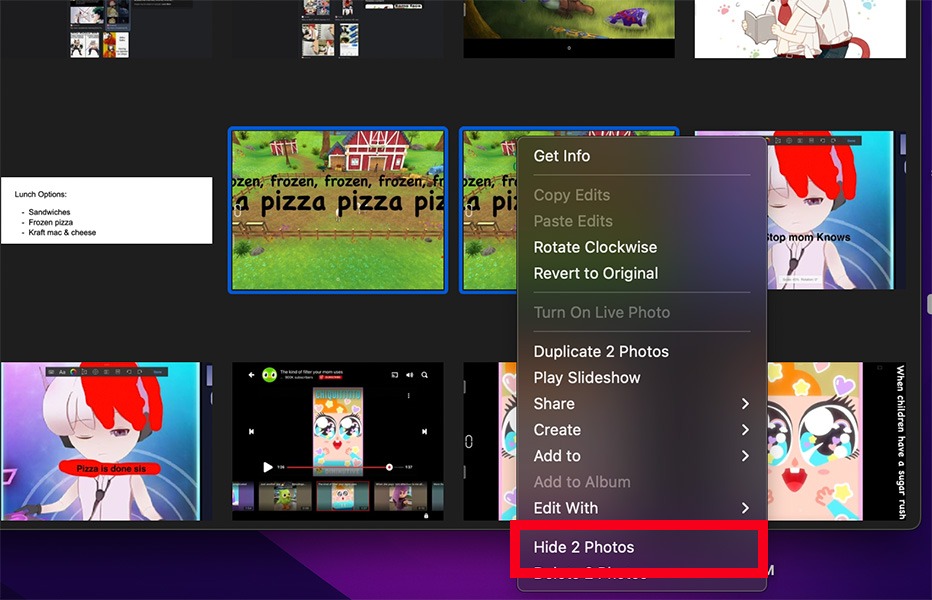
- Select the photos you want to hide from the Library folder, and right-click to find the “Hide Photo” option.
Note: you can do this for multiple photos at once. When you hide a picture, it is placed into the “Hidden” folder.
Also helpful: you can use several features within the Apple Photos app to search, edit, and compare images on your Mac.
How to Hide the “Hidden Folder” Using the Photos App
Once you use the steps above to hide photos on your Mac, they are moved to the Hidden folder. Unfortunately, if someone knows to look on the right side of the Photos app, they can still locate this folder and find your hidden photos.
For added security, follow the steps below to hide the Hidden folder from your Photos app.
- Open the Photos app, and click the “View” button in the top menu bar.
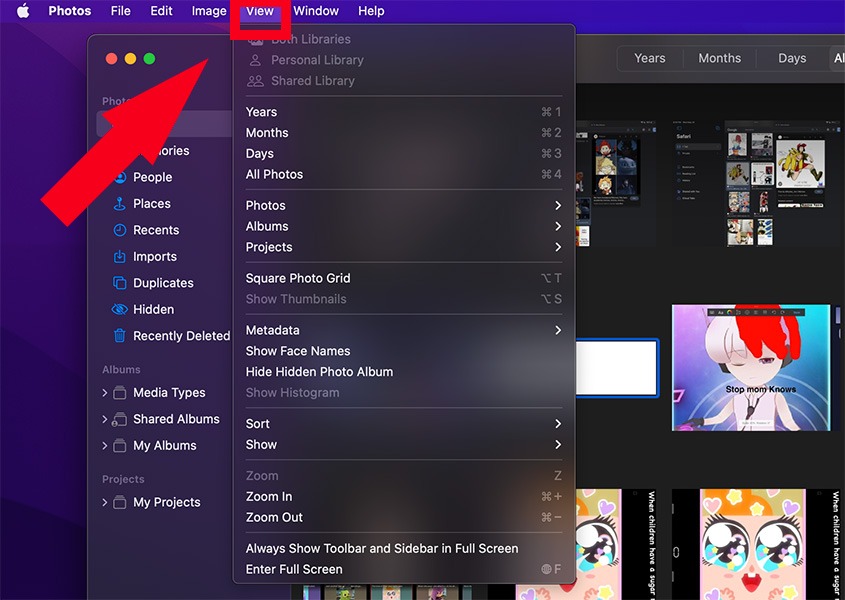
- Click on “Hide Hidden Photo Album.”
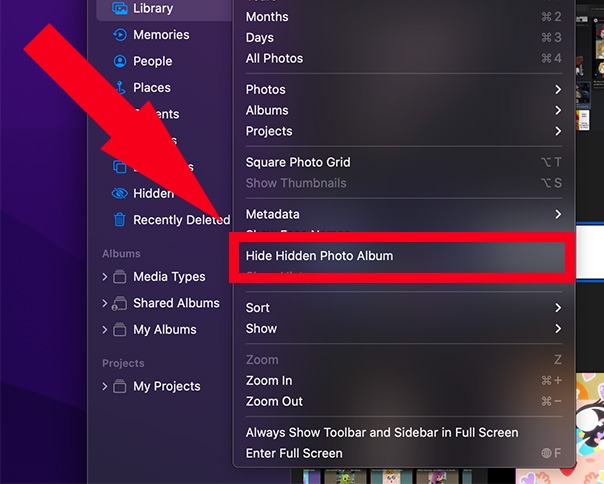
The Hidden folder will not be displayed on the Photos app, and you can follow the same steps to bring the folder back.
Good to know: if you want to organize your images, create and use Smart Albums in the Photos app.
How to Hide Albums on a Mac
The option to hide an entire album is unavailable in macOS Ventura. However, you can achieve a similar effect by creating a second library and moving the album you want to hide into the newly created library. Follow the steps below.
- If the Photos app is open on your Mac, right-click on it, and select “Quit.” Ignore this step if your Photos app is already closed.
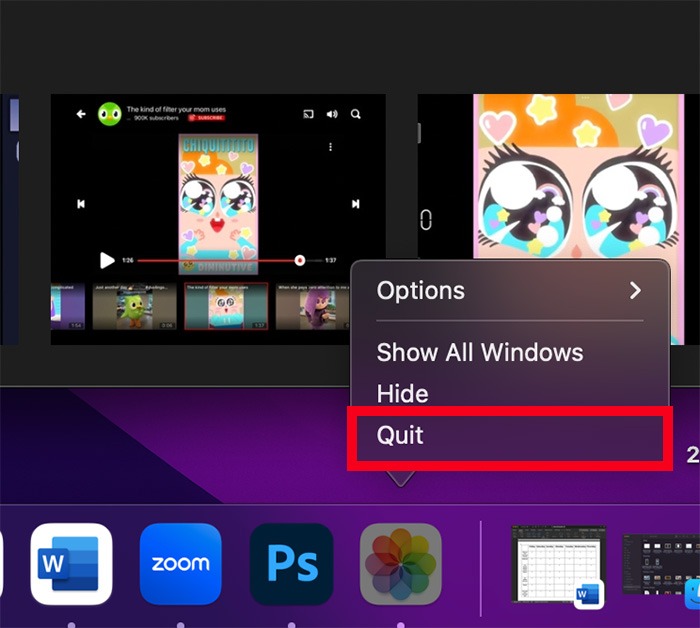
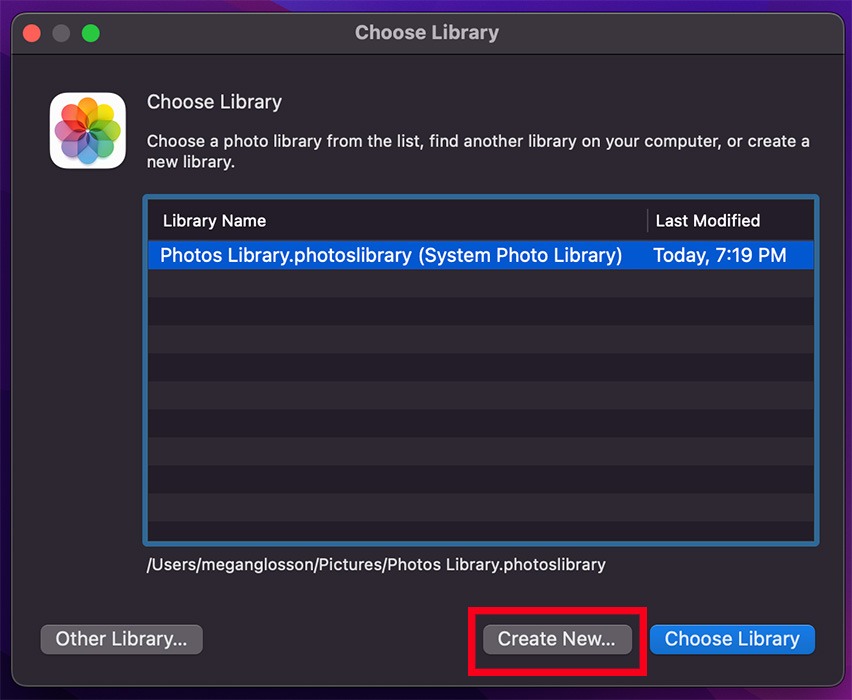
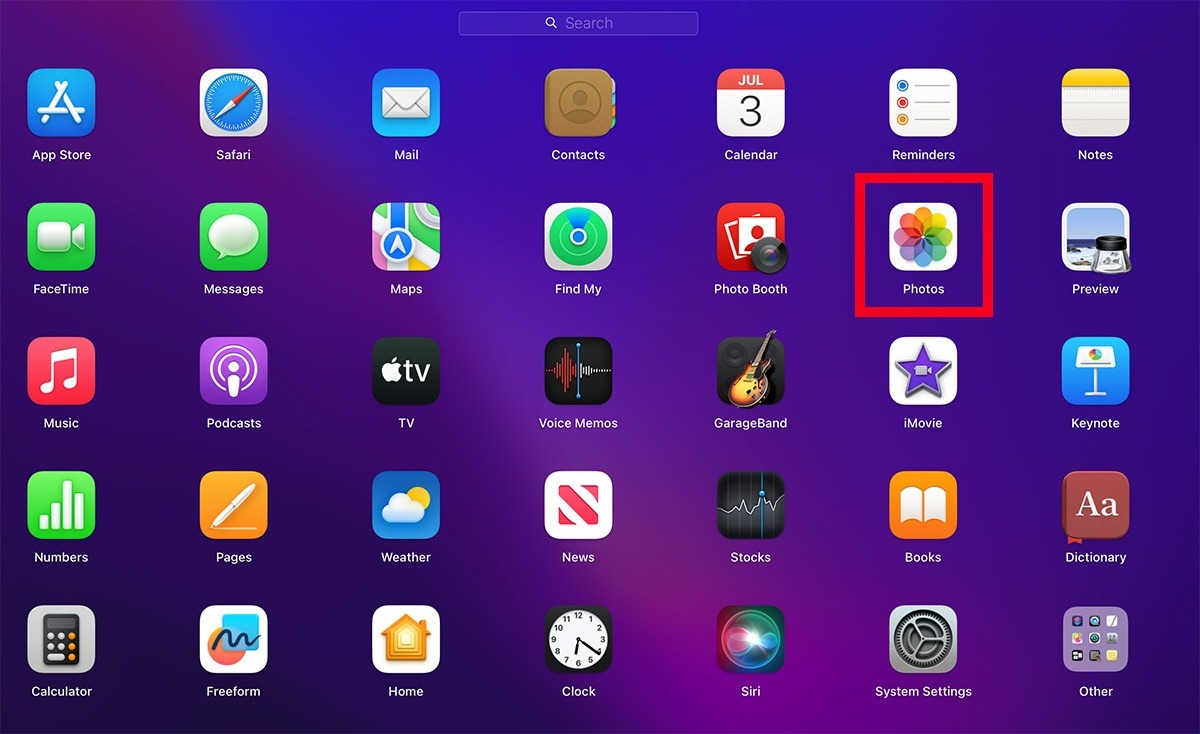
- To have the option to create a new Library, you must go to Launchpad, hold down the Option key, then click to open the Photos app. If you simply open the app, you will not see the menu in the next step.

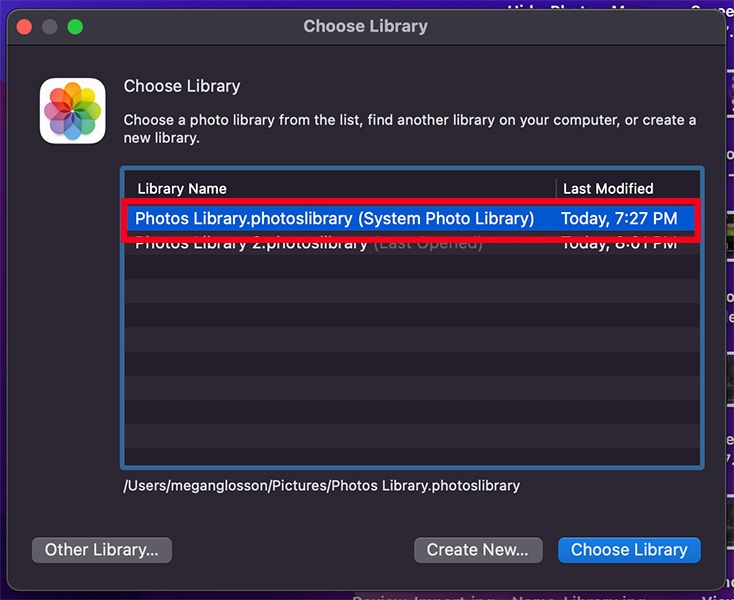
- When the “Choose Library” menu opens, click on “Create New.”
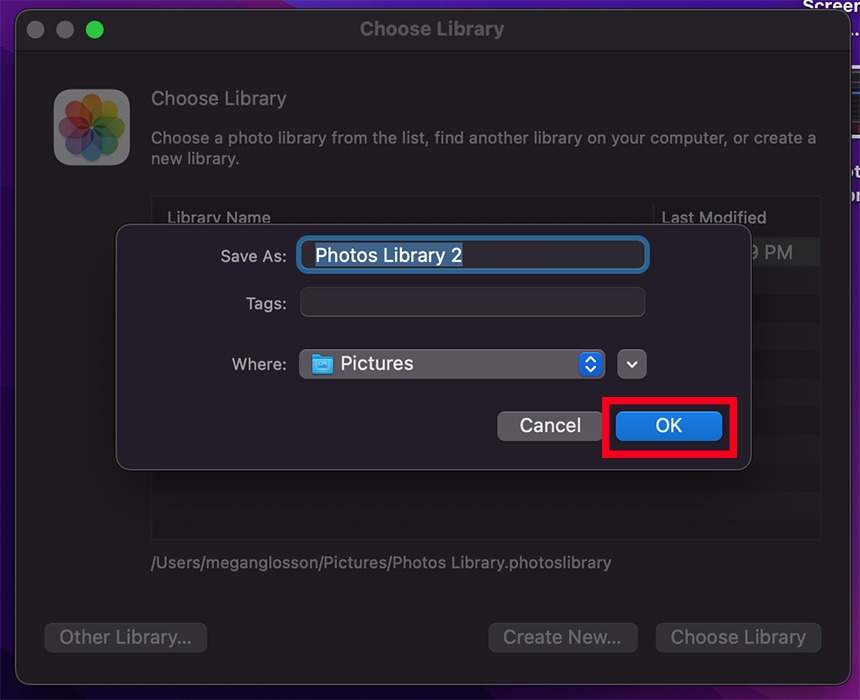
- Enter a library name, choose a location on your Mac where you would like to save the new library, and hit “OK.”
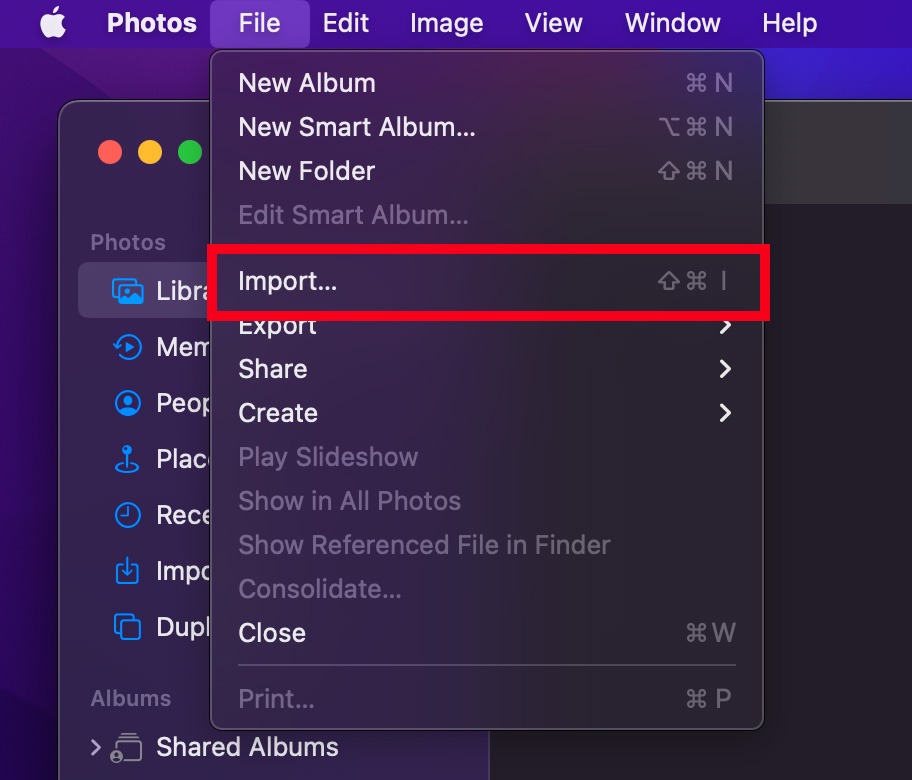
- In the menu bar of the new library, select “File -> Import.”
- Select the main library where your photos are stored, then click “Review for Import.”
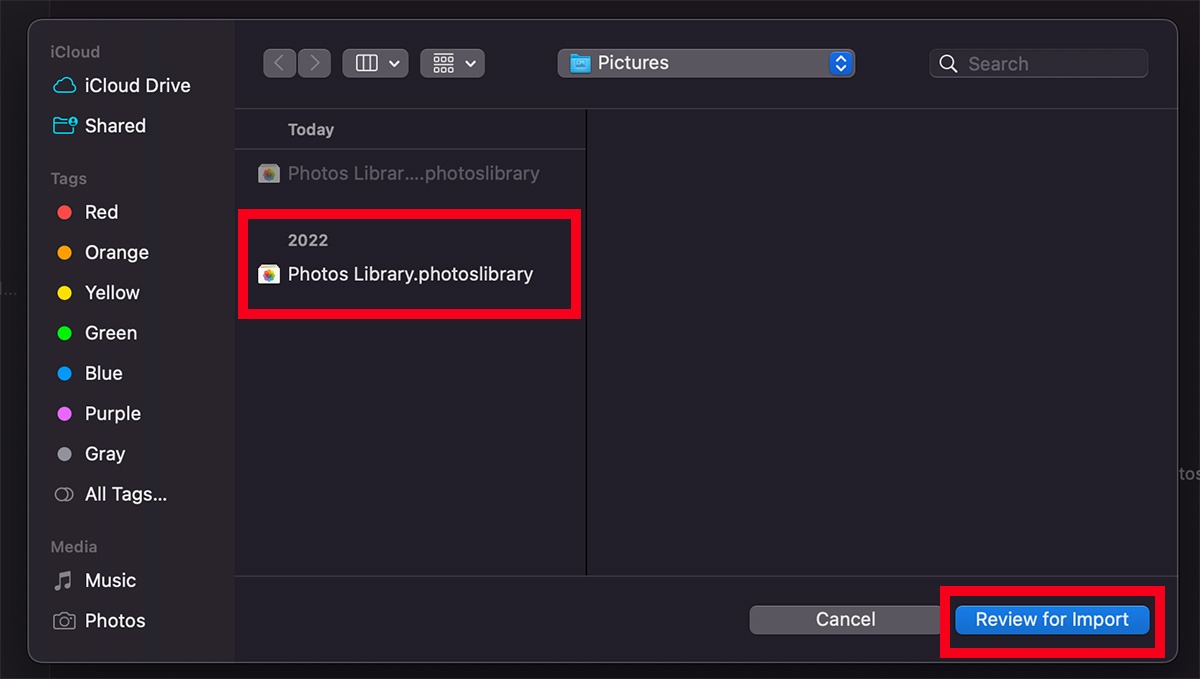
- Select any photos you wish to include. When finished, click “Review for Import.”

- You can review the images you selected, then choose “Import All New Photos.”
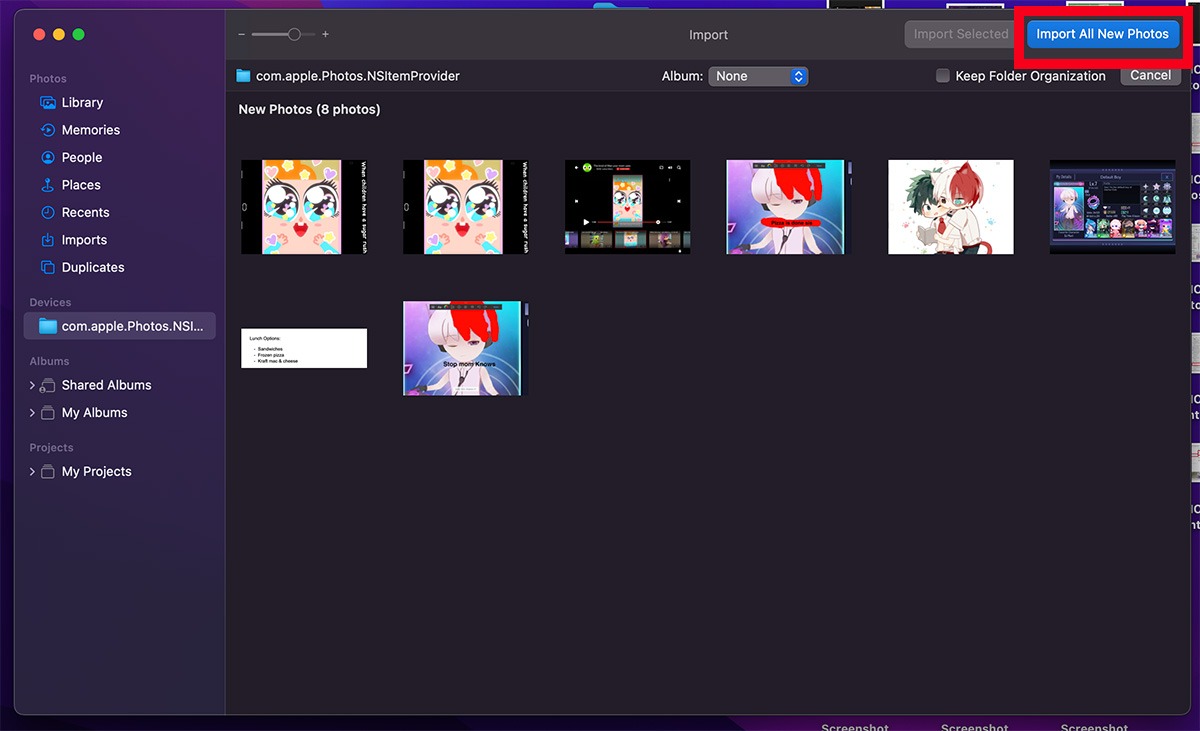
- Quit the Photos app once you are finished, then reopen it using the Launchpad and Option key. When the menu opens to “Choose Library,” select your main library.
How to Unhide Photos Using Photos App
There may be times when you need to unhide images you previously tucked away. If that happens, follow these steps.
- Open the Photos app.
- Click on the “View” option from the menu bar on top.
- Select “Show Hidden Photo Album.” Ignore this step if you already see the “Hidden” folder on the right side of the app.
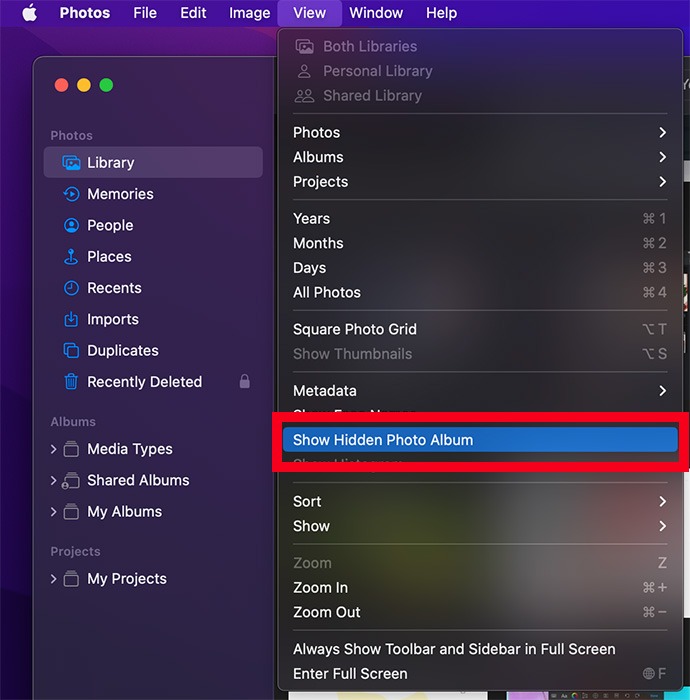
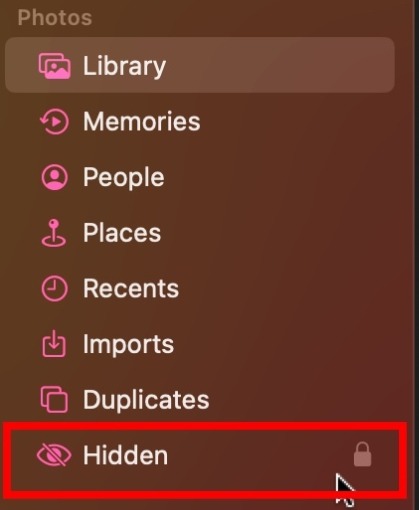
- From the left side of your Photos app, click on “Hidden.”
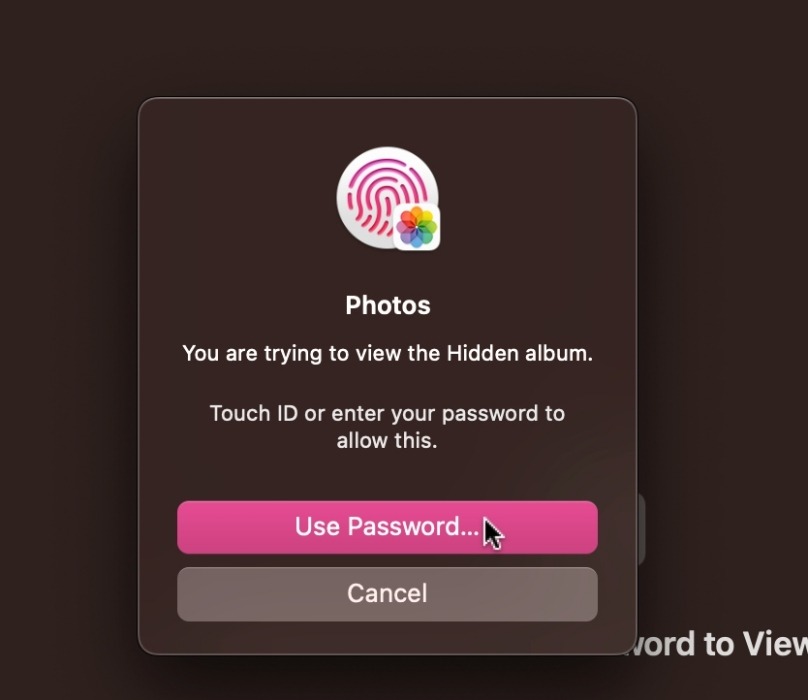
- Use Touch ID or the system password to access the hidden photos.
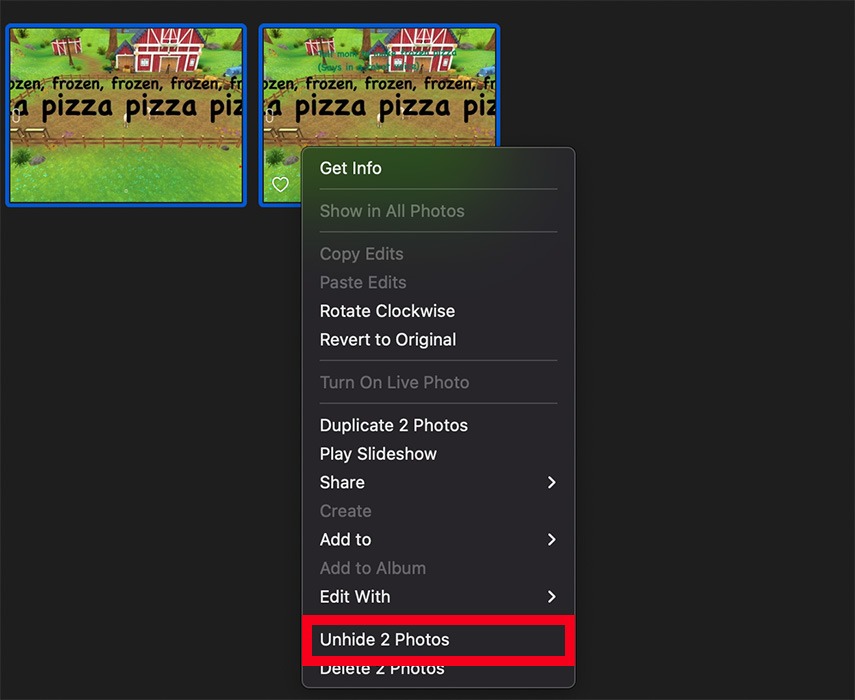
- Locate the images you want to unhide. Right-click on the images, then select “Unhide.” The photos will be moved back to your main library.
Tip: easily select multiple photos on Mac to perform a single action on multiple photos.
Alternative: Use F-Vault to Hide Photos on Mac
If you don’t want to use the default hide feature on your Mac, use the third-party app F-Vault by following these steps.
- Install the F-Vault app and create an account.
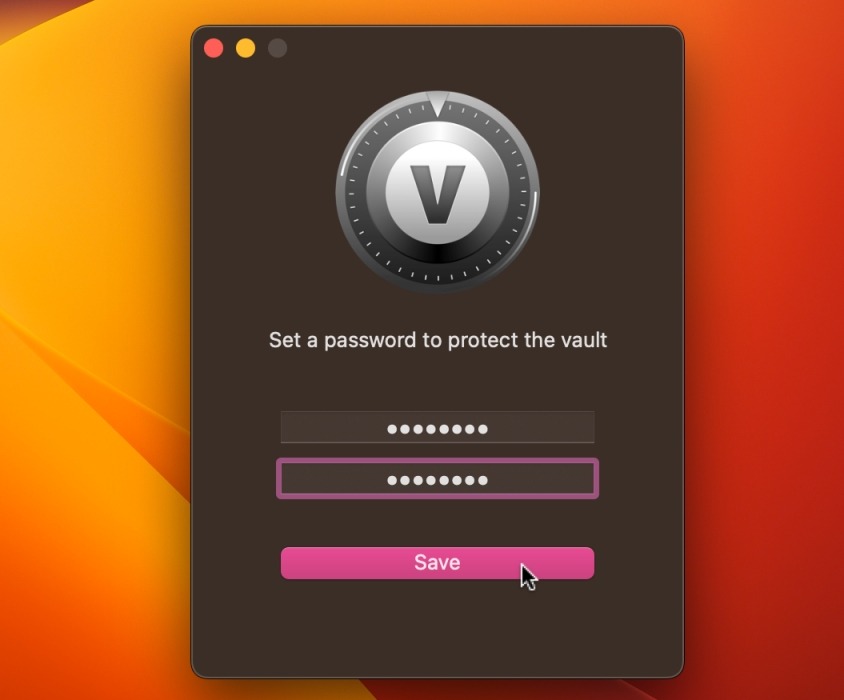
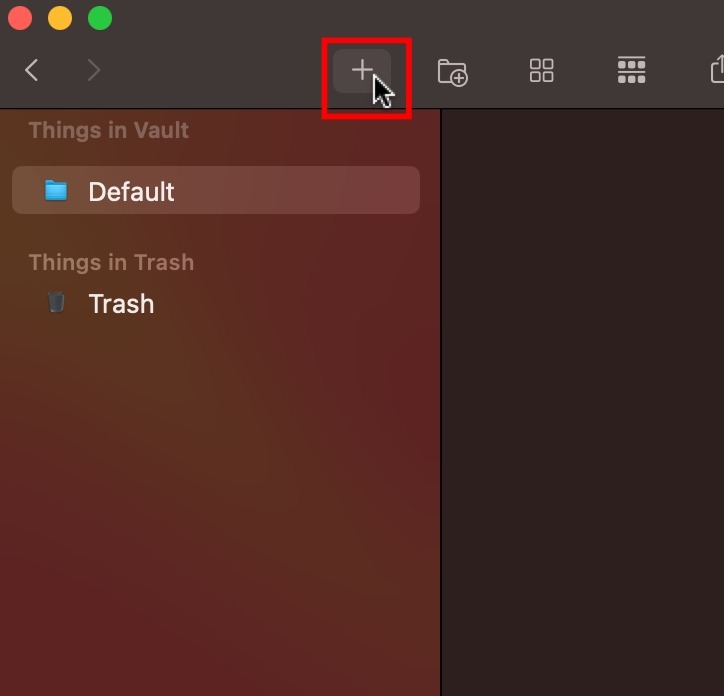
- Click on this “+” icon, which will allow you to import images to this vault.
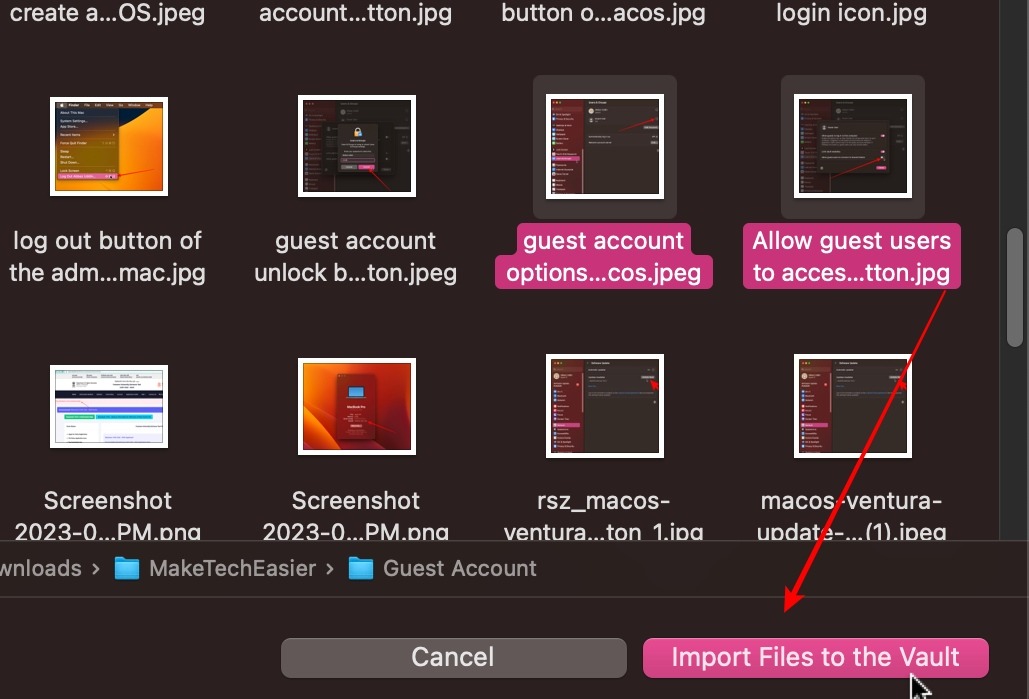
- Select the images you want to import to the vault, and click on “Import Files to the Vault.”
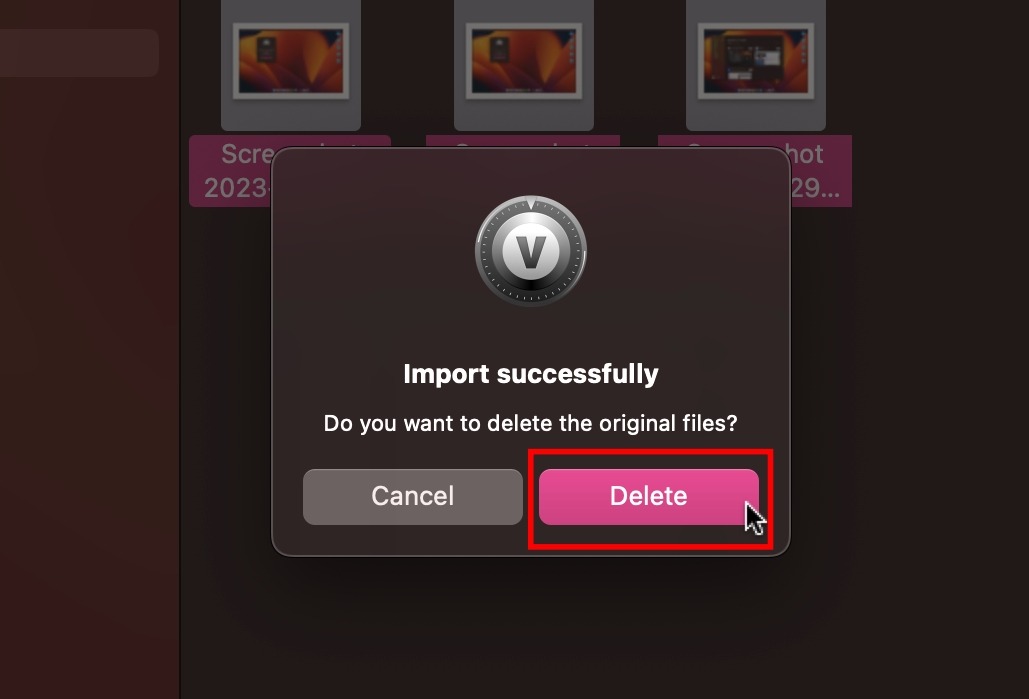
- Click on the “Delete” option to import the images to your vault on F-Vault and delete the original photos.
Frequently Asked Questions
What should I do if I accidentally delete a hidden album on my Mac?
If you accidentally delete a hidden album, check the “Trash” on your computer. Deleted files on Macs usually land in the Trash. You can also use Time Machine Backup to recover your photos from a previous backup. If the above methods don’t work, Data Recovery Software can help.
What are smart albums and how are they different from a regular photo album?
Smart albums on Macs work like a smart music playlist or email filters. You set up criteria based on multiple parameters. Whenever the conditions are met by a picture, it’ll show in the folder, unlike regular albums, which are manually created and have to be maintained by the user.
Image credit: Unsplash. All screenshots by Abbaz Uddin.
Our latest tutorials delivered straight to your inbox