
Whether you’re creating a Word document or Excel spreadsheet, you may use a particular font or cell format to reuse it throughout your document with a click. You can create a custom style, edit it later, and use it in other Word or Excel documents.
Content
How to Create a Custom Font Style in Word
You can create your own font formatting style in Word, using existing text in your document. Before you save it, you can also update the formatting to apply formats like bold or italics, as well as a size or color.
- Select the text in your document with the format you want to save. As an example, we are selecting text with bold, italic, and in red color.
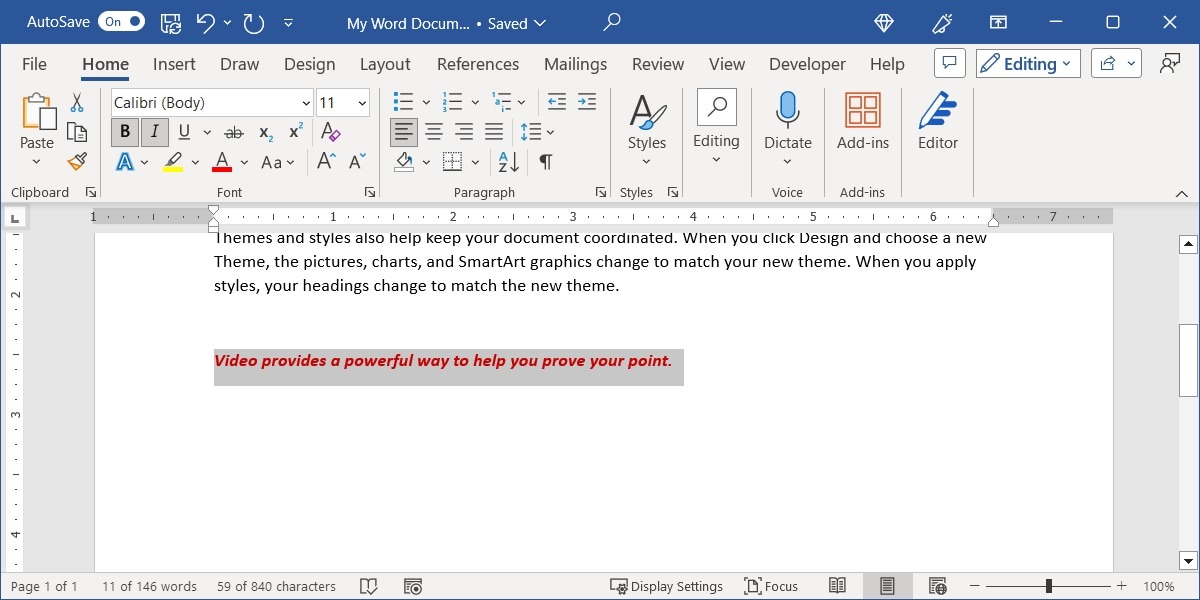
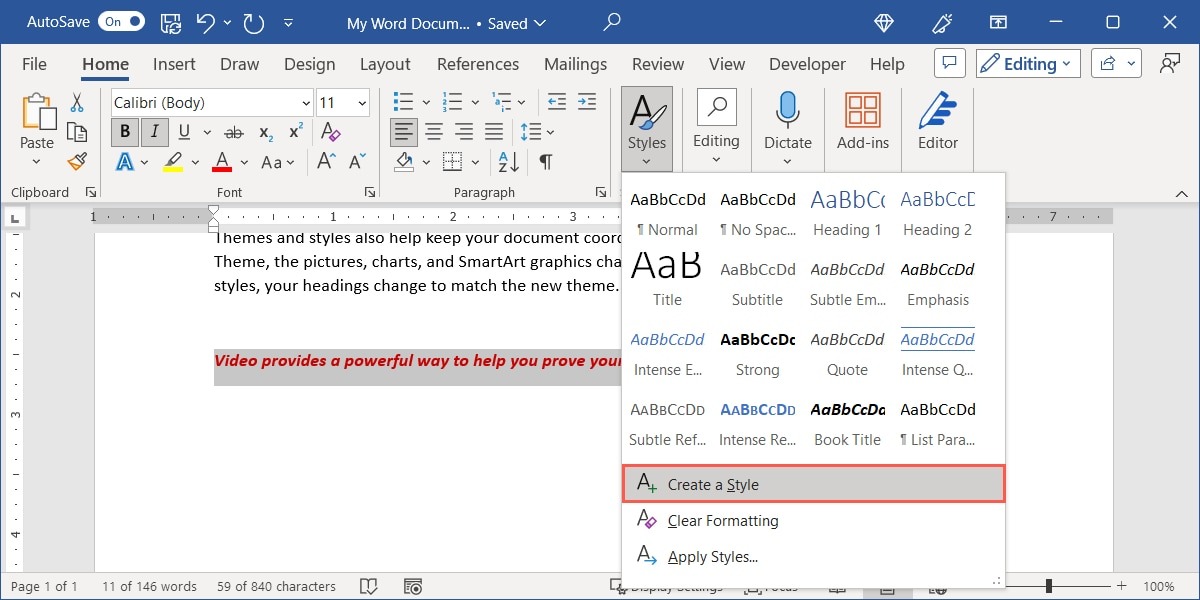
- Go to the “Home” tab, open the “Styles” menu, and choose “Create a Style.”
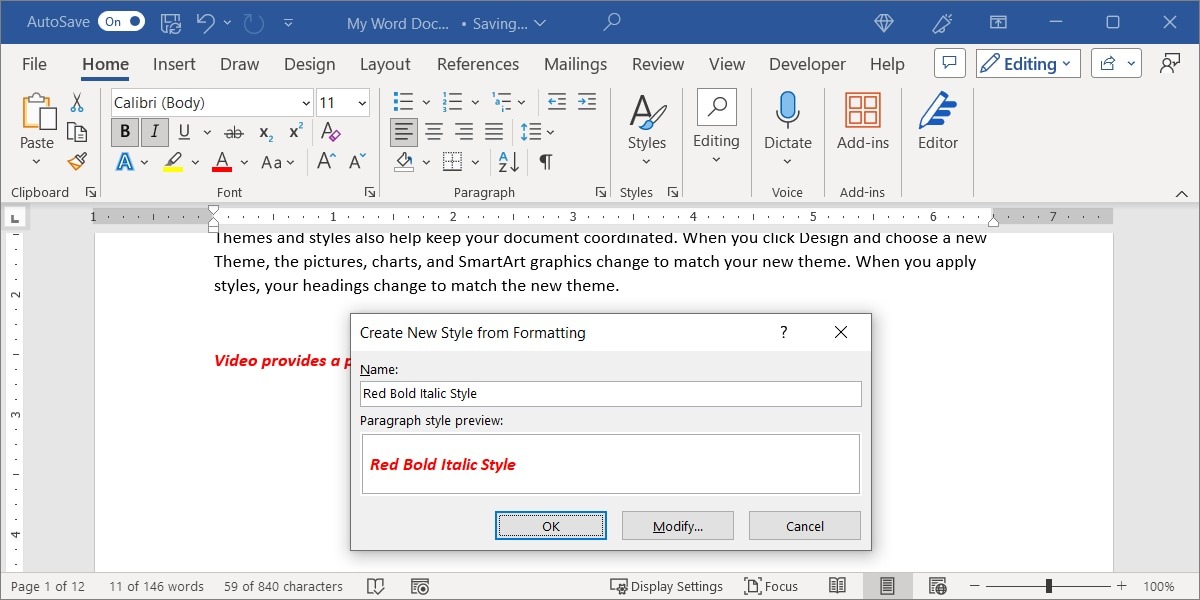
- Give your style a “Name” at the top. You can edit the style from its preview. If you want to use the style as is, select “OK.” Otherwise, click “Modify” to make changes.
- If you choose “Modify,” leave the drop-down boxes set to the defaults in the “Properties” section, unless you are applying the style to a table, list, or individual characters.
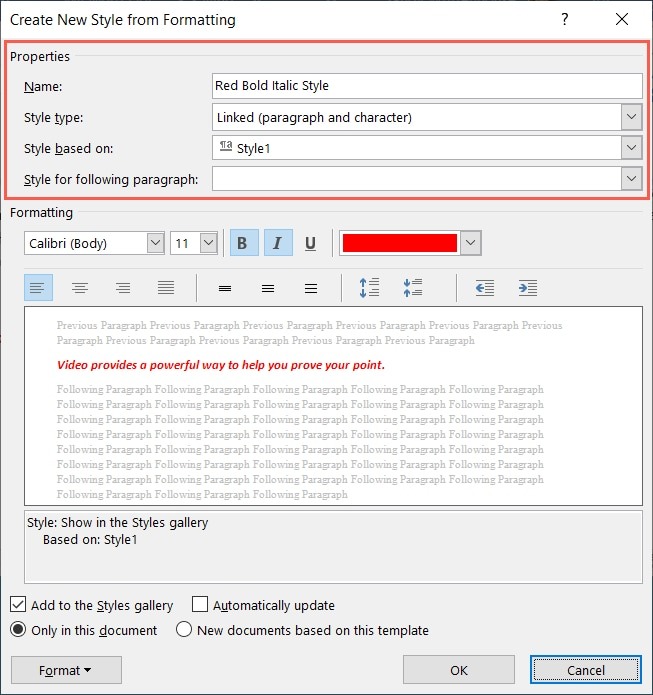
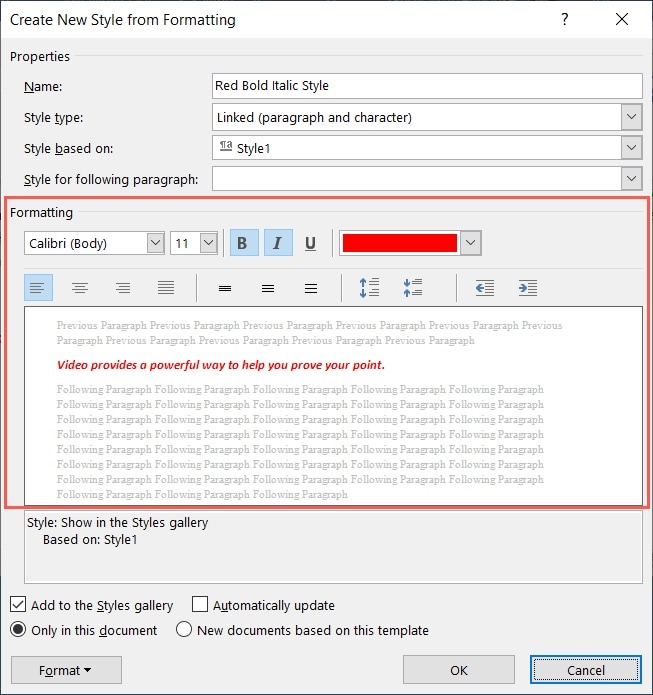
- In the “Formatting” section, select the elements you want to apply, and see a preview as you do.
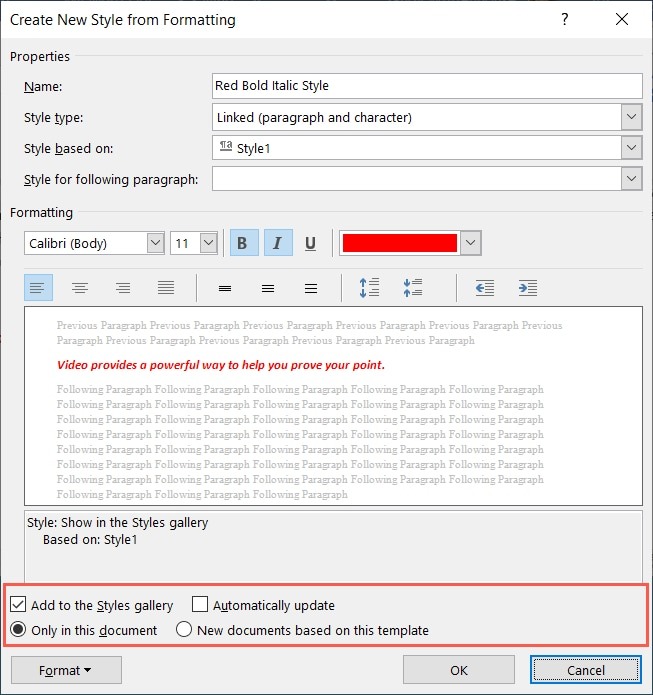
- At the bottom, leave the marked options as they are. This adds the custom style to the gallery and requires you to modify it manually if you want to change it. Additionally, the style is only in your current document rather than changing the default Microsoft Word template.
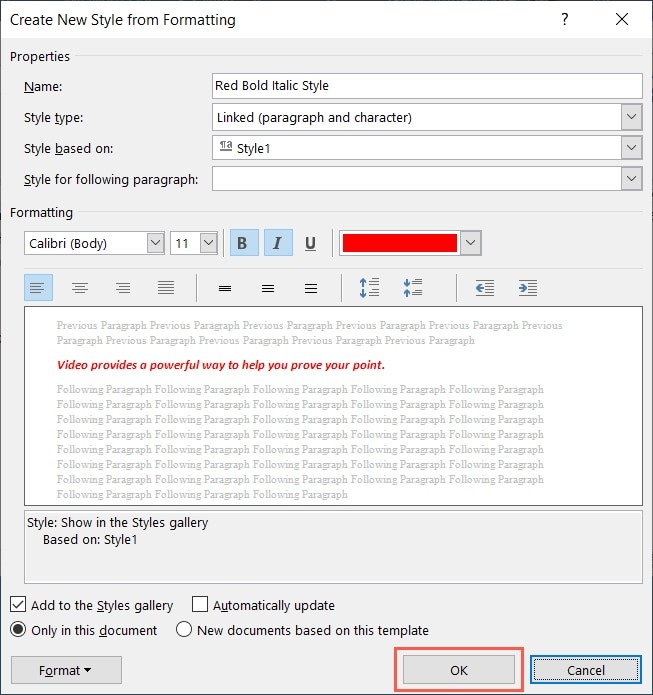
- Click “OK” to finish and save your custom style.
Tip: Microsoft Word uses preinstalled fonts on Windows or Mac. Be sure to embed exotic fonts in your Word document if you want to share the file.
Use a Custom Style in Word
The beauty of the custom style feature in Word is that you can reuse it throughout your document. This makes formatting your text the same way a breeze.
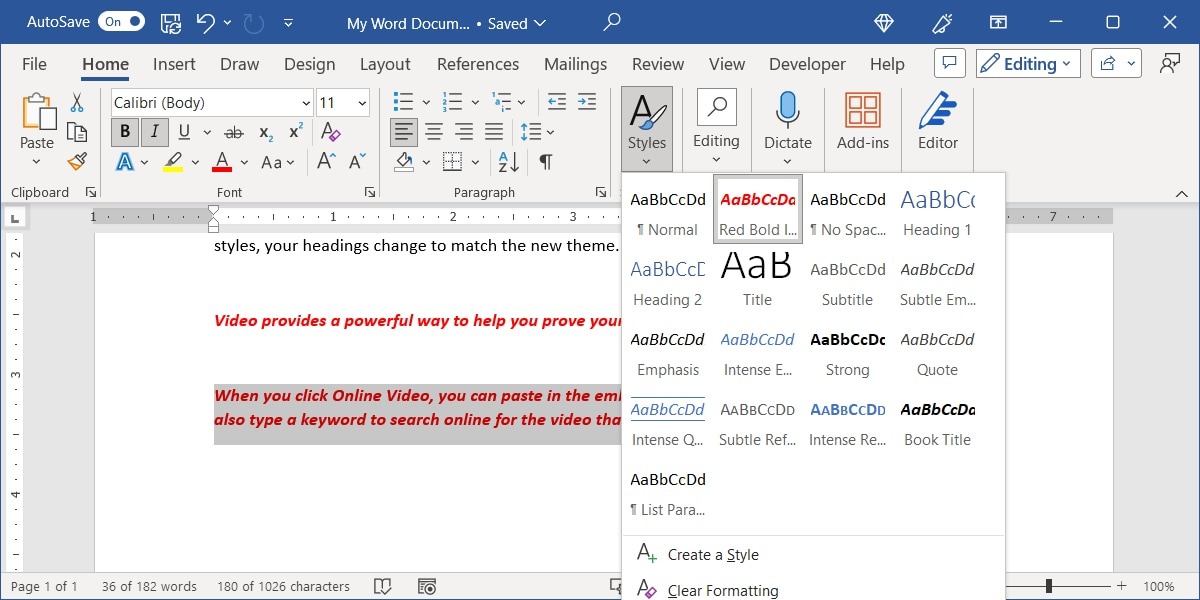
To use your custom style, select the text you want to apply it to, and go to the “Home” tab. Open the “Styles” menu, and choose the name of your style.
Edit or Delete a Custom Style in Word
If, after you create a style, you want to make changes to it, you can do so easily.
- Go to the “Home” tab, and open the “Styles” menu. Right-click your custom style, and choose “Modify.”
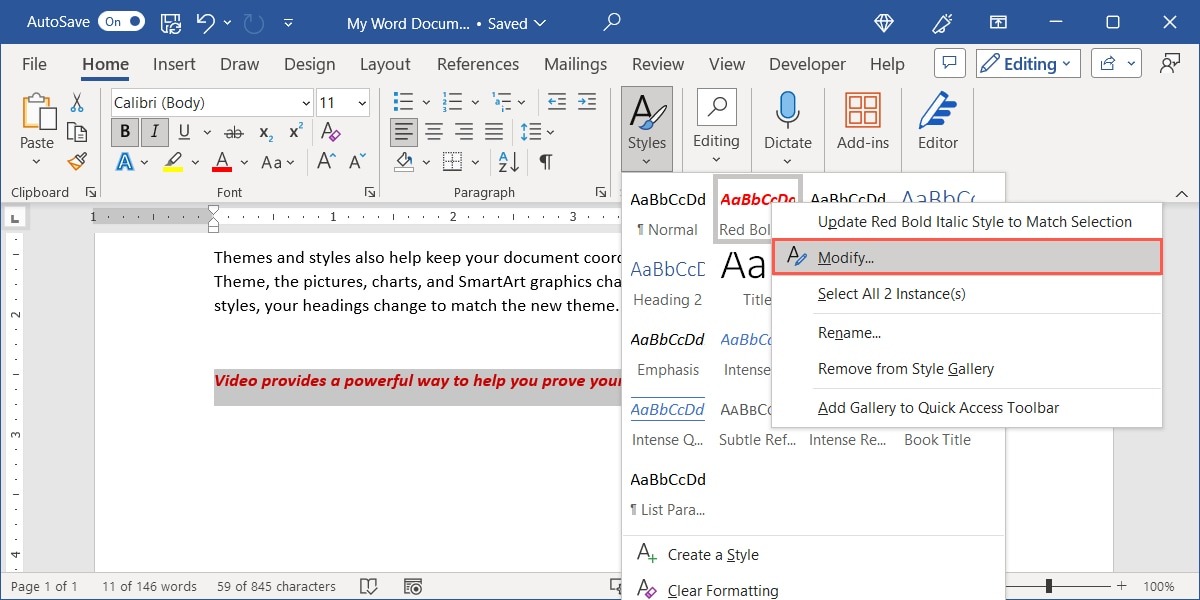
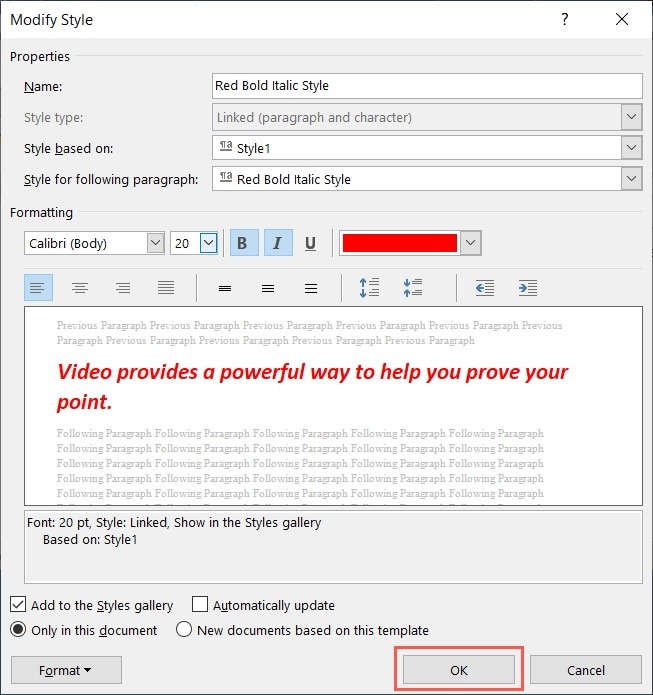
- The “Modify Style” window offers the same style options. Make your change. For example, we are increasing the font size. Click “OK” to save the edited style.
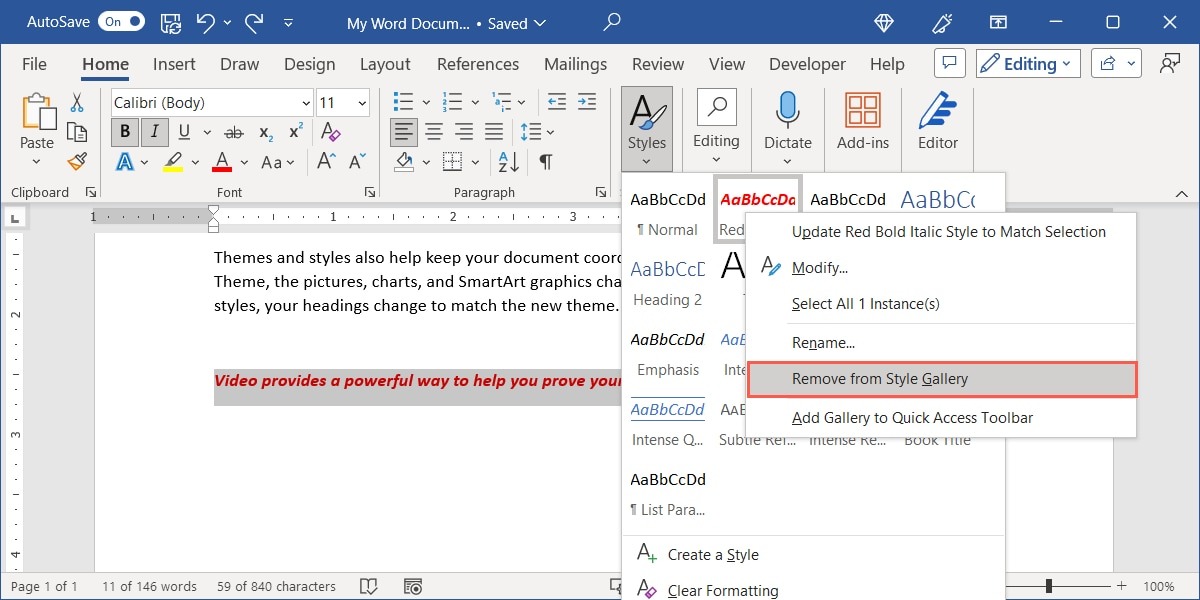
- If you prefer to remove the style altogether, right-click it in the “Styles” menu, and choose “Remove from Style Gallery.” Your font remains formatted with that style; however, the style is no longer available in the “Styles” menu.
Export a Custom Style in Word
Along with the ability to reuse a custom style throughout your current document, you may want to use it in another Word document as well. This is helpful if you’re creating multiple documents using the theme.
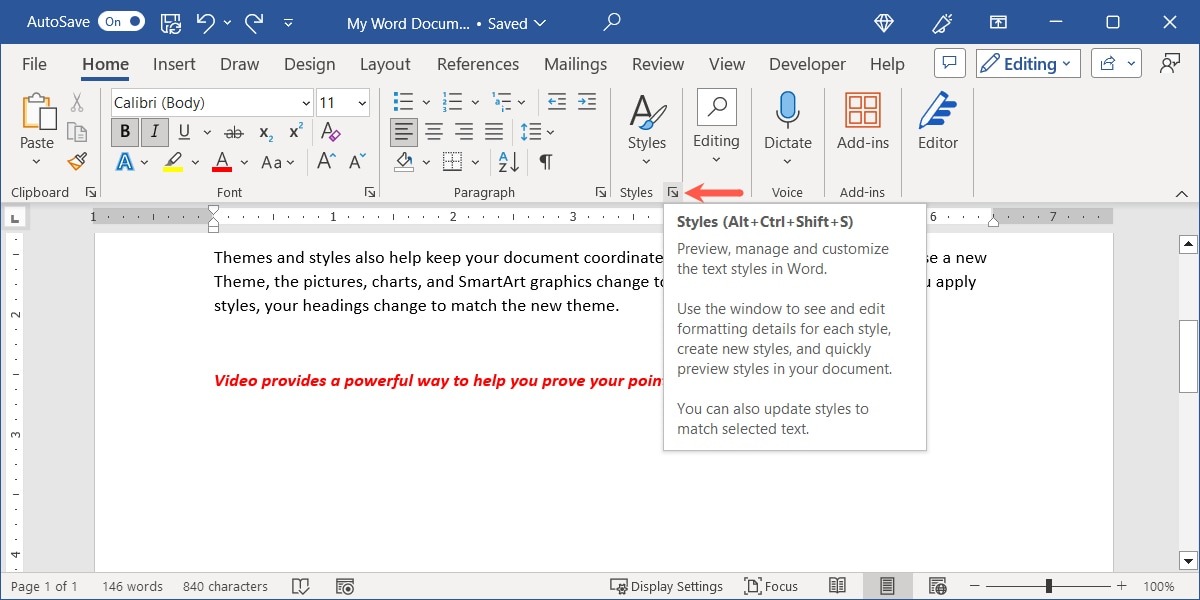
- With the document open where you create the custom style, head to the “Home” tab, and click the “Styles” launcher, which is the tiny arrow in the bottom-right corner of the “Styles” group.
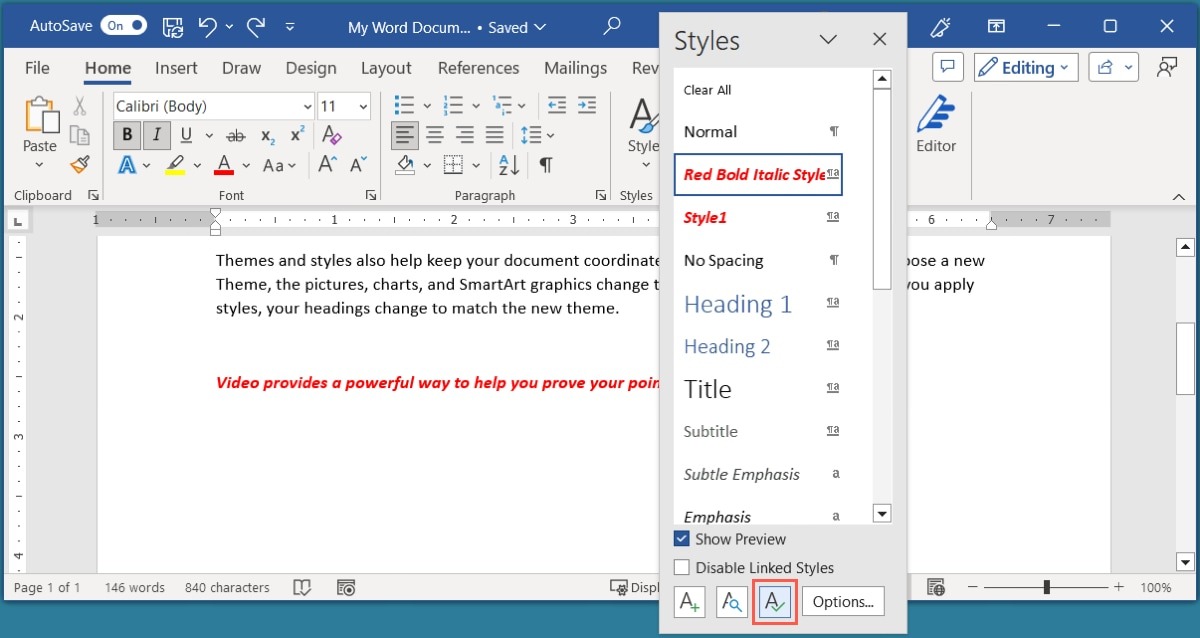
- When the Styles box opens, select the “Manage Styles” button (the “A” with a checkmark) at the bottom.
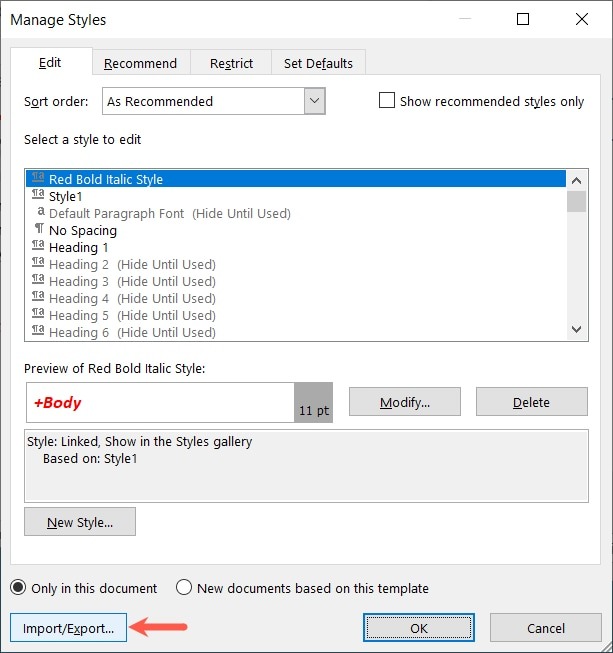
- In the Manage Styles window, select “Import/Export” on the bottom left.
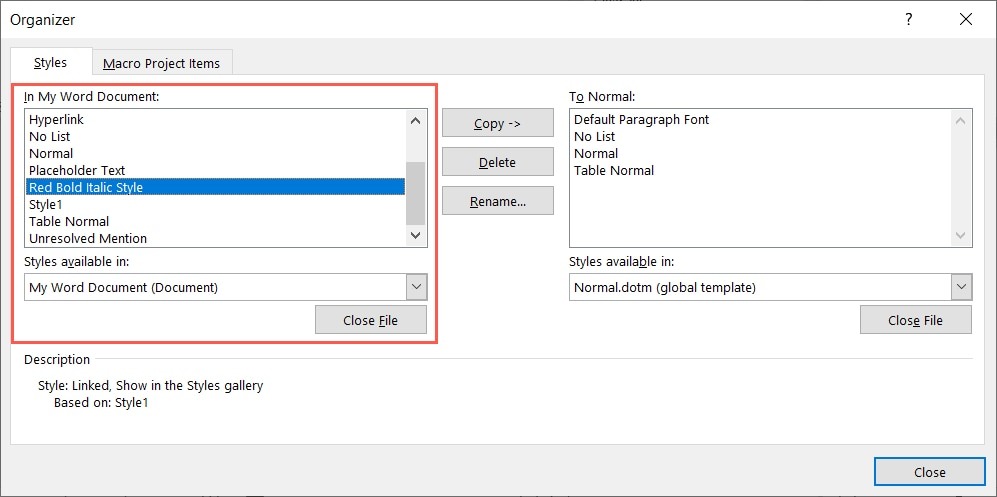
- In the “Styles” tab, you have your current Word document and its available elements on the left. If you scroll through the box at the top, you will see the name of your custom style.
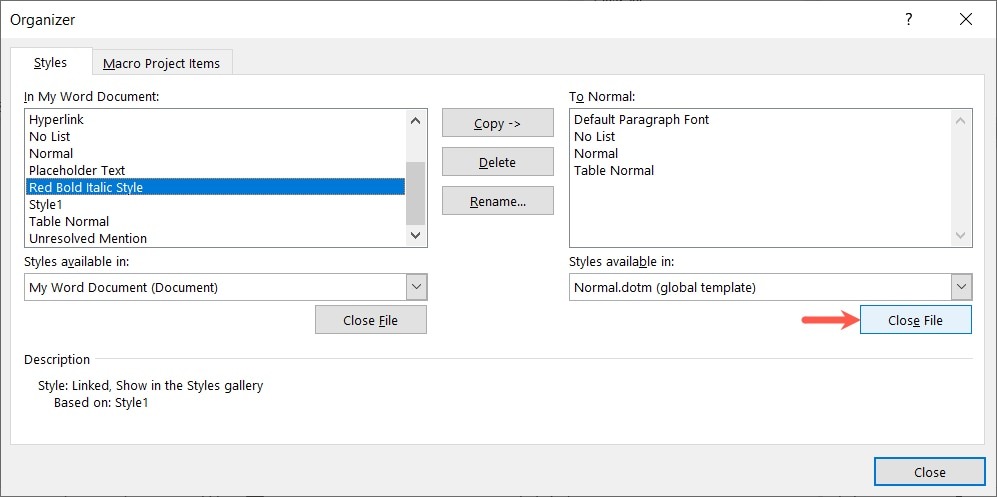
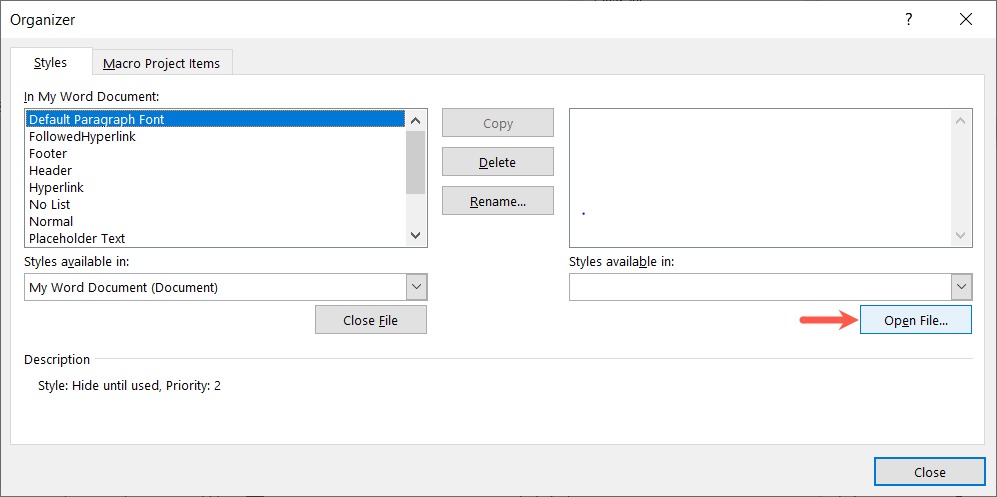
- On the right, you have the default Word template and its elements. Select “Close File” so that you don’t accidentally change this template and can open the Word document you want.
- Click “Open File” to browse for the Word document.
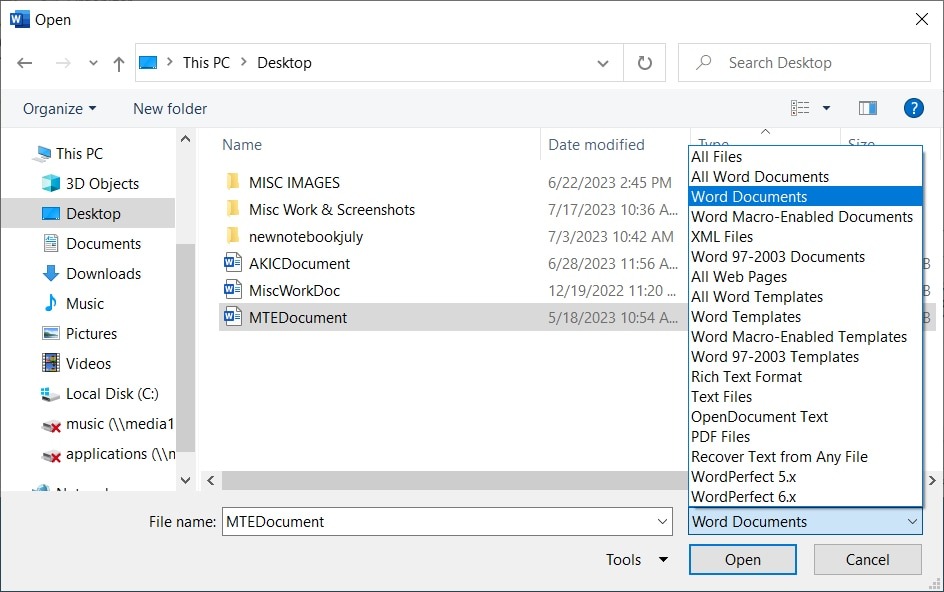
- Choose the location for your Word document, and select it. You may need to change the file type drop-down menu on the bottom right to “All Files,” “All Word Documents,” or another option. Click “Open.”
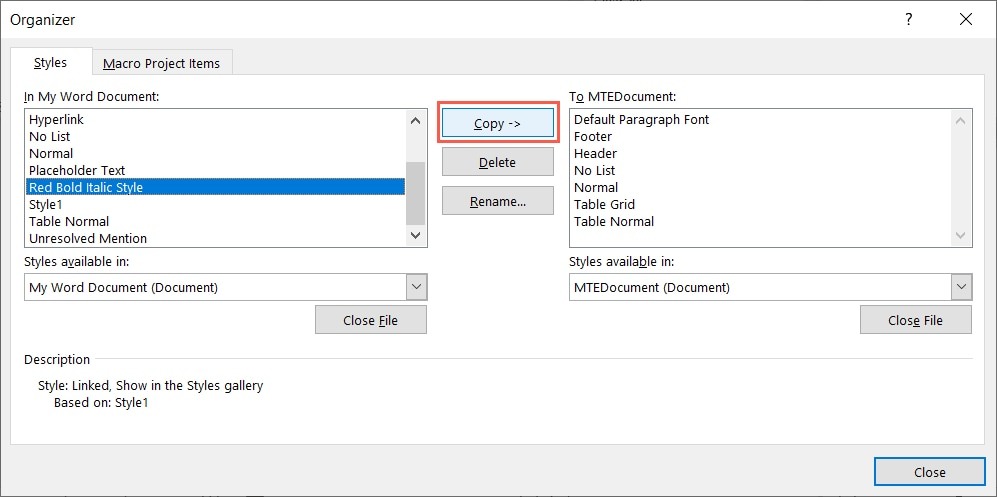
- With the document and its elements on the right side of the “Organizer” window, select your custom style in the box on the left side, and click “Copy” to export it to the document on the right.
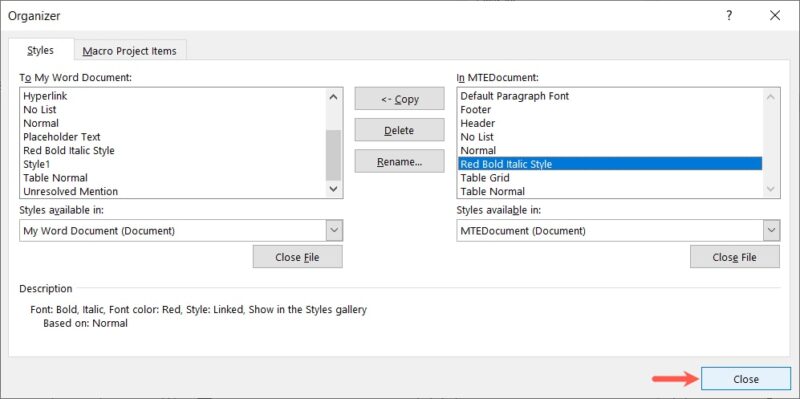
- Click “Close” when you see the custom style in the list on the right.
- If you receive a pop-up message asking if you want to save the changes to your selected file, click “Save.”
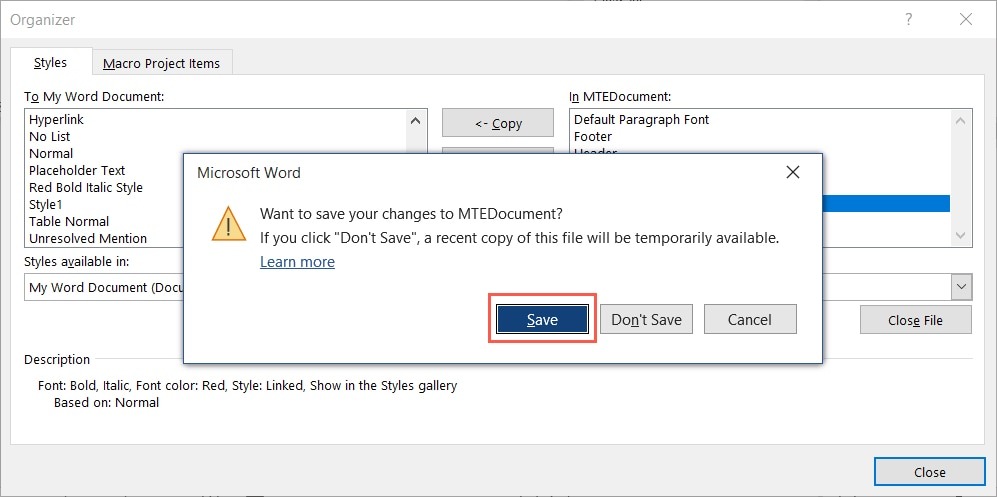
When you open the second Word document, go to the “Home” tab to see the custom style in the “Styles” menu.
Note: you can also add a watermark in Microsoft Excel.
How to Create a Custom Cell Style in Excel
Similar to custom font styles in Word, you can create custom cell styles in Excel. You can use the custom style in all spreadsheets within the workbook.
Format the font, data type, color, border, and alignment based on a current cell, with or without additional changes before you save it.
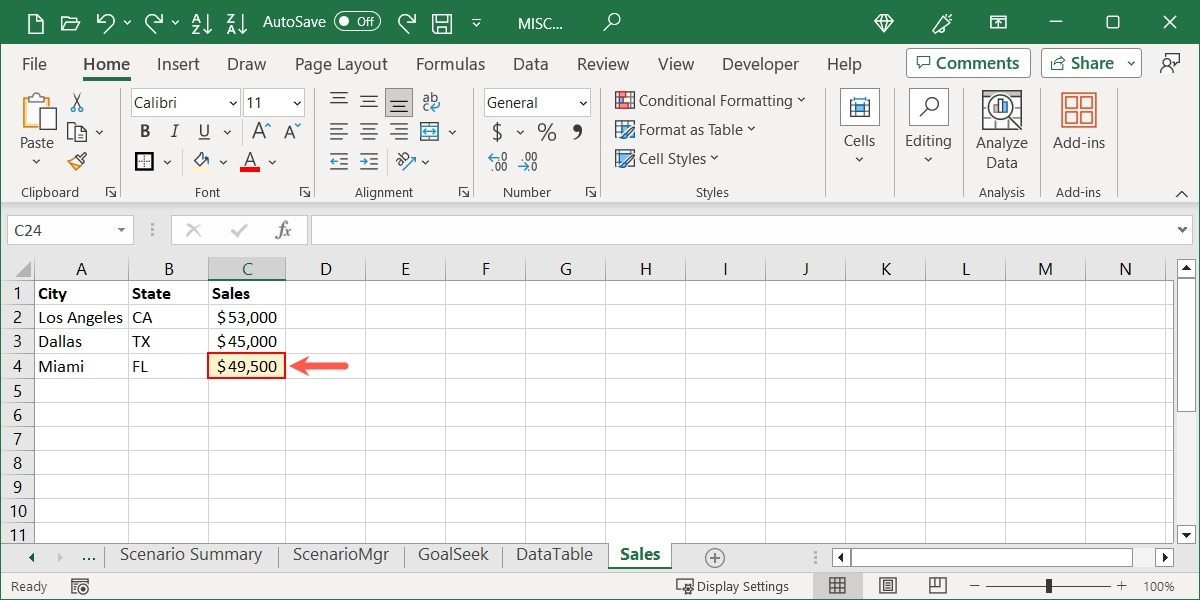
- Select the cell with the formatting you want to save. As an example, we are choosing a cell with a currency number format, thick red outside border, and light yellow fill color.
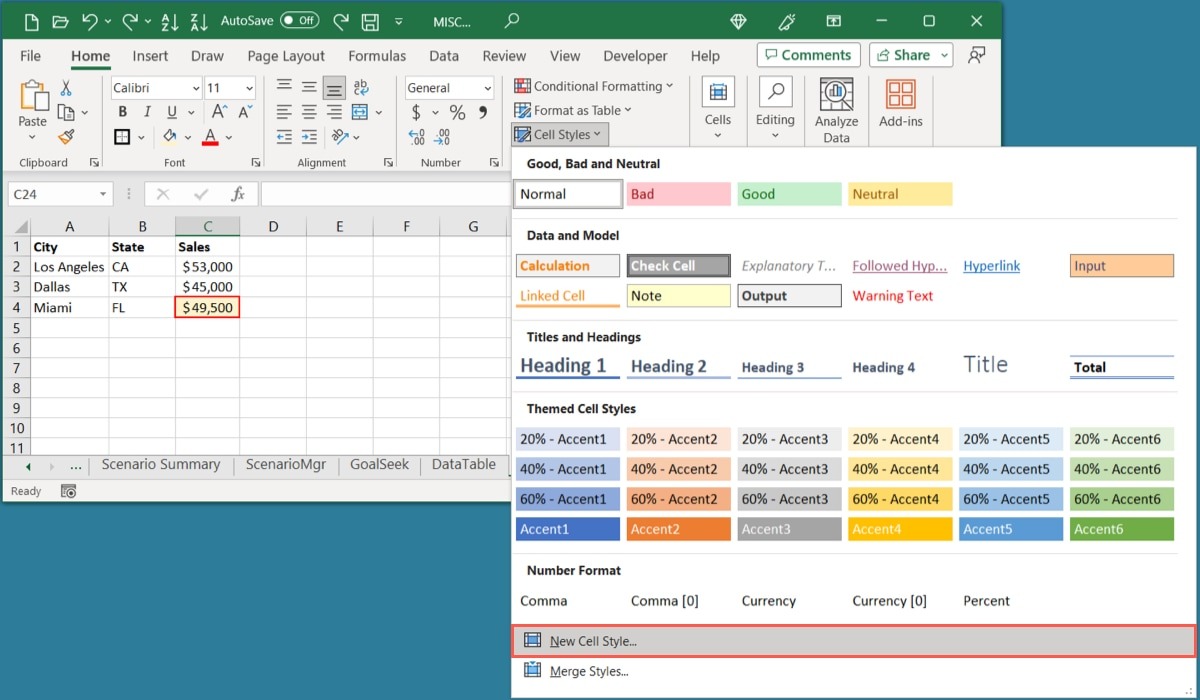
- Go to the “Home” tab, open the “Cell Styles” menu, and choose “New Cell Style.”
- Enter a “Style name” at the top for the current formatting to be applied to the cell. To use all formats you see, leave all boxes checked. Otherwise, uncheck the formats you don’t want.
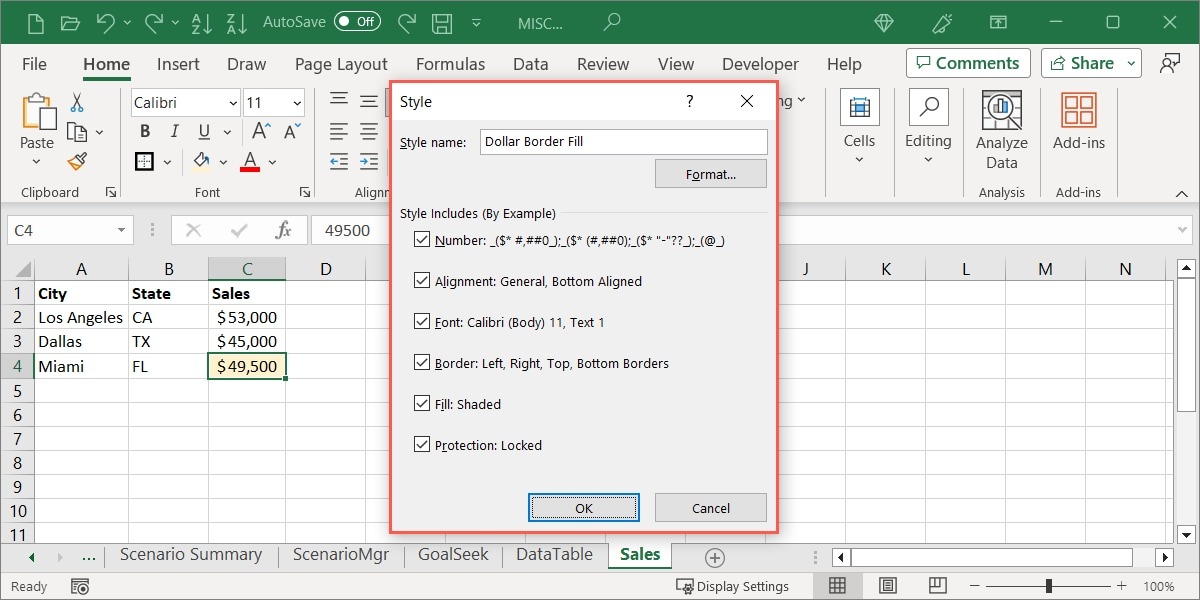
- To add or change the style, click “Format.”
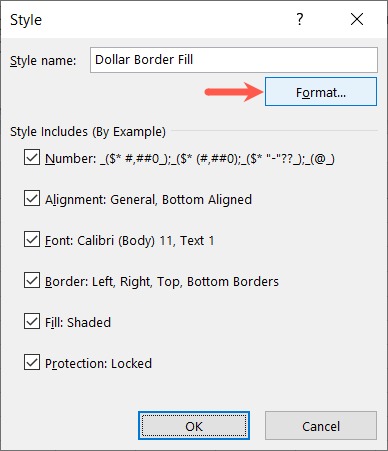
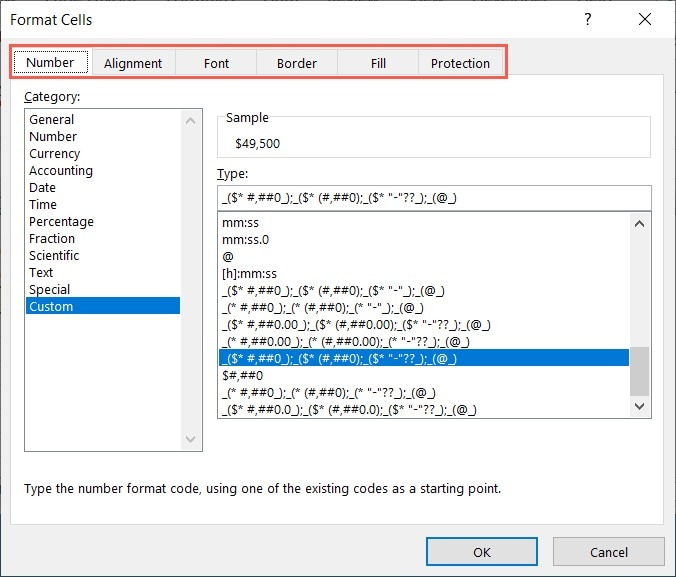
- Use the tabs labeled “Number,” “Alignment,” “Font,” and so on, and their options to adjust the current format for the cell, then click “OK.”
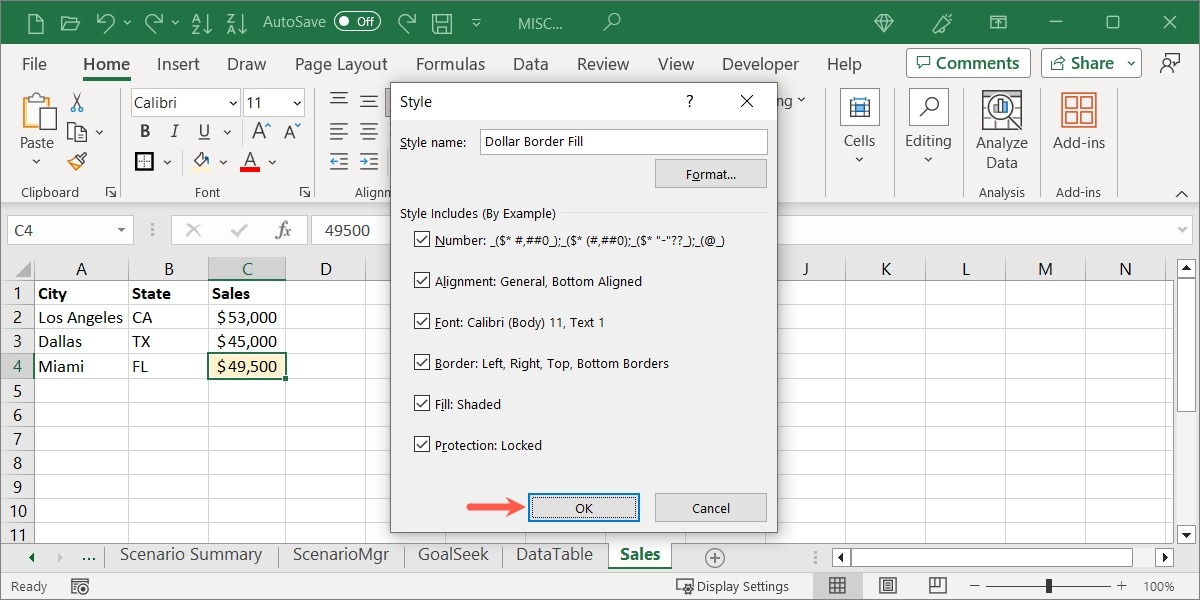
- Select “OK” to save the style.
Tip: to further customize your Excel workbook based on specific criteria, use conditional formatting.
Use a Custom Style in Excel
Just as in Word, you can apply a custom style you create to a cell in Excel by choosing it from the menu.
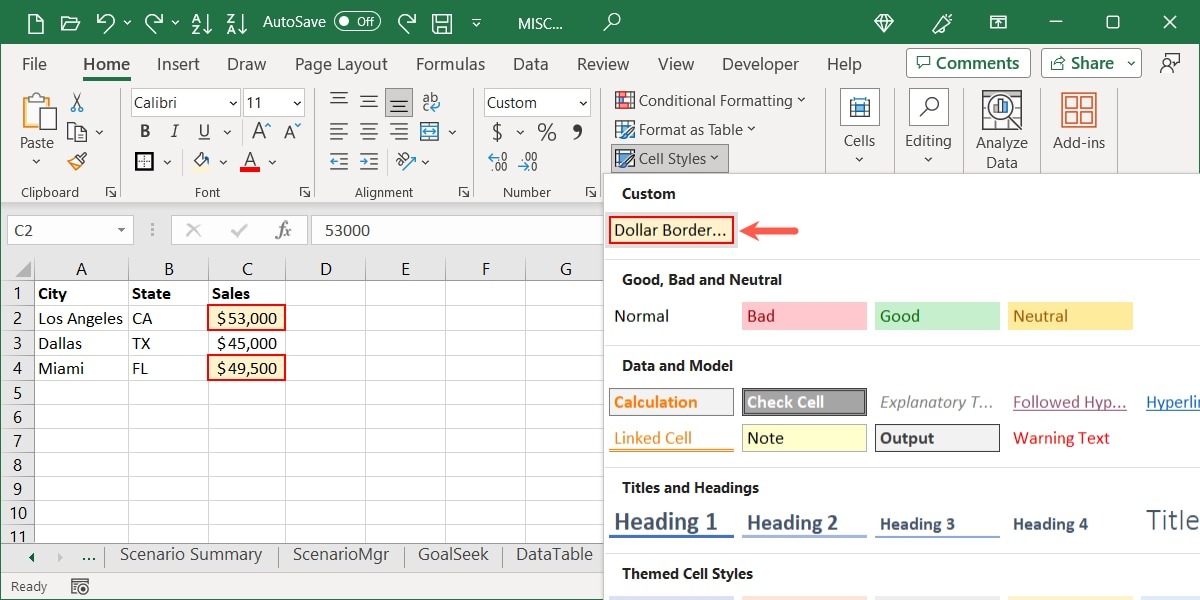
Select the cell you want to apply it to, and go to the “Home” tab. Open the “Cell Styles” menu, and choose the name of your style in the “Custom” section.
Edit or Delete a Custom Style in Excel
You may want to make changes to a custom style after you create it.
- Go to the “Home” tab, and open the “ Cell Styles” menu. Right-click your custom style, and choose “Modify.”
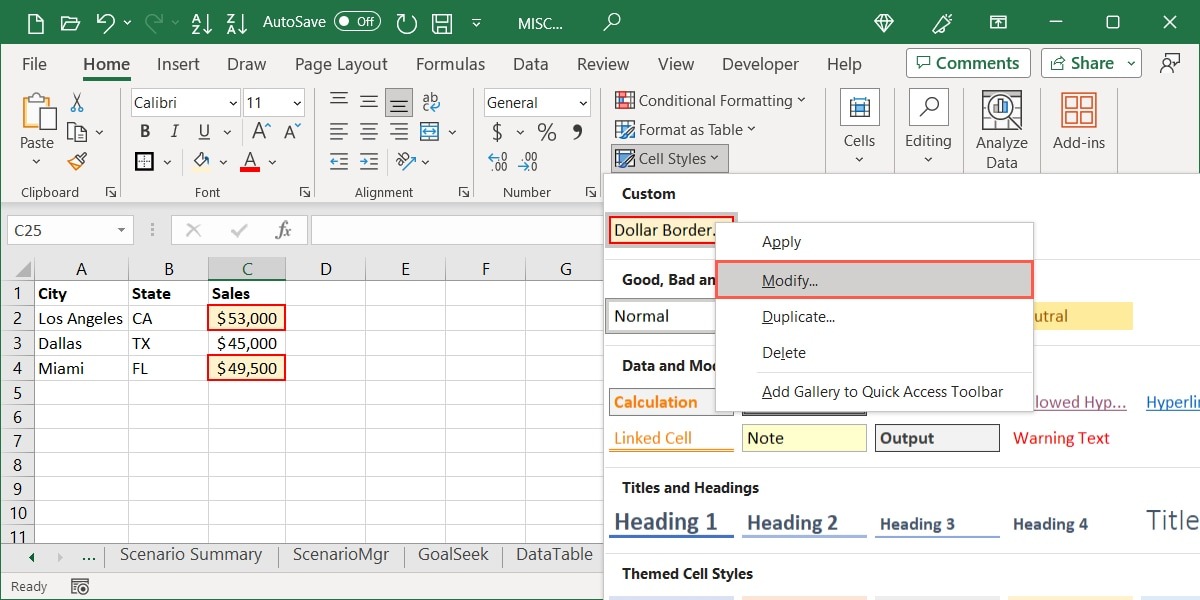
- Use the “Format” button to open the Format Cells box, make your changes, and select “OK.”
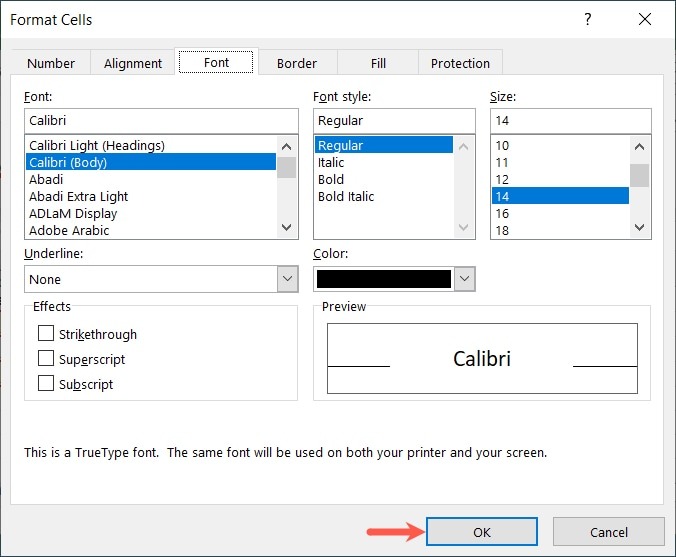
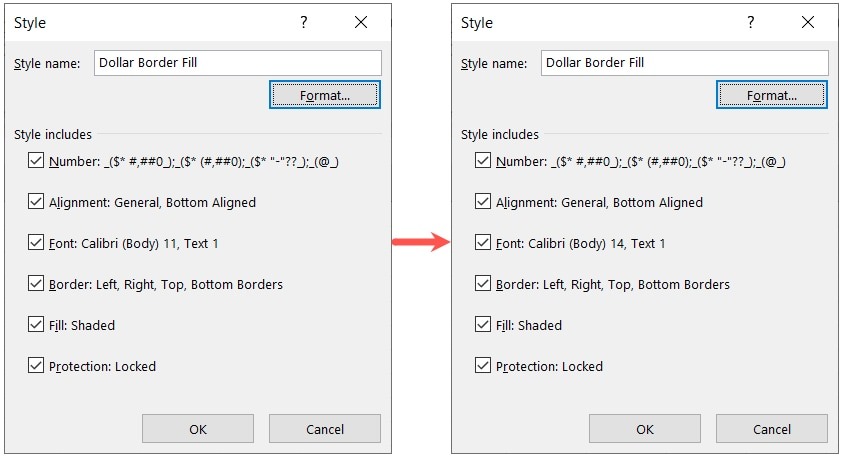
- For example, we are changing our font size from 11 to 14 points. Click “OK” to save your changes.
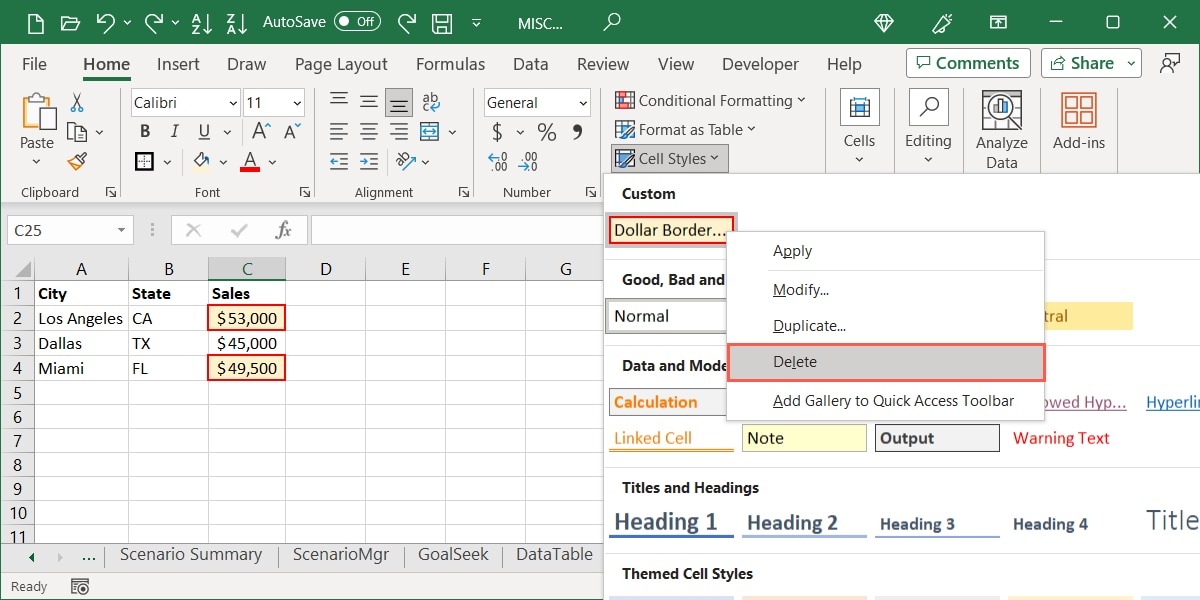
- If you want to delete your custom style, right-click it in the “Cell Styles” menu, and choose “Delete.” Ensure you want to remove it before clicking “Delete.”
Export a Custom Style in Excel
You may want to use your custom cell style in another Excel workbook. This helps you remain consistent across various workbooks and sheets. The process for doing so is a bit easier than exporting custom styles in Word. Just note that this merges all custom styles you create, not just one.
- Open the Excel workbook where you want to use the custom style you created. You can minimize it to your Taskbar or Dock if you would like.
- Return to the original workbook, go to the “Home” tab, and open the “Cell Styles” menu. Choose “Merge Styles.”
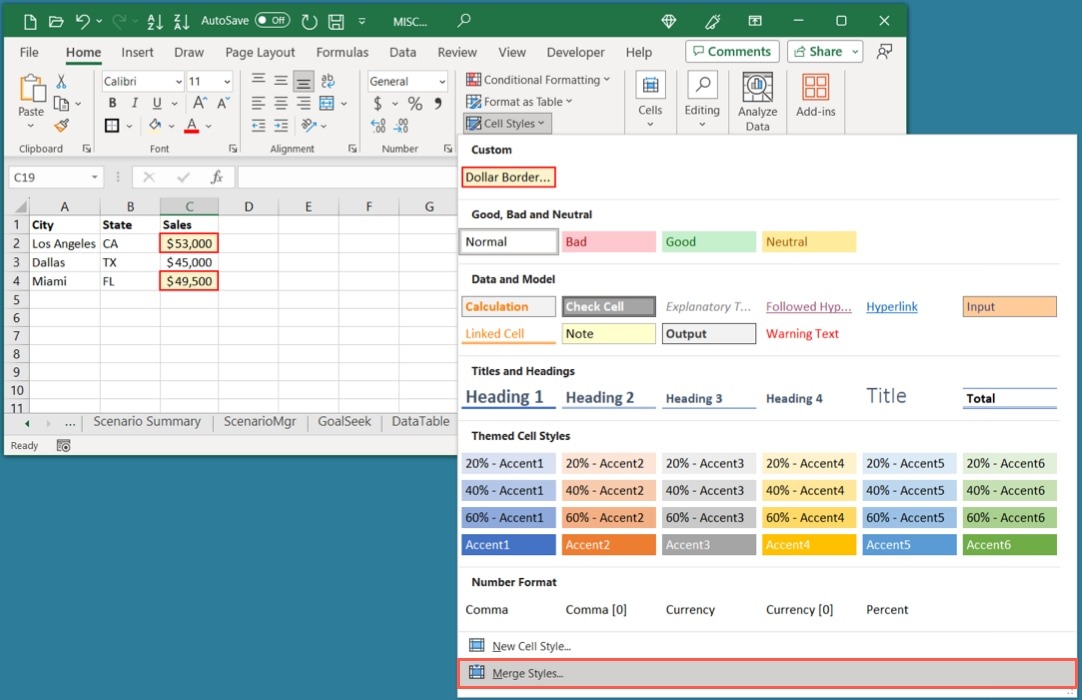
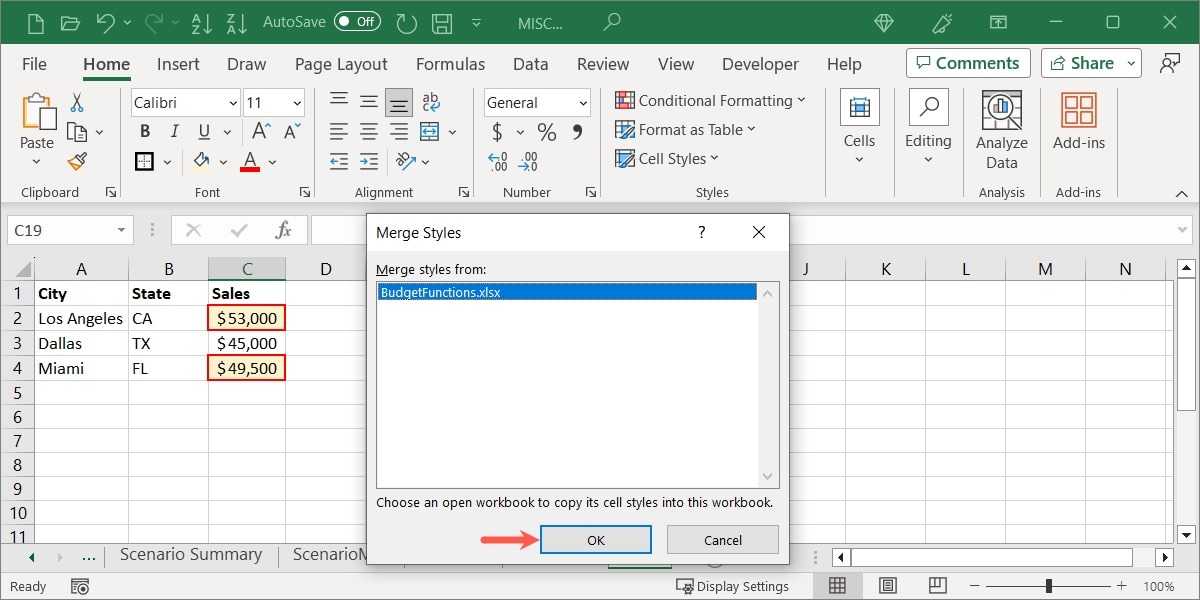
- You’ll see the name of your second Excel workbook. If you have more than one open workbook, choose the one you want from the list. Click “OK.”
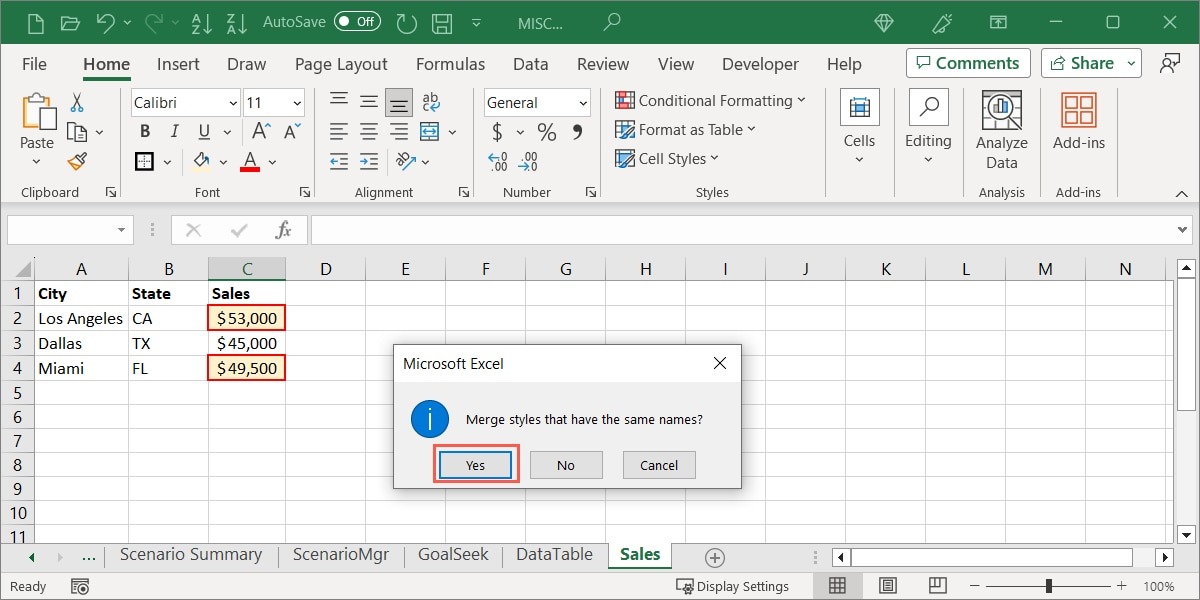
- If you receive a message letting you know that you have styles with the same names, choose “Yes” to continue and merge or “No” to not merge them.
When you view the second workbook where you merged the styles, you’ll see your custom option on the “Home” tab in the “Cell Styles” menu, just like the original workbook.
Frequently Asked Questions
Can I create a custom style in PowerPoint in the same way?
Microsoft PowerPoint does not offer a Styles feature like Word and Excel do. You’ll notice this if you visit the “Home” tab in PowerPoint.
One alternative is to copy text formatting from Word to PowerPoint. Another is to create a custom theme in PowerPoint. This includes fonts, colors, and effects similar to styles in Word and Excel. Visit the Microsoft Support page for creating a PowerPoint theme to get started.
Can I modify a style using an existing format in Word?
Yes. You can change your custom style or a default one using font formatting elsewhere in your document.
Select the text containing the formatting you want. On the “Home” tab, open the “Styles” menu, and right-click the style you want to change. Choose “Update [style name] to Match Selection.” That style is then replaced with the formatting of your selected text.
What’s the difference between styles and themes in Word and Excel?
Styles apply to the font or cell you choose and can include formatting, as described above. Themes, on the other hand, include fonts and color schemes that apply to your entire document or workbook, such as headings or font sizes. Additionally, themes can determine the styles you see in the Styles and Cell Styles menus.
Image credit: Pixabay. All screenshots by Sandy Writtenhouse.
Our latest tutorials delivered straight to your inbox