
In an increasingly digital world, where screens have become an integral part of our daily lives, it’s important to strive to maintain a healthy balance between PC usage and other activities. With built-in screen-time monitoring tools in Windows, you can gain valuable insights into your digital habits, allowing you to understand your usage patterns, assess productivity levels, and more. This tutorial shows how to check your screen time on a Windows PC.
Good to know: learn how to record your Windows screen with these tools, some of which are native.
1. Check Screen Time Using Settings
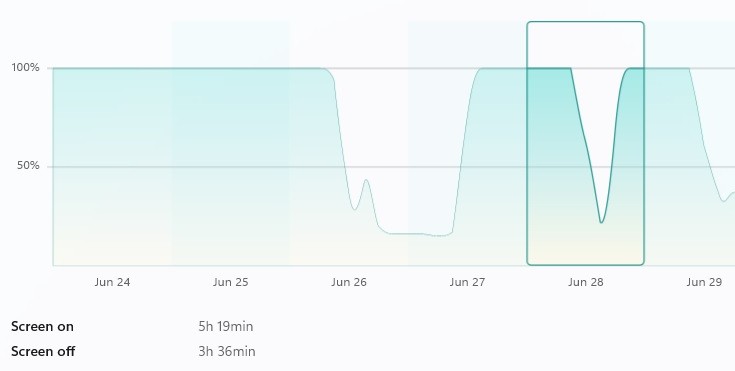
View a detailed report of your PC’s battery usage patterns via the Settings app. You’ll be able to check screen-on time, screen-off time, and sleep time.
- Click the Start menu at the bottom of your screen, and select the “Settings” icon.

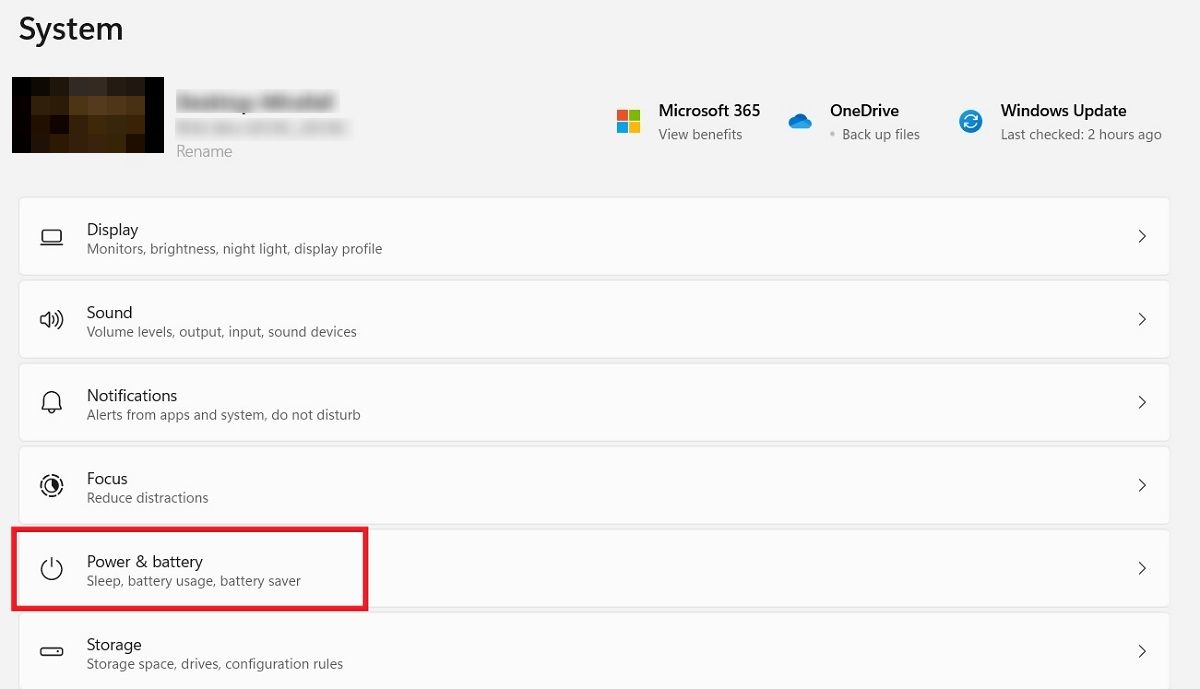
- Click on “Power & battery“ in the System tab if you’re using Windows 11. You’ll find a similar option in some versions of Windows 10 under “Settings -> System -> Battery.”
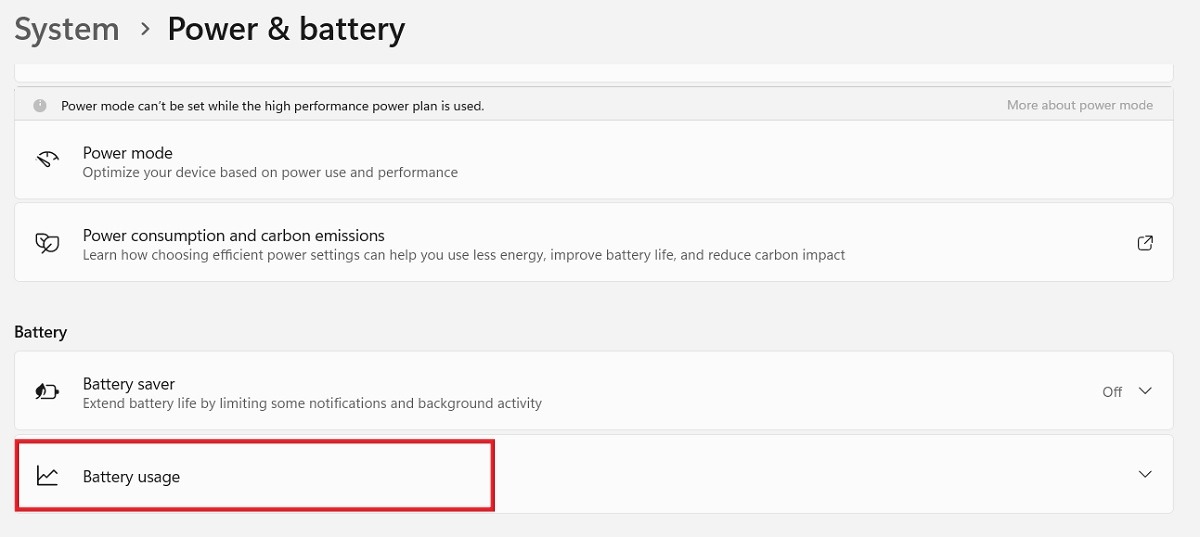
- Under the section titled “Battery,” click on the “Battery Usage” option.
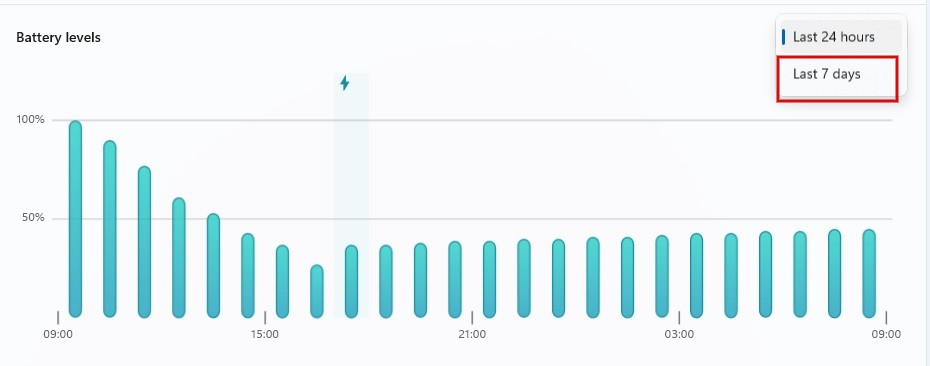
- Click the drop-down box above the “Battery levels” graph, and select the “Last 7 days” option.
- By default, you will see the daily average of the “Screen on/off” time and “Sleep” time below the graph.
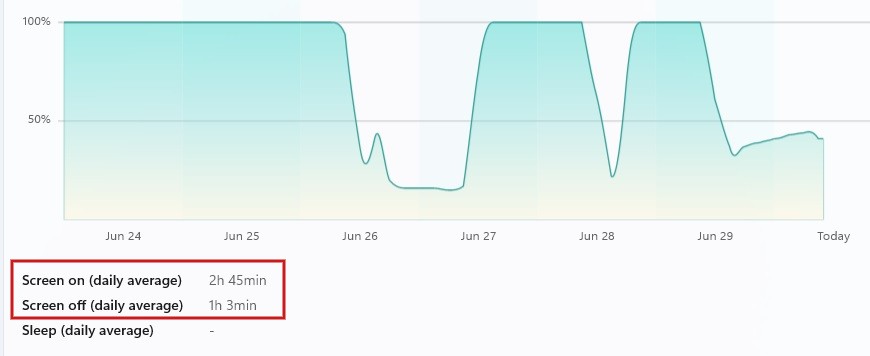
- By clicking any date shown on the graph, you can view the “Screen on/off” time and “Sleep” time for the specific date.
Tip: learn what to do if Windows can’t find Powershell.exe.
2. Check Screen Time with PowerShell
You can also use PowerShell to find out how much time you spend on your Windows computer on a certain day.
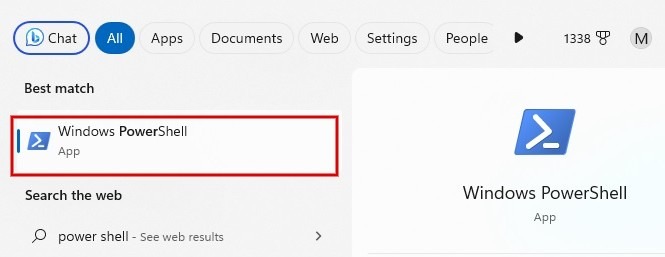
- Type “powershell” in the Windows Search box, and click the best match below.
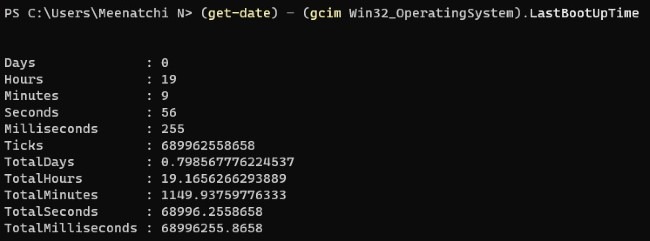
- Type the following command, and press Enter.
(get-date) – (gcim Win32_OperatingSystem).LastBootUpTime

- The time elapsed since the last bootup of your Windows computer will be shown.
Note: this method will not work for you if you’re not in the habit of turning off your computer every day. Learn which method is better: putting your PC to sleep or shutting it down.
3. Track Screen Time Using Windows Task Manager
The majority of users usually turn to the Task Manager if their computer becomes unresponsive. However, the utility can also be used to check the time spent on your PC.
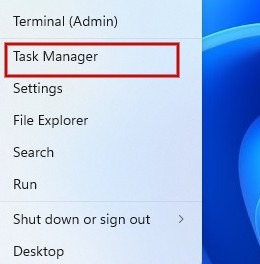
- Right-click the Start Menu icon, and click “Task Manager” in the list of options.
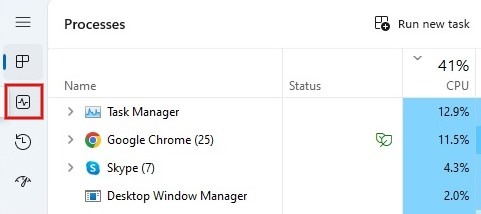
- Click the “Performance” icon (a graph symbol) in the Task Manager dialog box.
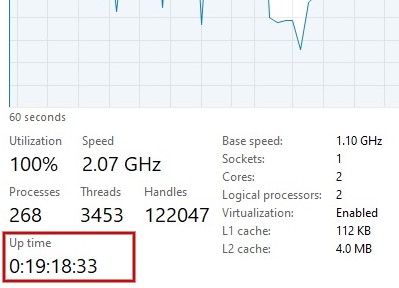
- Below the performance graph of the CPU, the “Up time” field displays how long your PC has been running since the last restart (not shutdown).
FYI: learn how to view devices on your Windows network and what to do if you can’t.
4. Check Screen Time Using the Network Settings Menu
It is also possible to check screen time by accessing the Network Connection menu on your Windows computer.
- Launch Control Panel on your Windows computer.
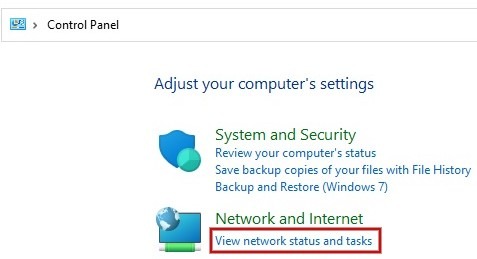
- Click “View Network status and tasks” under the header “Network and Internet.”
- Under the header “View your active networks,” click the “Wi-Fi” link, followed by the name of your Internet network.

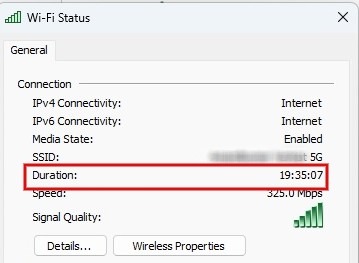
- Find the value of the “Duration” field to check screen time since the last bootup.
5. Check Screen Time on Kids’ Devices
Want to know how much time your child (or another account) spends on the computer? Set up a Microsoft Family Safety account, then invite other accounts you wish to monitor.
Easily view screen time by clicking on your child’s or the person’s name in the group. You can also limit their screen time from the Family Safety page.
6. Check Screen Time via Third-Party Apps
All the methods listed above will help you check the approximate screen time you spent on your computer. However, if you need to calculate the exact time you worked for invoicing purposes, you will need to make use of third-party time-tracking software.
Clockify is a free Web-based tool for Windows that helps you to track work hours across projects. You’ll have to remember to start the timer when you begin a work session, and stop it when you take a break or finish for the day.
If that’s not your cup of tea, check out other time-tracking app alternatives, such as Harvest, Hubstaff, and Timely.
Tip: want to share your favorite games with your family? Learn how to do that with Steam Family Sharing.
Frequently Asked Questions
How do I track time spent on specific apps on my computer?
Your computer has to be running on battery to do so. Navigate to “Settings -> System -> Power & Battery” on Windows 11. Under the “Battery usage per app” section, you’ll see a list of apps that have been consuming battery. Check the “In use” value underneath each app to learn how much time you spent on it. On Windows 10, check “Settings -> System -> Battery,” then click “See which apps are affecting your battery.”
What is the largest span of time I can view in the screen time statistics?
You can view screen time statistics for a maximum of seven days, and only the last 7 days, via Windows Settings.
Image credit: Pixabay. All screenshots by Meenatchi Nagasubramanian.
Our latest tutorials delivered straight to your inbox